The Instant Assessment Tool in Interactive Classroom can be used to collect and mark answers to any question that has an answer that needs to match exactly - like spelling words.
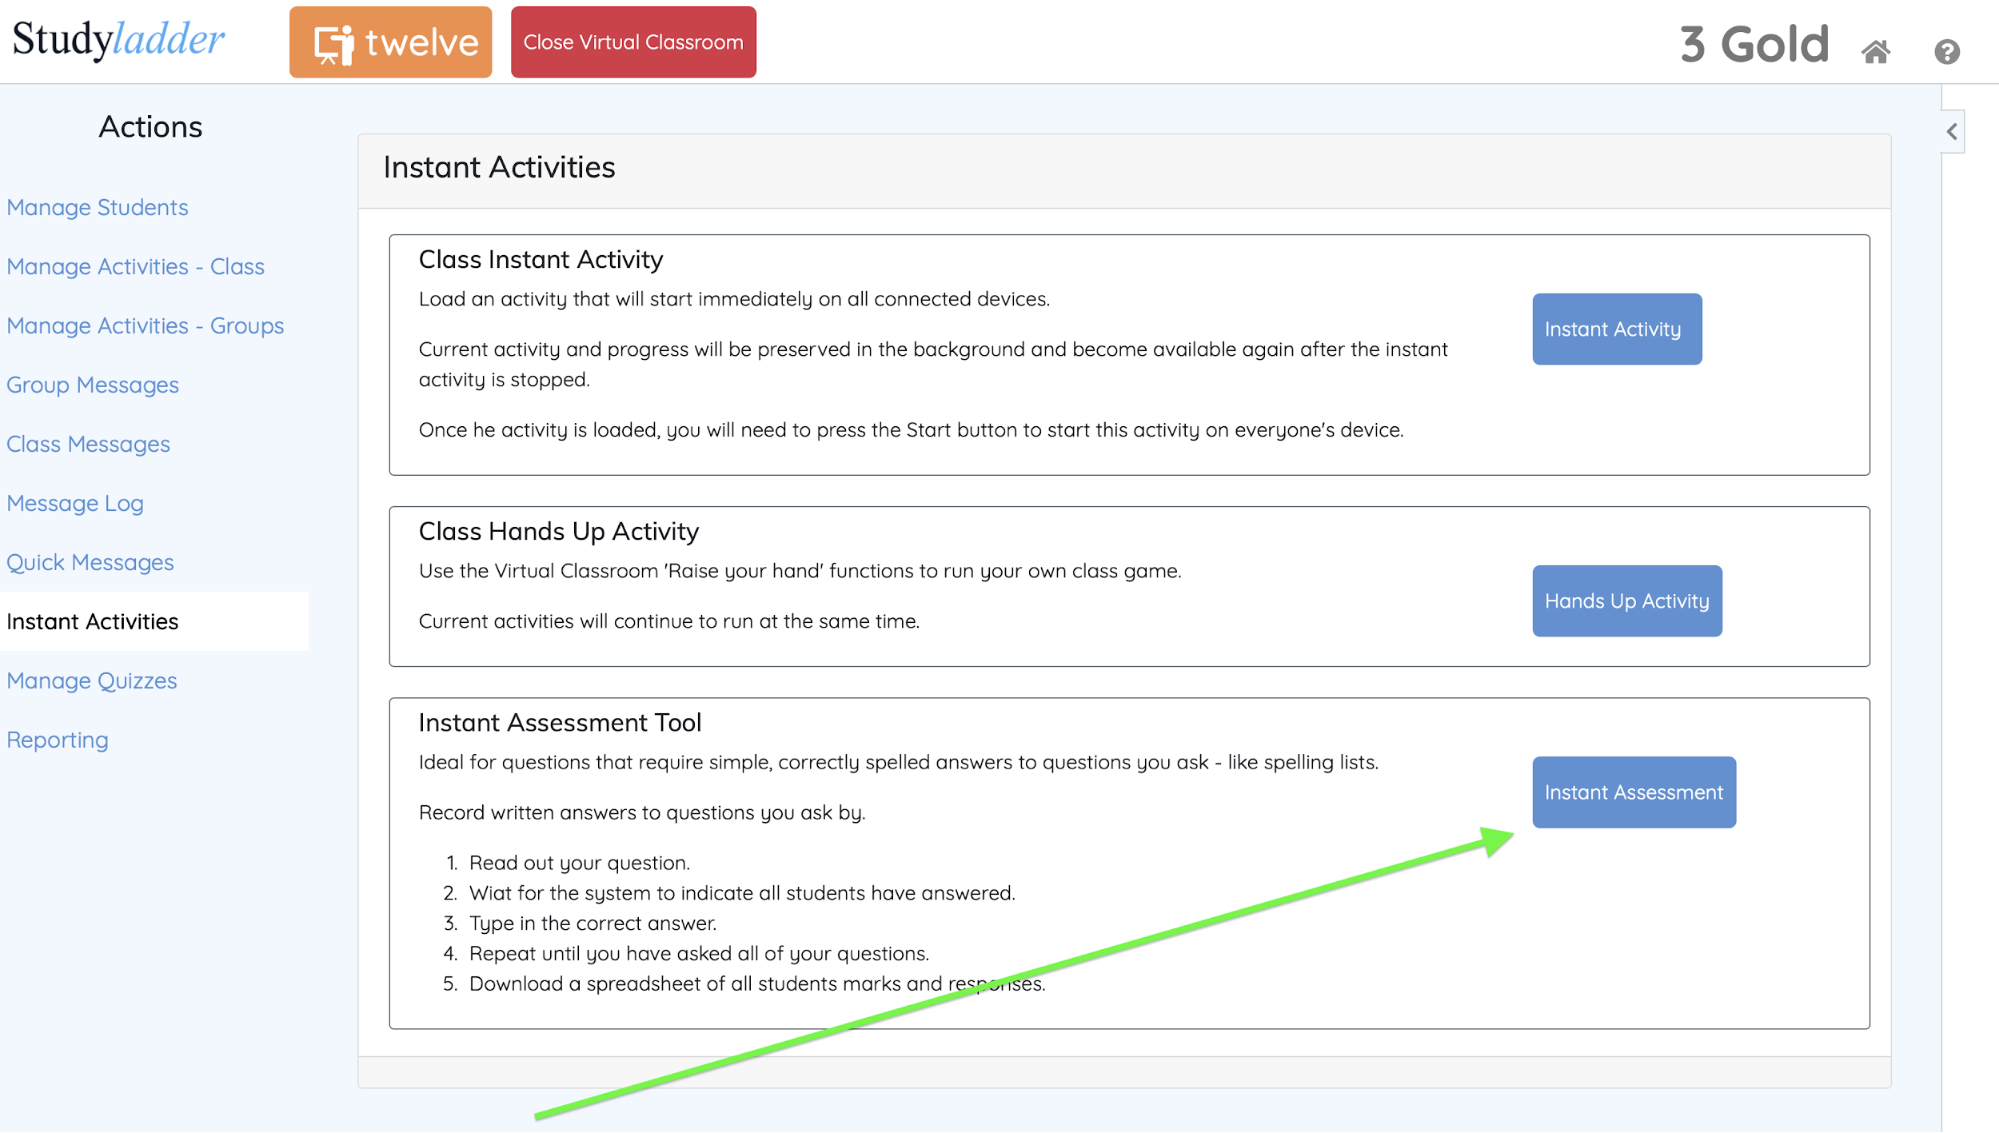
Once you have started your Interactive Classroom and all of your students are logged in, go to the “Instant Activities” panel by clicking the link in the Actions sidebar.
Now click on the “Instant Assessment” button to start the test.
The question you ask is entirely up to you, it just needs to have an answer that will be matched exactly.
For a spelling test, it can be useful to have your word list open in another window or app so you can read them out, then copy - paste the correct answer (no embarrassing typos).
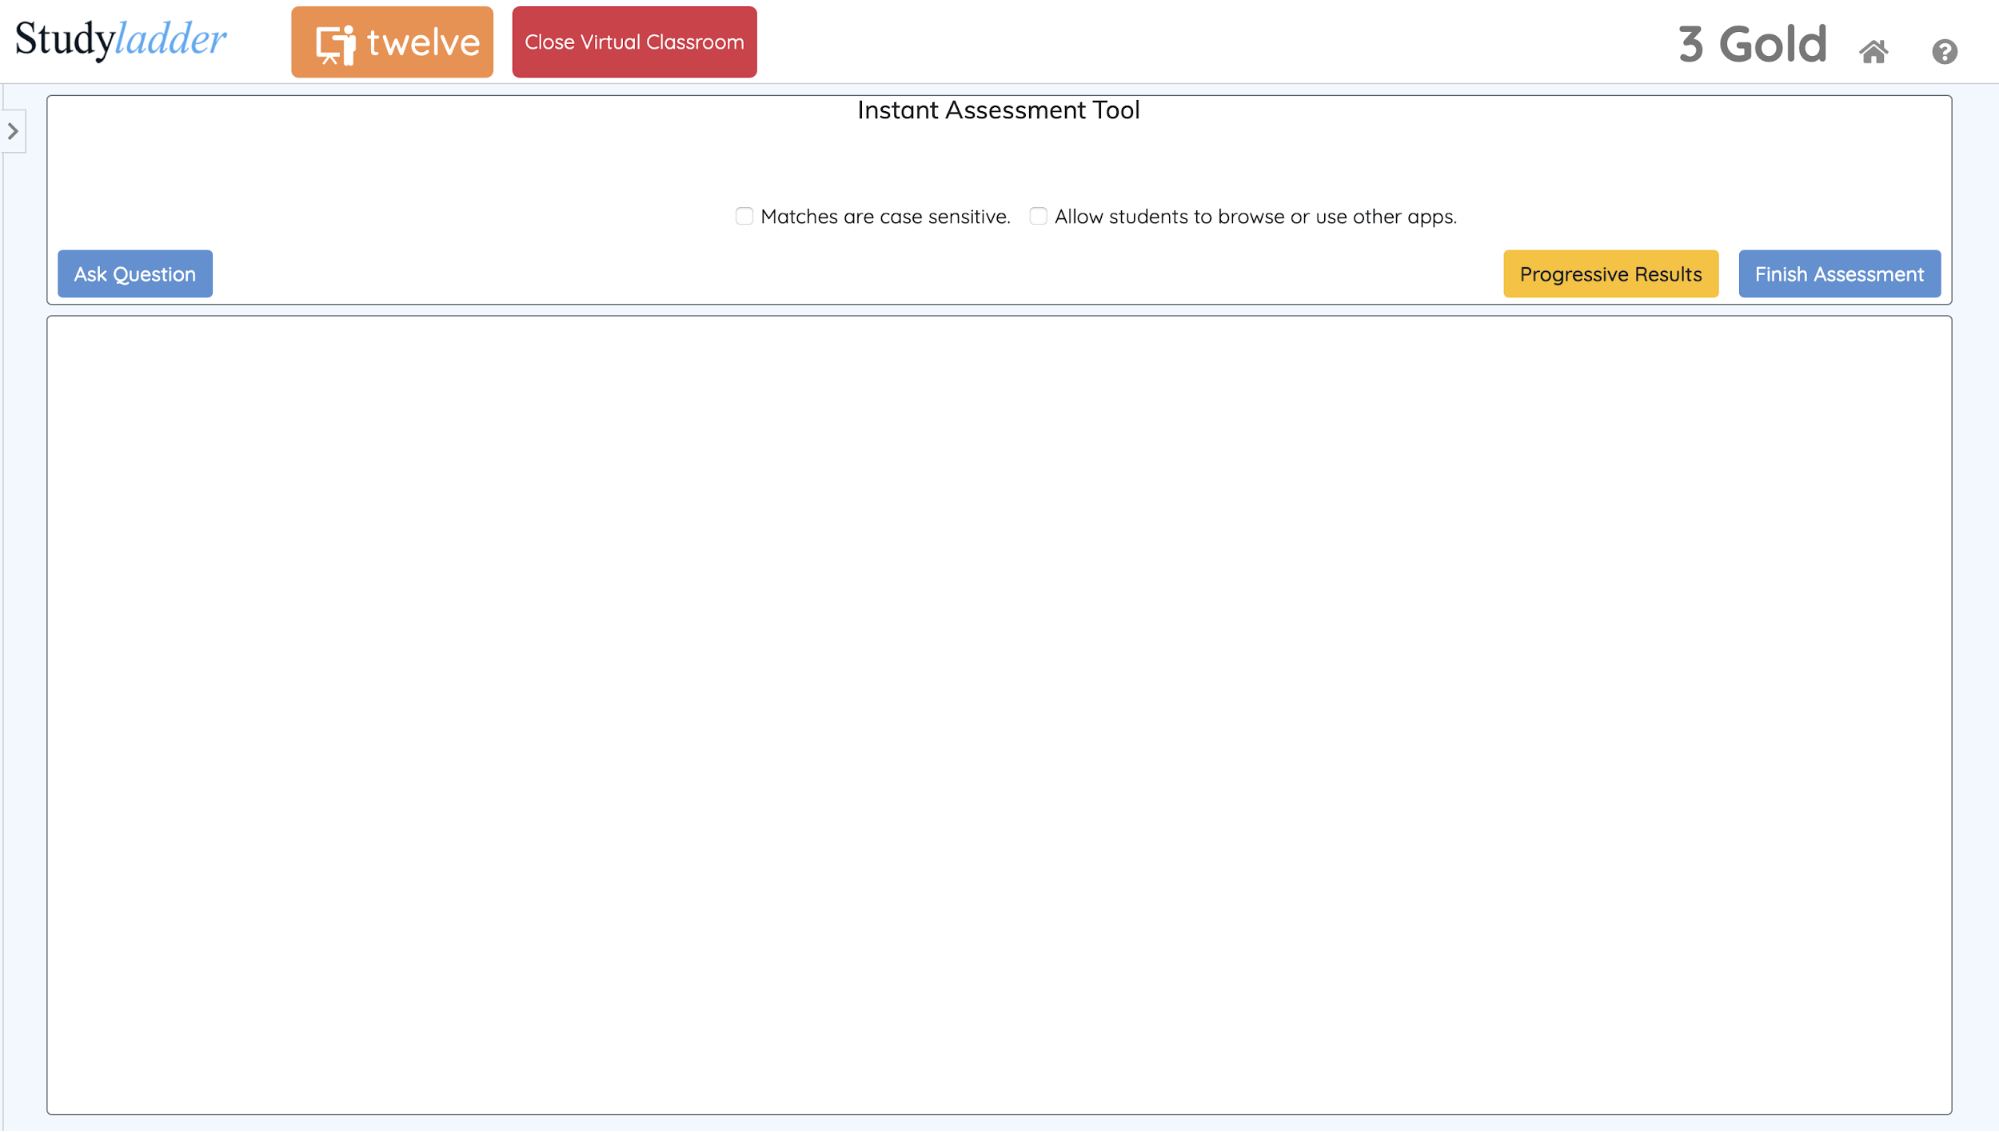
You just need to click the “Ask Question” button either before or just after you ask your question.
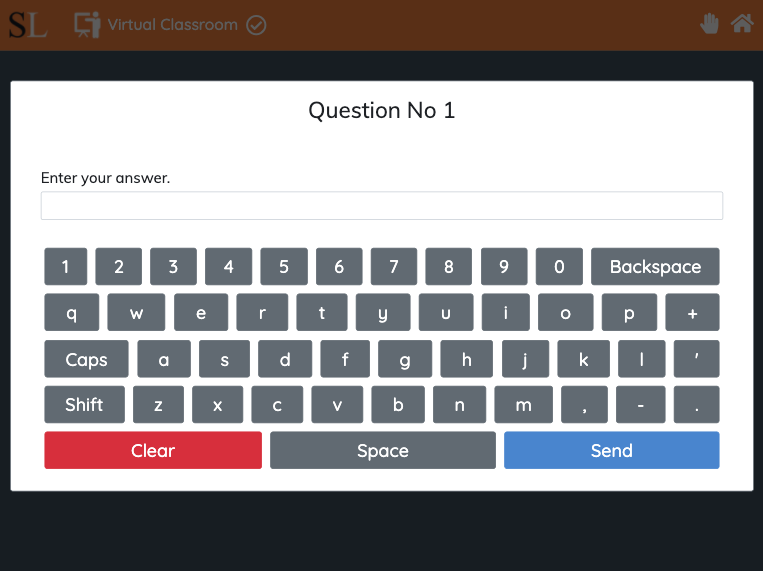
As soon as this button is clicked, the students will be presented with a popup to type the answer into.
By default, answers will be matched as case-insensitive - that is words are matched regardless of whether they are capitalised or not.
If you want to make the match case-sensitive, then just select the “Matches are case sensitive” option at the top of your screen.
Browsing to other windows or apps is also disabled by default - this prevents students looking up answers on the internet. If they attempt to open another tab, window or app, or type into the address bar, their current answer will be automatically submitted (even if it is blank or incomplete).
You can also override this behaviour and allow browsing by selecting the “Allow students to browse or use other apps” option if that is appropriate for your assessment.
These options only affect the current question and can be changed any time during the assessment.
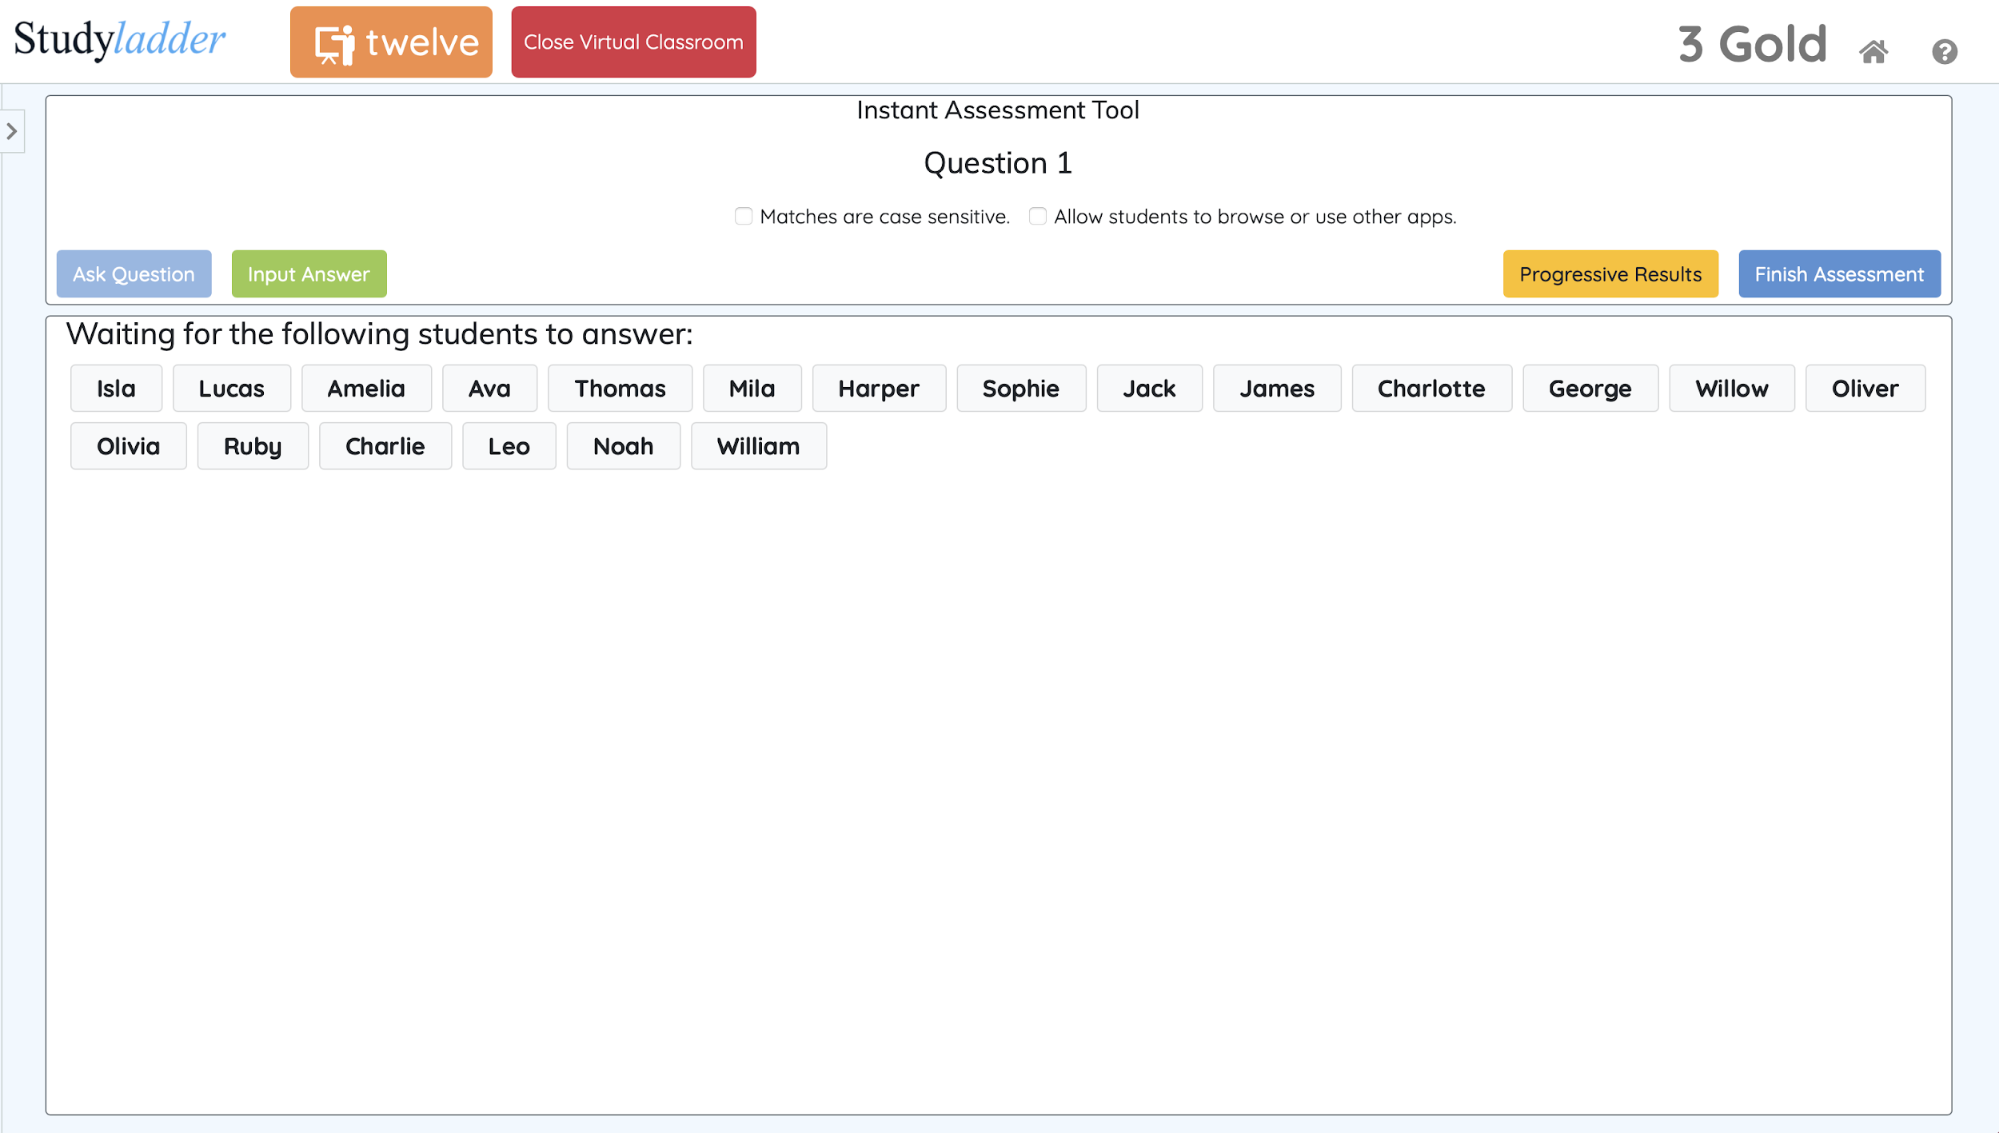
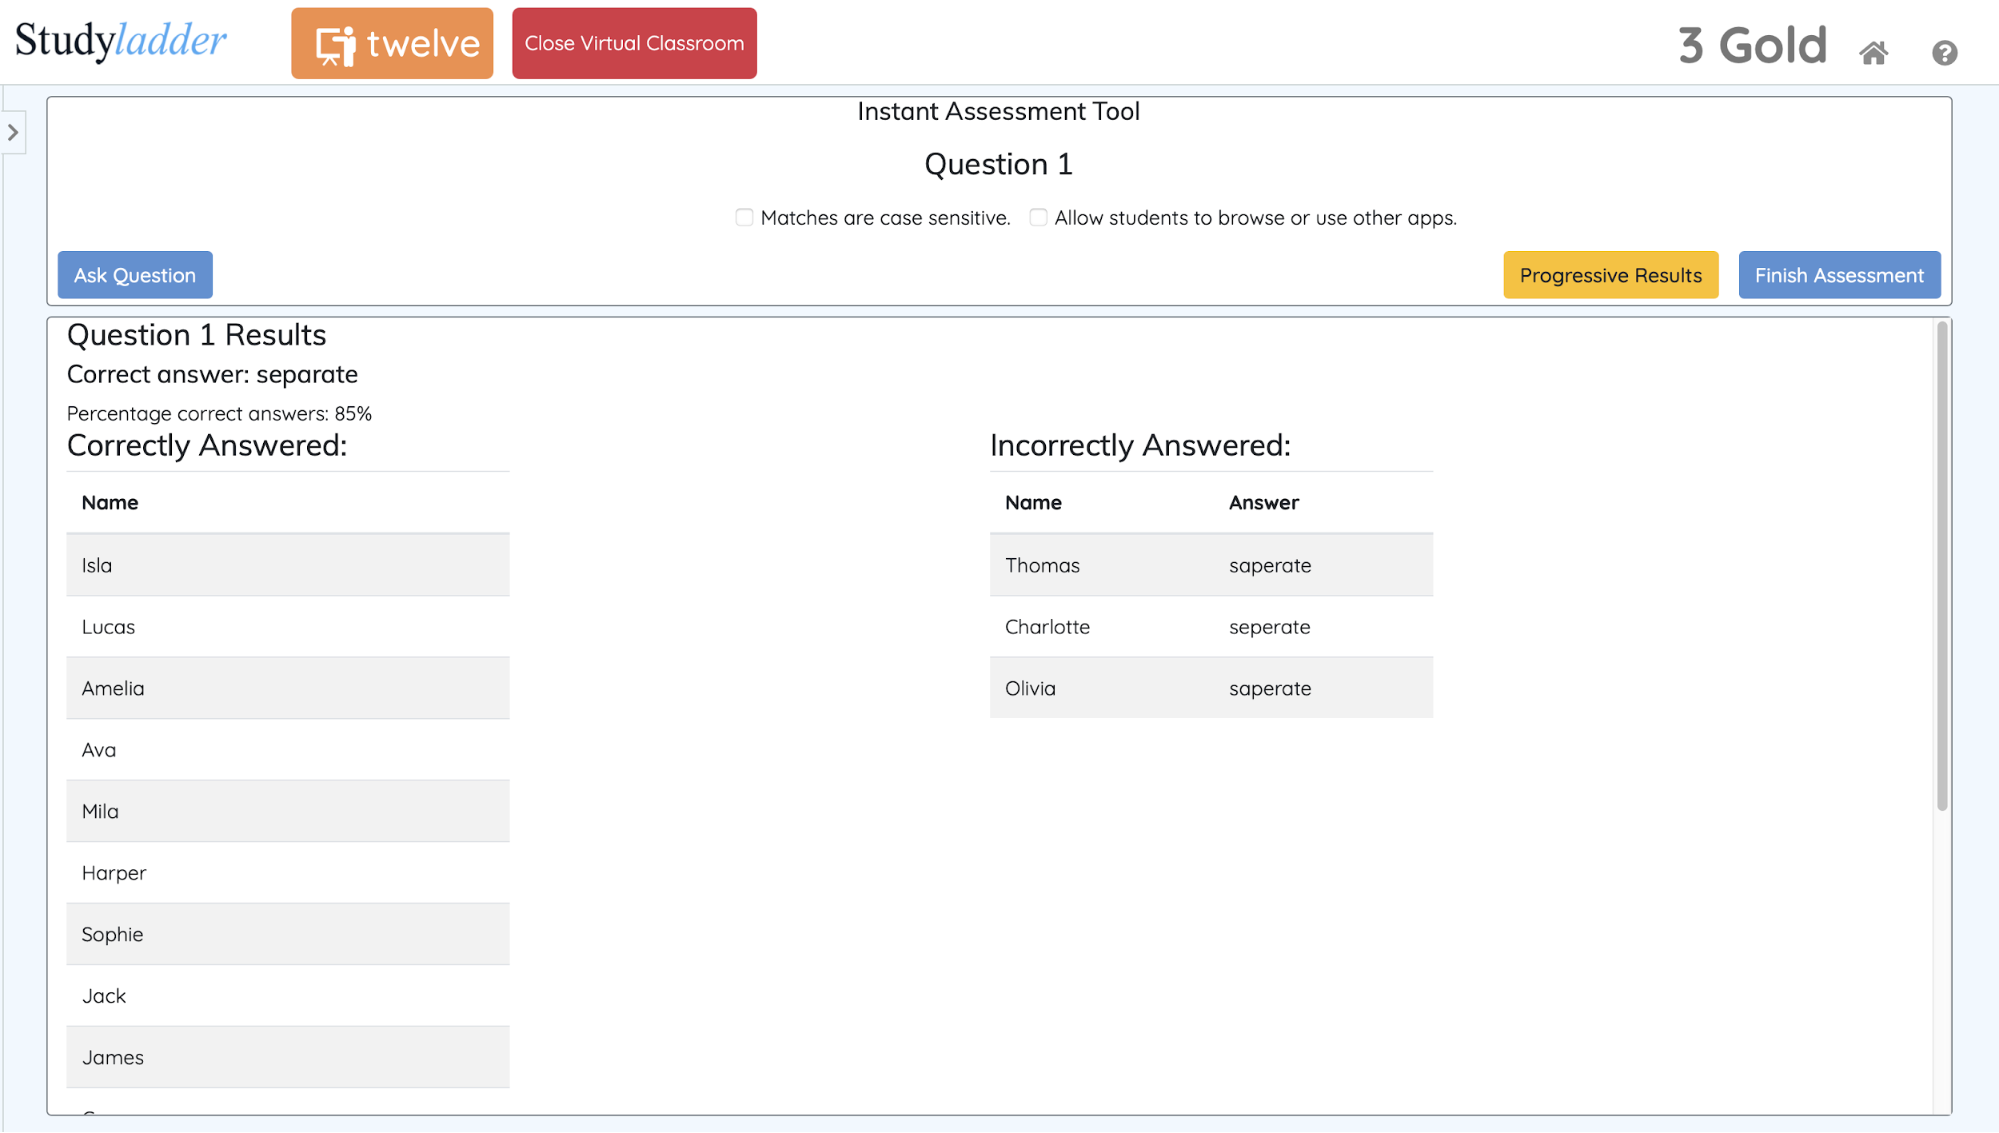
Once you click “Ask Question”, you will see a list of all students who have not submitted and answer.
As each student enters their answer, their name will disappear from the list until none are left. At this point, you should enter the answer.
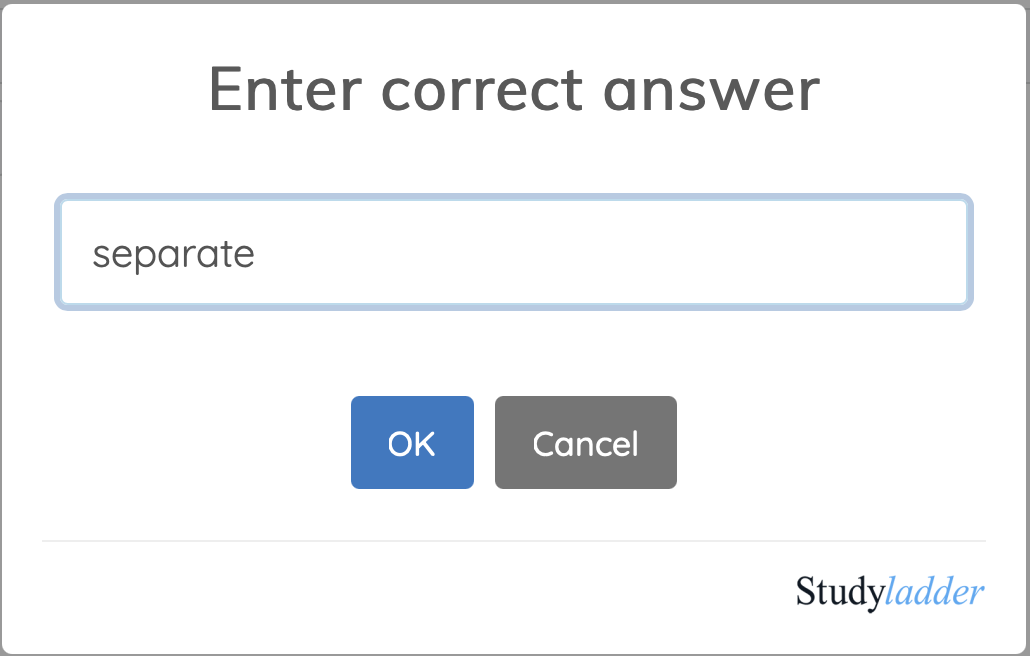
Click the “Input Answer” button to enter your answer.
You will see a popup where you can type your answer. Keep in mind that only students who have entered an exact match will be marked correct.
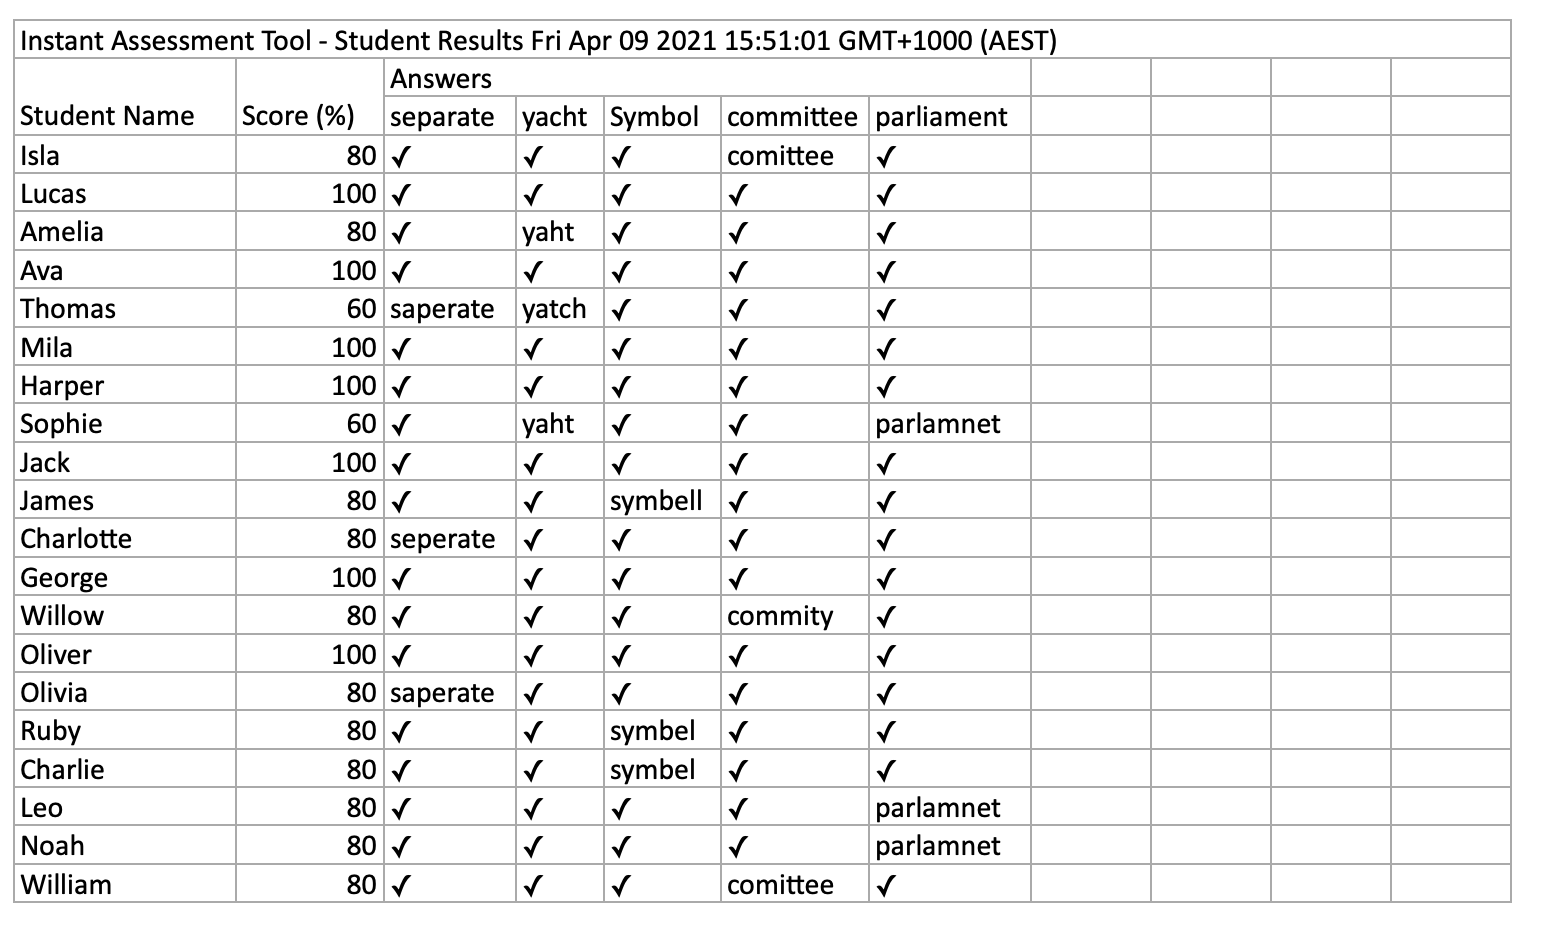
In this example, the students were asked to spell “separate”.
Once you click “OK” you will see a summary for the question that shows a list of students who answered correctly on the left, and incorrectly on the right. Incorrect answers are also shown.
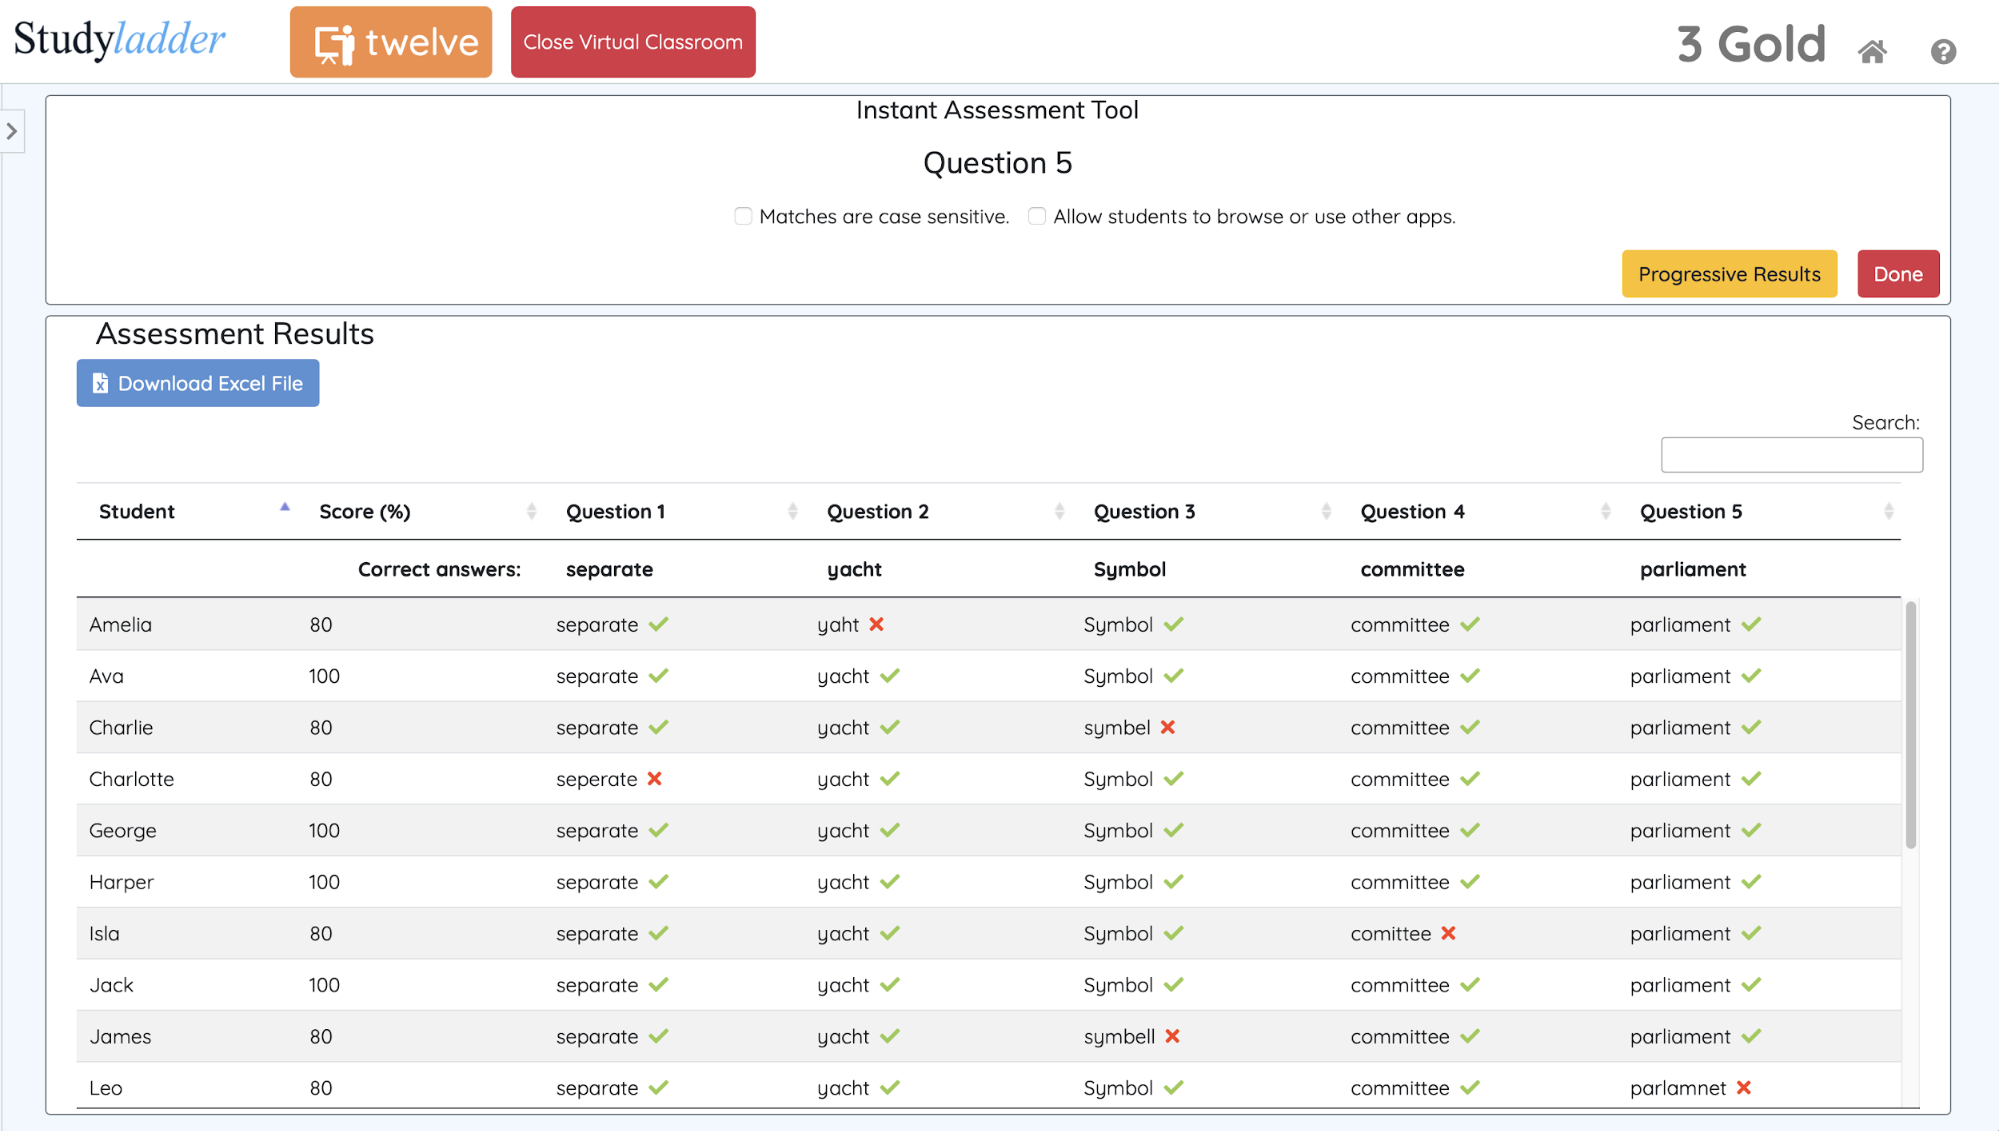
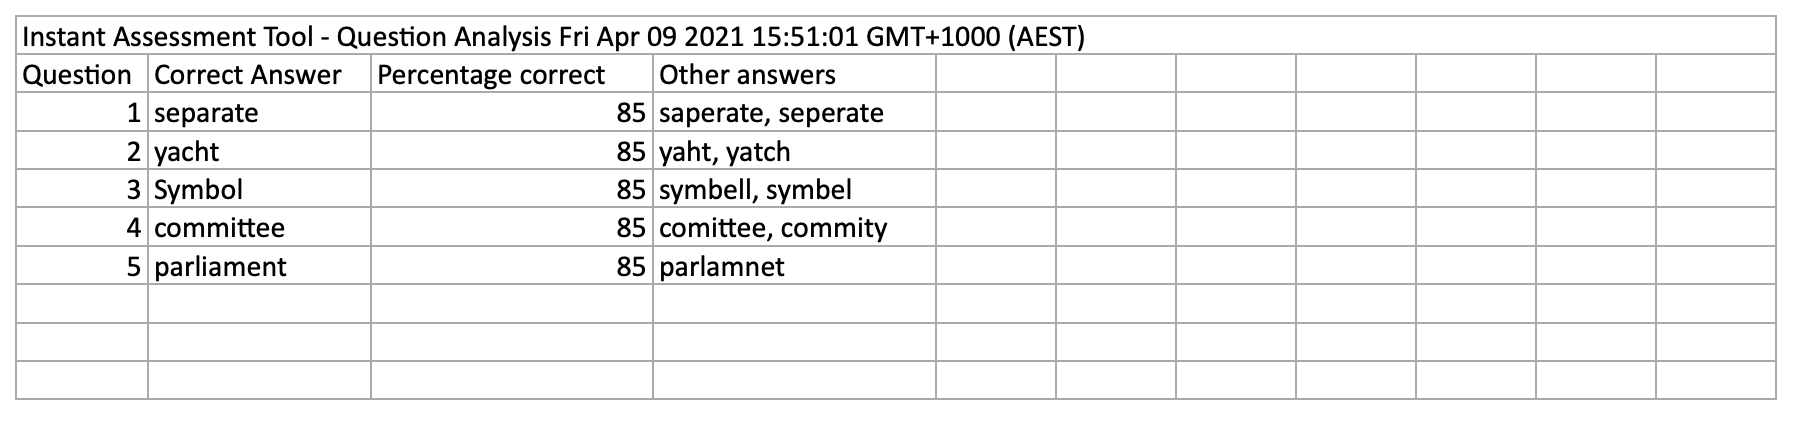
In this example, another four questions were asked - “yacht”, “symbol”, “committee” and “parliament”.
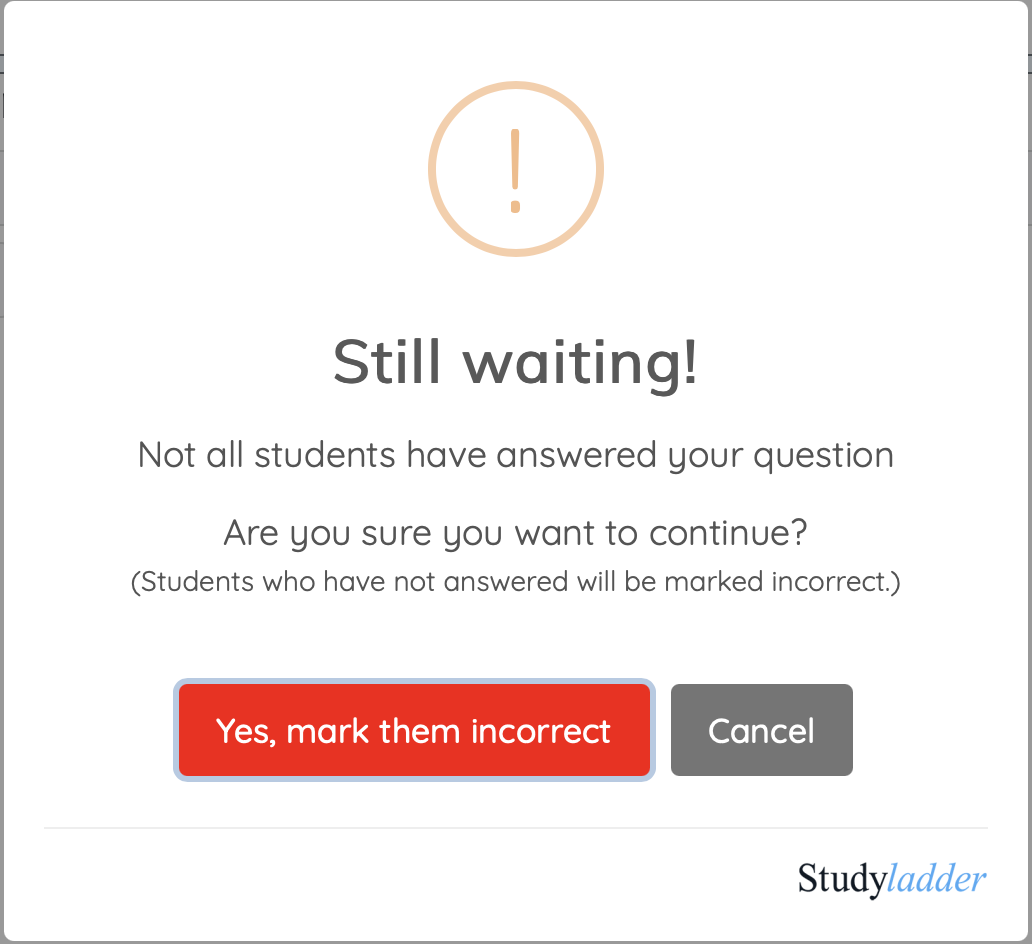
It should be noted that you can answer the question at any time and students who have not yet submitted their answer will be marked incorrect with a blank answer. This allows you to use time limits for questions.
You will see this popup if you input an answer before students are “all in”.
Click on the “Finish Assessment” button to get the final result (you can click “Progressive Results” any time to monitor student progress).
This will finalise the test and show the results.
You can sort and search the results table using the sort buttons next to each column heading, or by typing into the search box.
These results can be downloaded into an Excel spreadsheet by clicking on the “Download Excel File” button and allow you to save the entire results for the test.
Two separate result sheets are produced for each test: