Interactive Classroom Quick-Start Guide
Contents
Before you begin
Getting Started
Step 1: Open the Interactive Classroom management console
Step 2: Creating an Interactive Classroom and connecting students
Connecting Students
Troubleshooting Student Connections
What's Next?
Fun stuff
Videos
Introduction to Interactive Classroom
Connecting your Students
Assigning Activities for the Class
Back to topBefore you begin
There is no additional setup required for Interactive Classroom. It uses the same classes and groups that the rest of StudyLadder does.
If you are planning on running an Interactive Classroom session, you will find that everything will run more smoothly if all of your students have already logged in to their own StudyLadder accounts and have the home page open.
On the student home page, the
![]() button should be visible in the Quick Links section.
button should be visible in the Quick Links section.
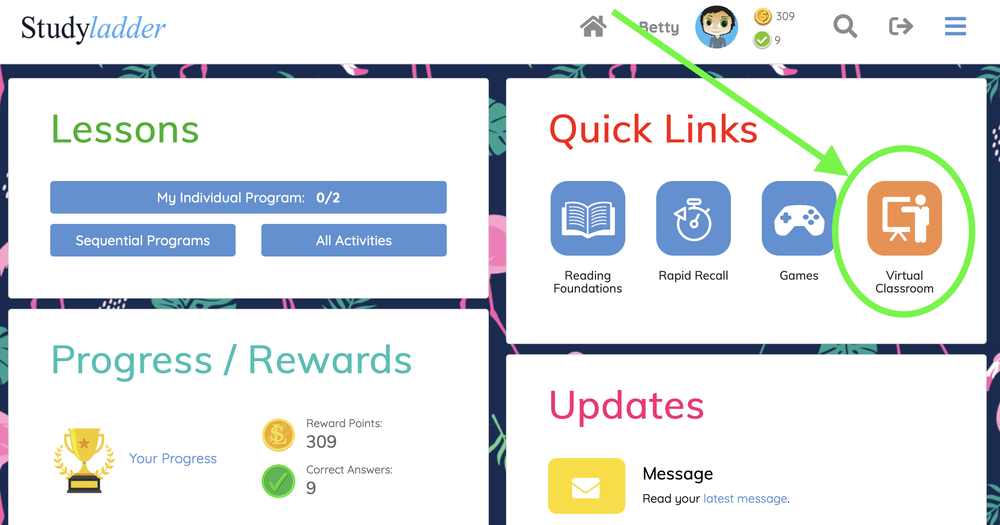
They will need to click on this shortly.
Getting Started
Step 1: Open the Interactive Classroom management console
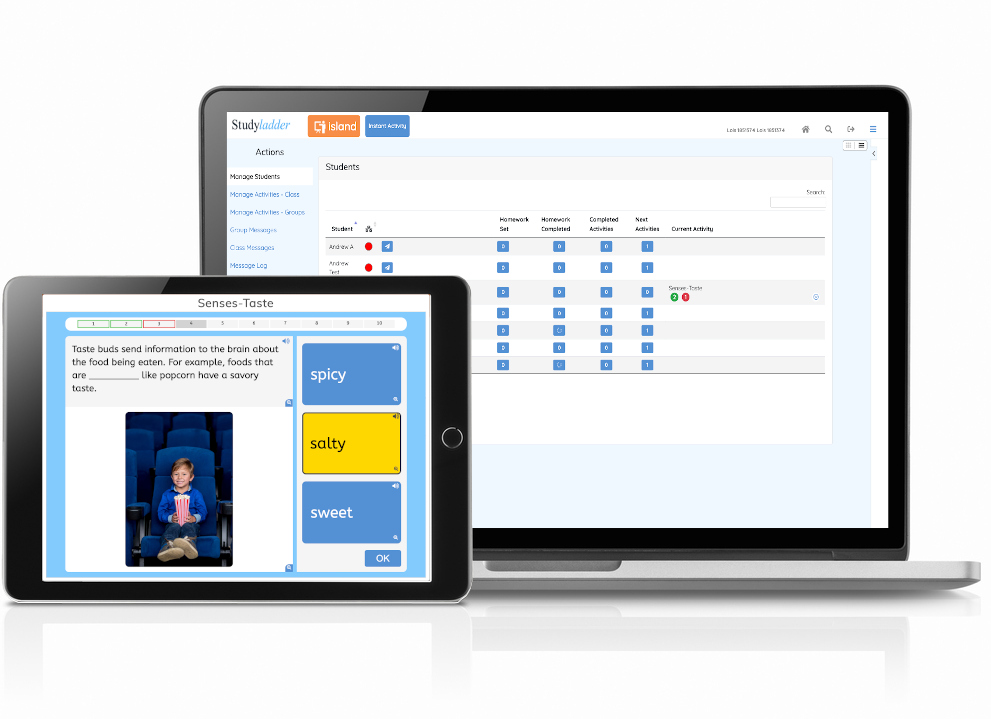
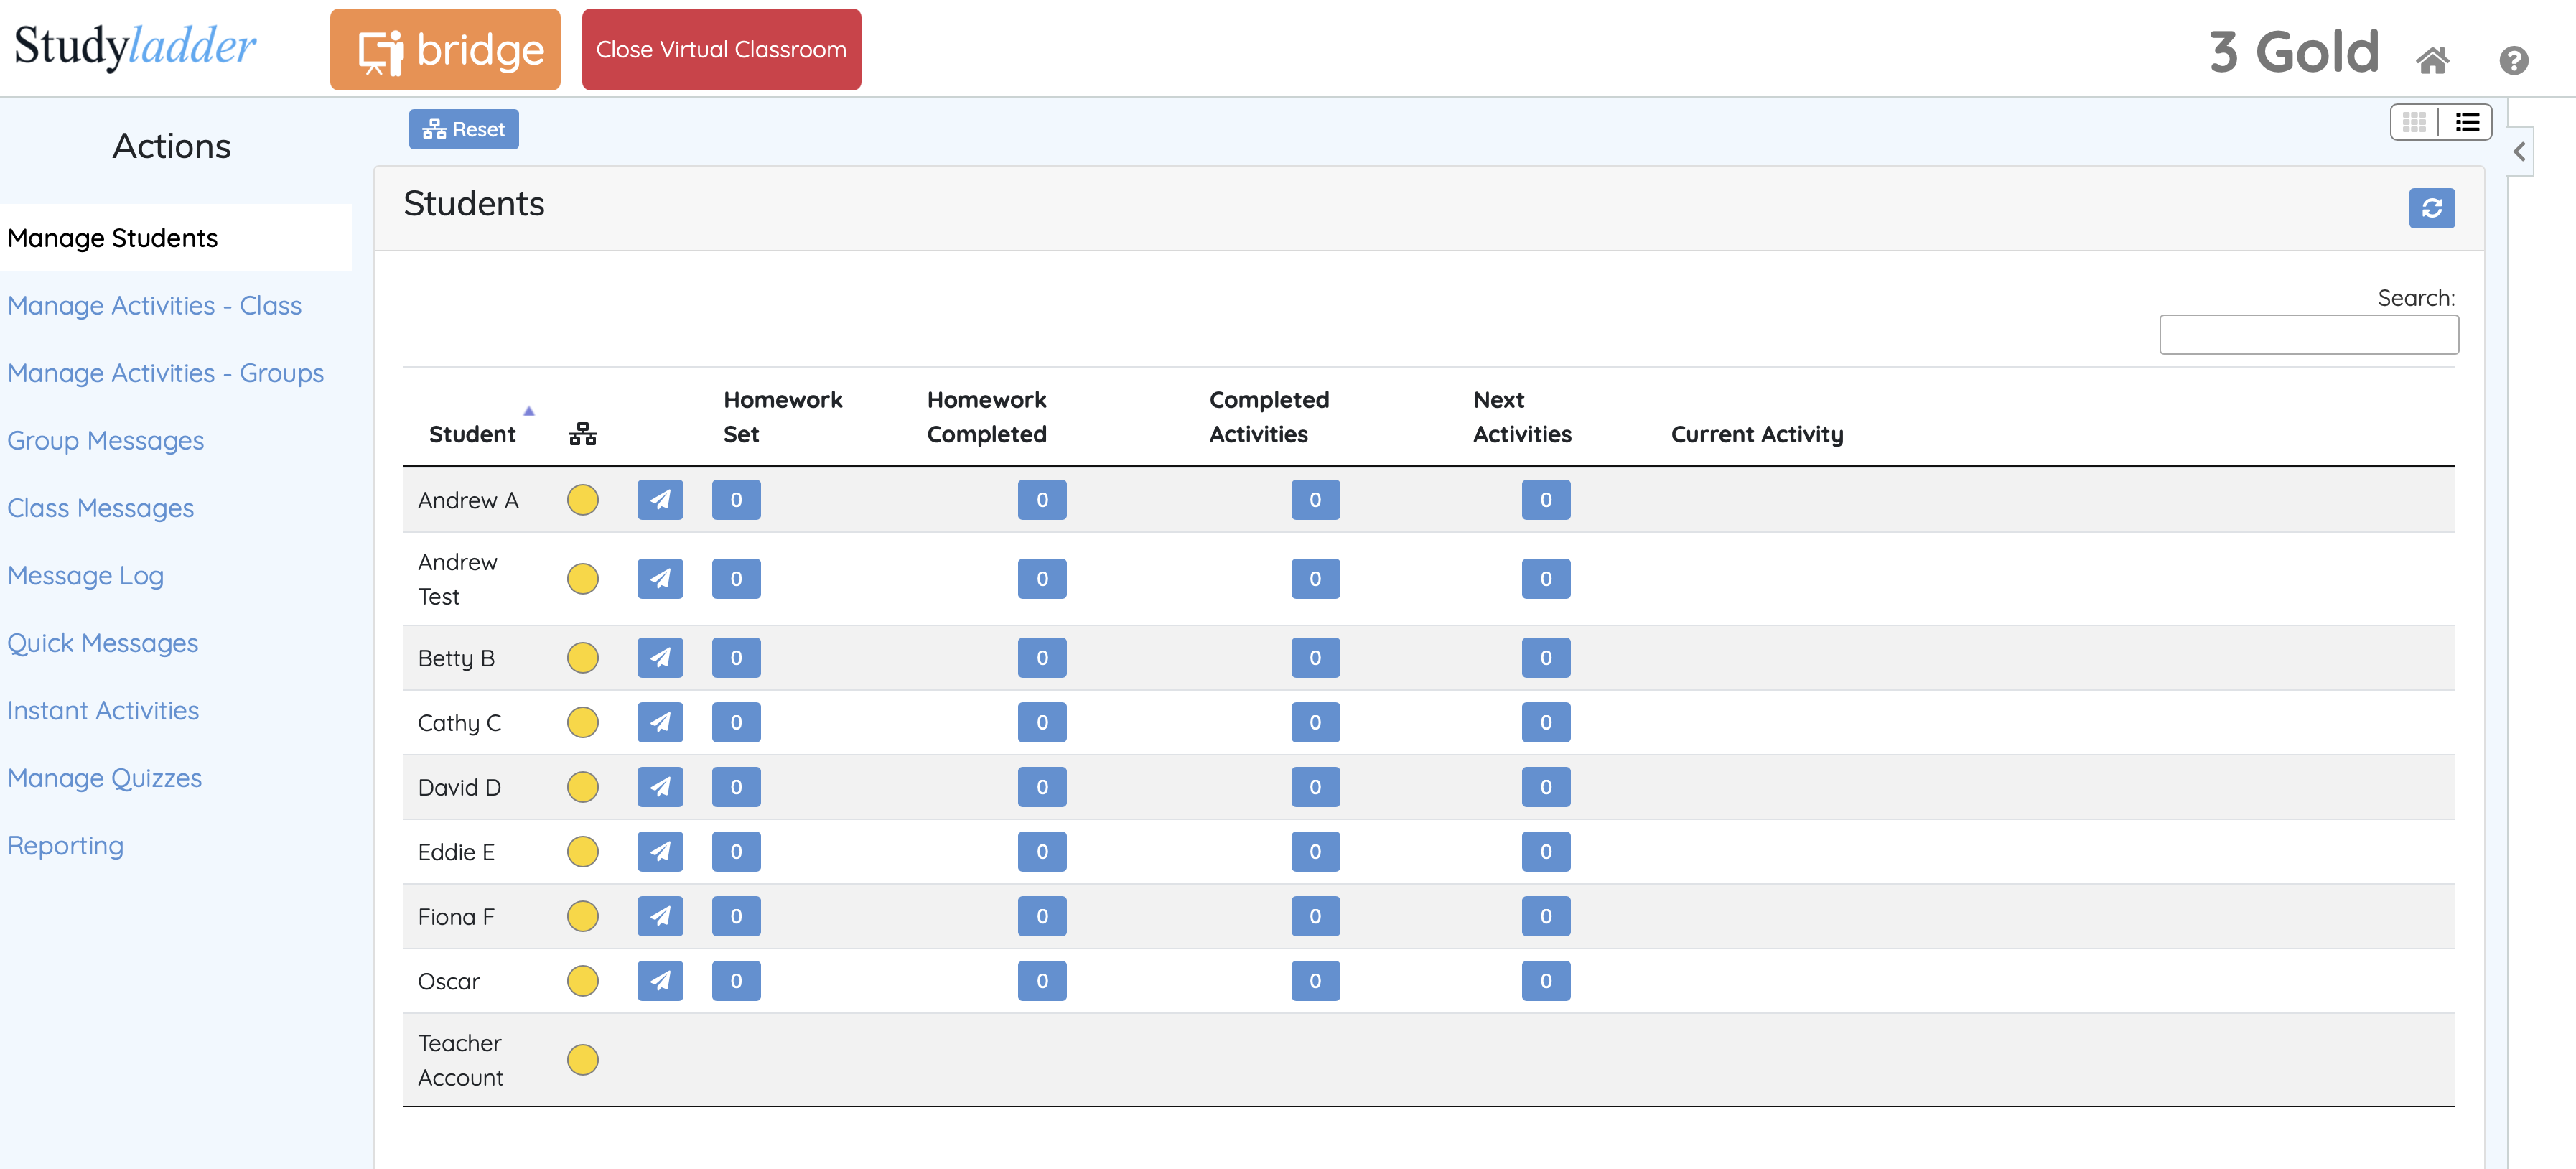
Each class has it's own Interactive Classroom management console. This is accessed from the Teacher homepage (just click the home link from any other teacher page).
In the "Manage Class" area for each of your classes, you will see a Interactive Classroom button. Click this to activate the management console for this class.
The management console should now open in a new tab.
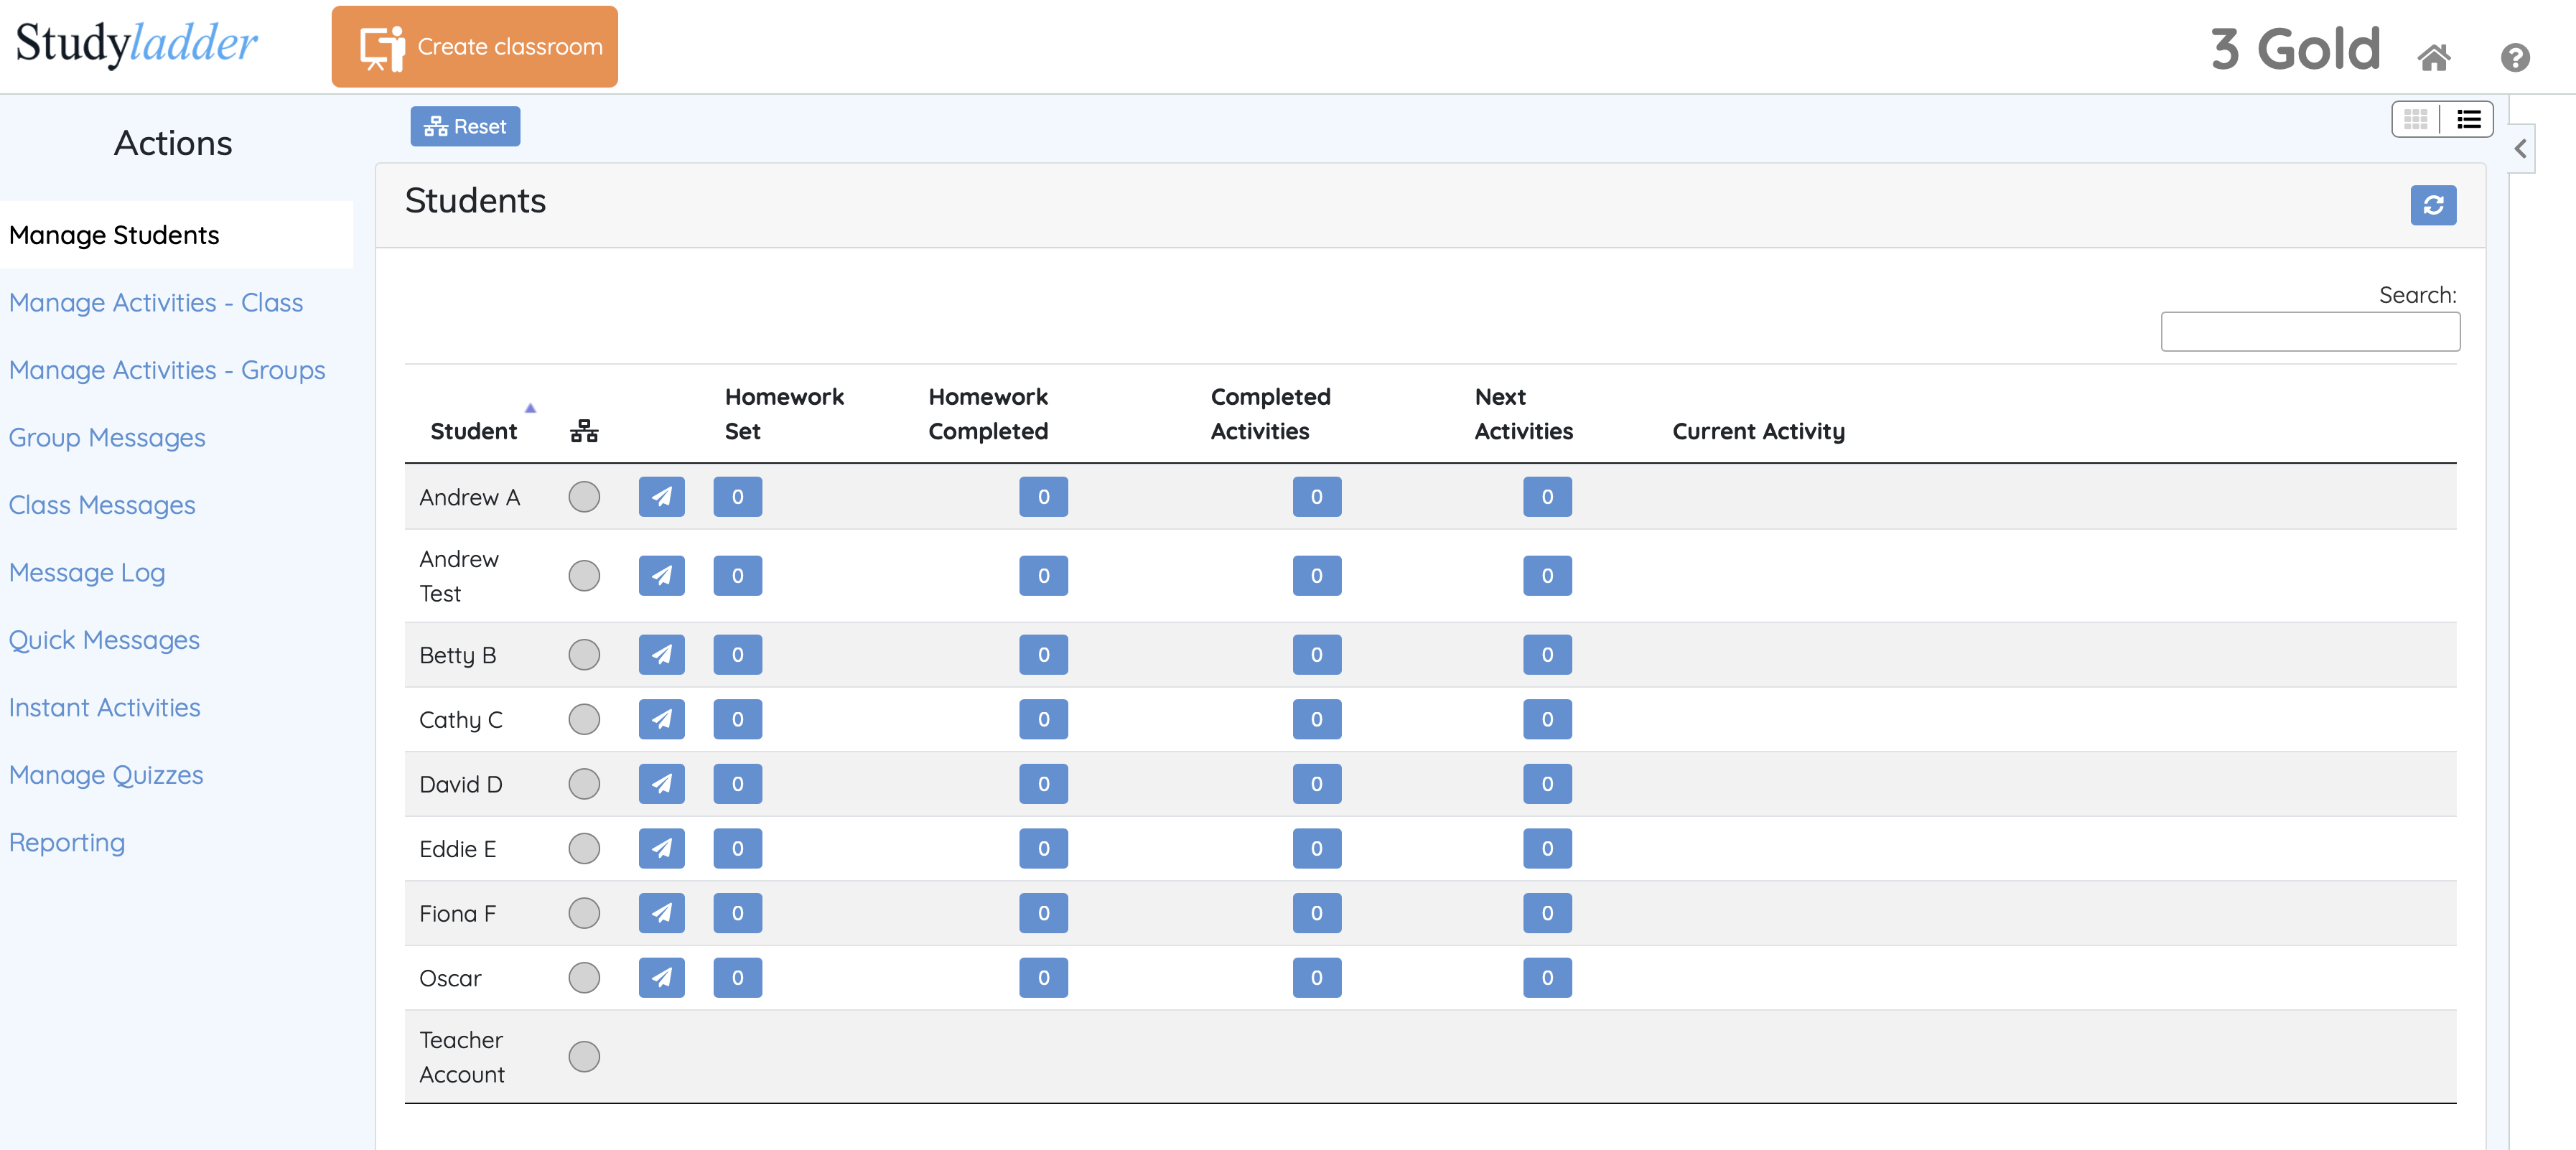
You can switch between list view and grid view at any time by clicking the view toggle at the top-right or the screen
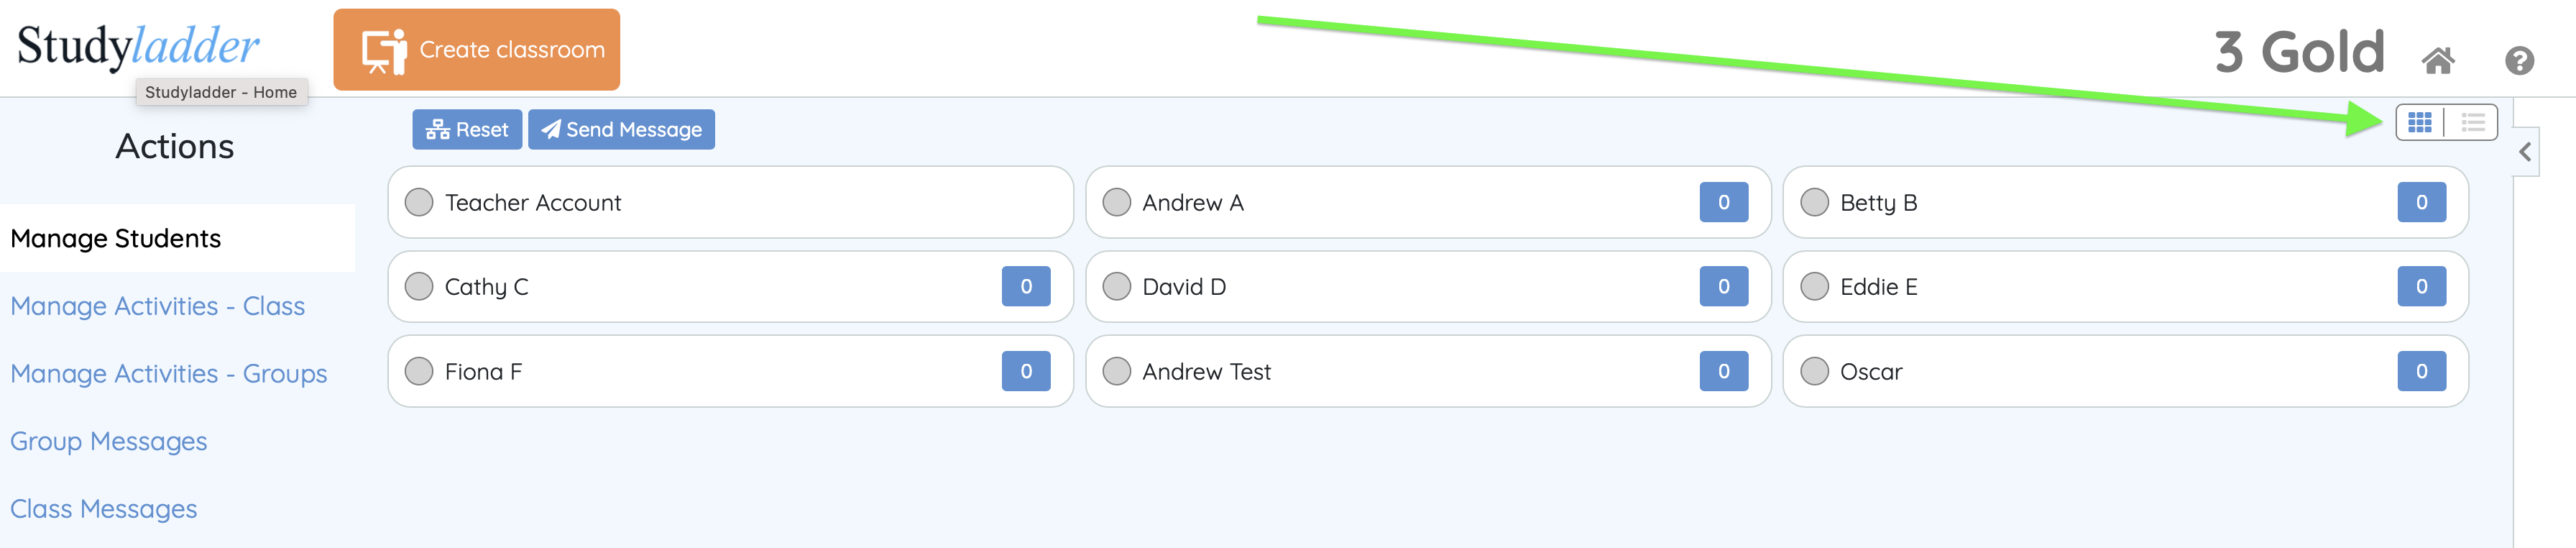
Grid view allows more students to be displayed at once. This view is useful for ensuring all students are connected and for monitoring progress.
While it contains less detail than the list view, it still allows monitoring of real-time progress and viewing of results for completed activities, without needing to scroll.
Step 2: Creating an Interactive Classroom and connecting students
Creating the Interactive Classroom
To create a new Interactive Classroom live session, just click on the
![]() Create classroom
button
at the top of the management console window.
Create classroom
button
at the top of the management console window.
There are 2 possible modes of operation for Interactive Classroom:
- Standard Mode - This uses a peer to peer connection method and works best when all devices are on the same local network. It will work across an internet connection, it is often blocked by firewall settings. Some schools disable peer to peer style connections for all of their networks. Standard mode is the preferred mode of operation and offers additional features like remote control. It is also much faster with interactions being almost instantaneous.
- HTML Mode - This mode sends all communications via the StudyLadder website. It has the advantage of being able to pass through most firewalls. If you can open the StudyLadder website, then you can use HTML mode. The disadvantage of HTML mode is that it is much slower with response times ranging from 2 to 10 seconds. This is most apparent when using instant activities, class games and quizzes. You may experience some lag in these activities.
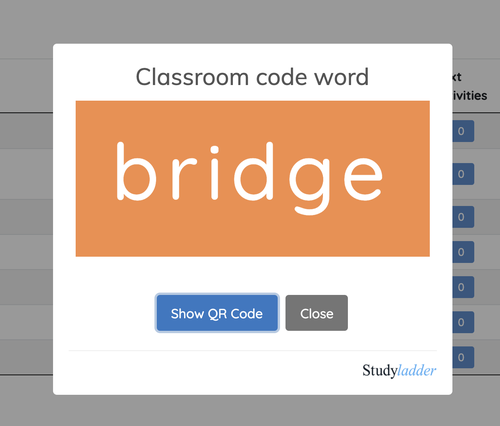
This button should now change to show a 6 letter randomly selected word that is the code word for the live session you have created.
Clicking the button again will show an enlarged version of the code word for easy display on an electronic whiteboard or similar.
For this guide, we will look at manual connection. The QR code is covered in the main documentation here .
Connecting Students
Try Standard Mode first, and if you experience connection difficulties, switch to HTML mode.
Once you have your class code word, it is time for your students to connect to the Interactive Classroom session by clicking the
![]() button in the Quick Links section.
button in the Quick Links section.
This will open the Interactive Classroom window and prompt the student to enter the class code word ("bridge" in the example).
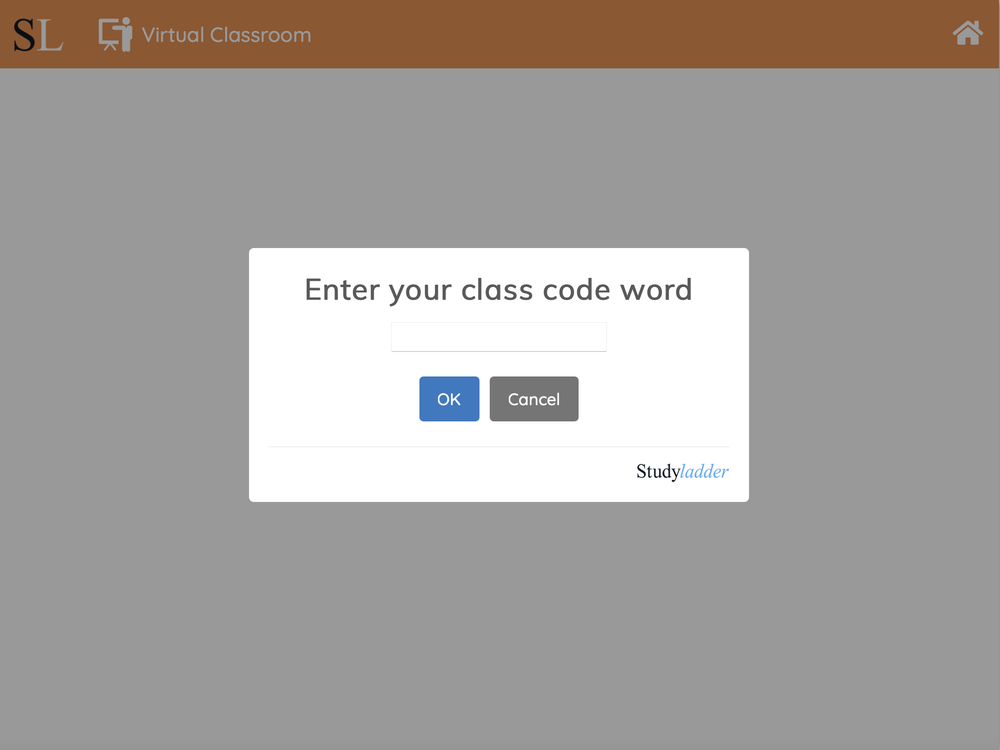
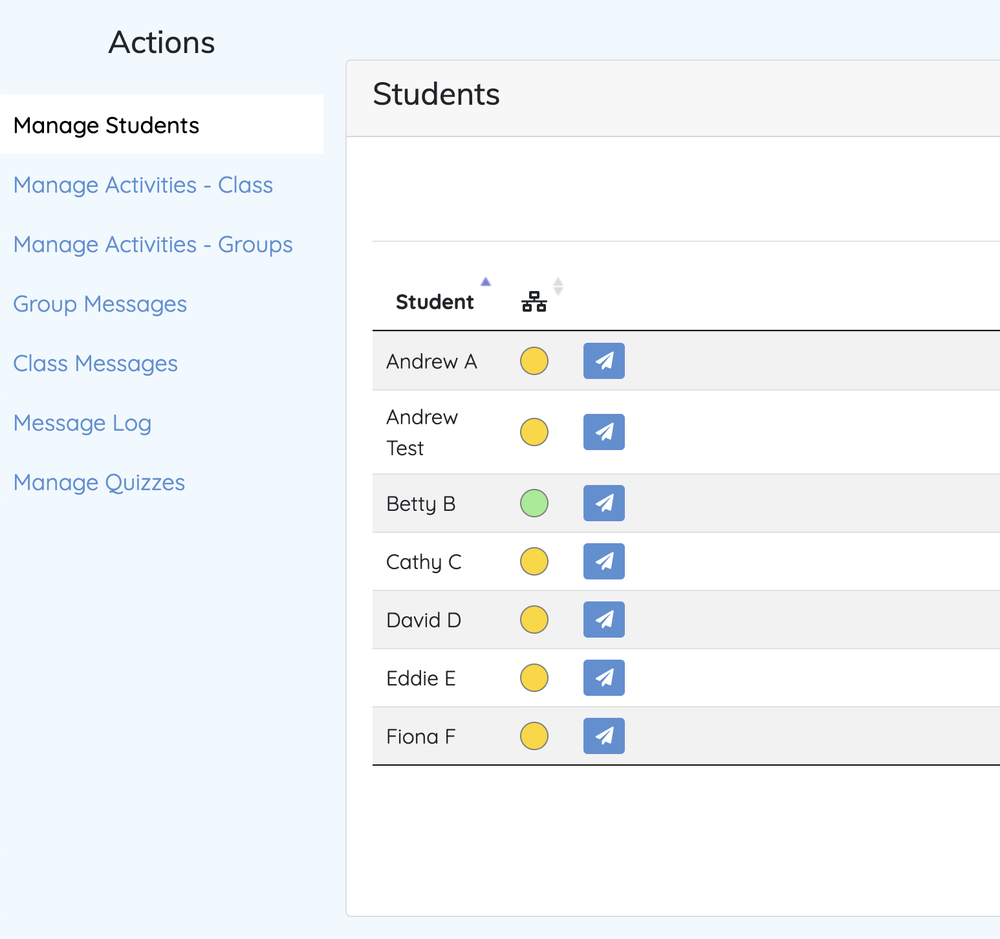
The student's device should now connect to the Interactive Classroom you have created. This is shown by the coloured indicator next to their name turning from yellow to green.
You can see this on Betty B in the example below.
Once connected, students are ready to receive activities, messages and quizzes.
Troubleshooting Student Connections
Please note that HTML mode connects differently and should not require trouble-shooting. Just allow about 10 seconds for students to show as logged in after they have connected.
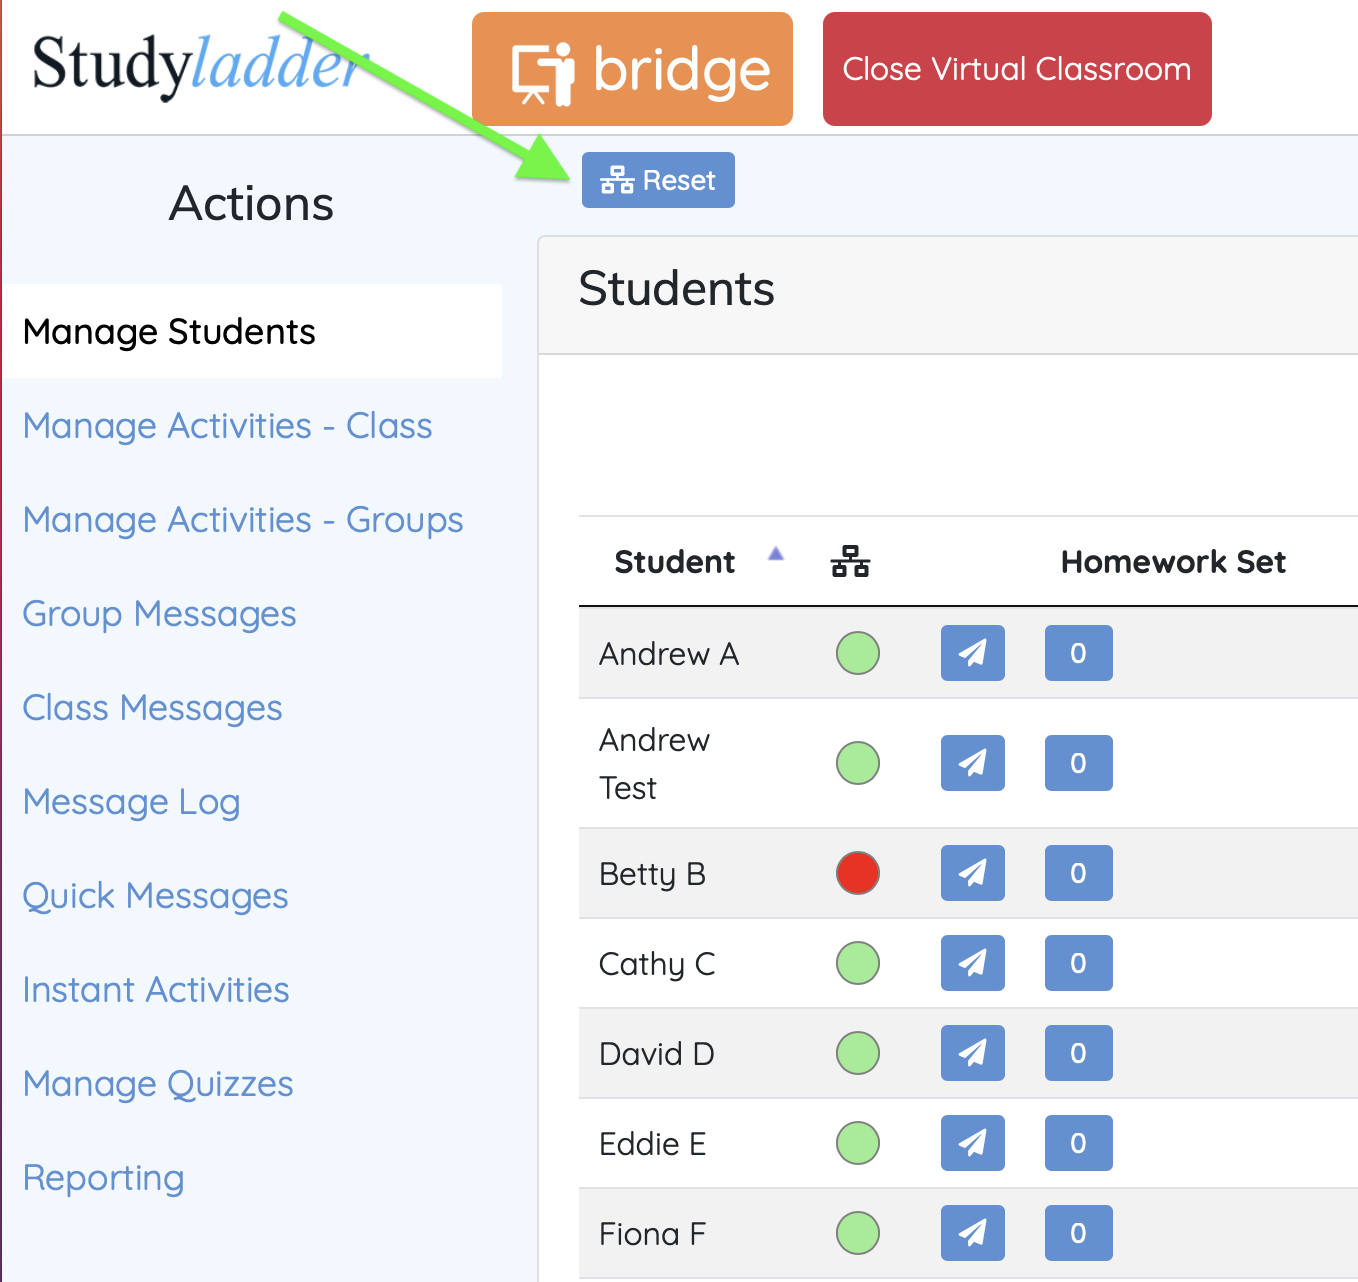
The current state of a student connection can be seen by selecting "Manage Students" from the Actions sidebar and checking the connection indicator next to their name.
The possible states for the indicator are:
| Student has an active, live connection to this Interactive Classroom session. | |
| Waiting for the student device to connect - this state will listen for the student for 2 minutes. | |
| The student is disconnected - either they have closed the Interactive Classroom page or closed the browser or powered down their device or moved out of WiFi range. | |
| You have not created an Interactive Classroom yet. You will need to click the "Create Classroom" button. This will also happen if you refresh the interactive classroom page. |
Student connection indicator has turned red before they can connect
This usually happens when a student is having difficulty with their device or the login process and the connection times out (about 4 minutes)
To fix this you will need to do the following:
-
Click on the
Reset
button at the top of the screen.
-
Follow the steps outlined in the "Reset Connections" dialog that appears next
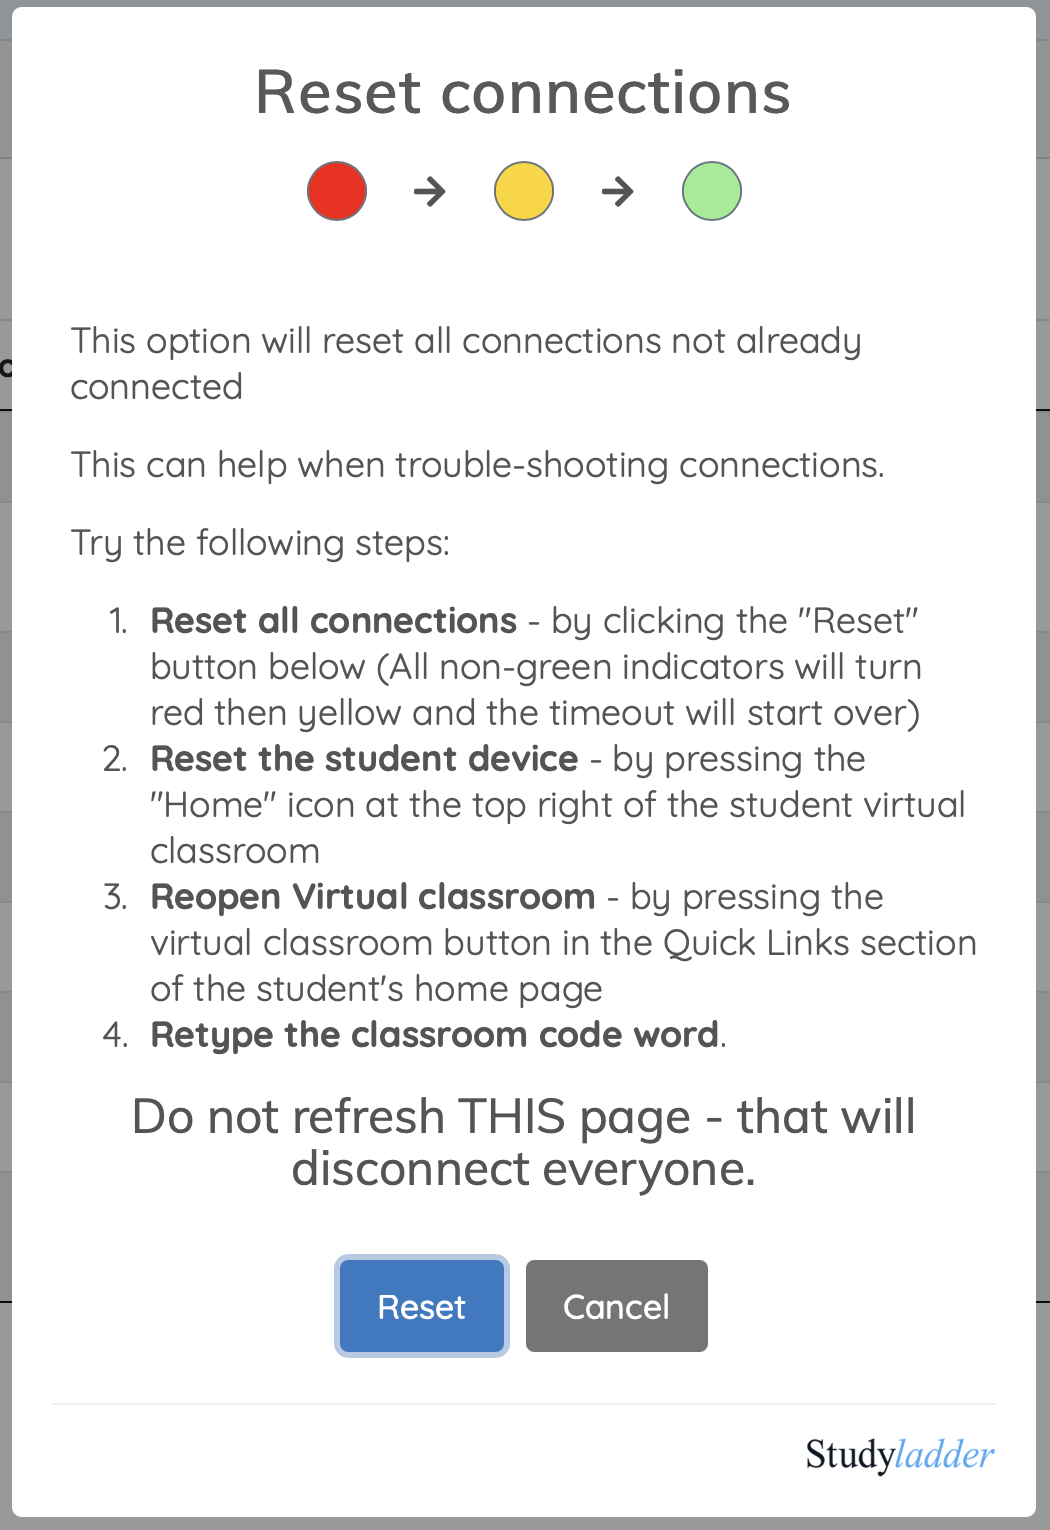
If you follow these instructions, all student connection indicators for students who have not connected yet, will turn red very briefly and then turn yellow (indicating that the student connection is ready for them to try again).
Student accidently refreshes or closes their Interactive Classroom
You will know this has happened if their connection indicator turns yellow again.
Normally, they can just reopen the Interactive Classroom page and re-enter the class code word.
Student connection indicator is green but they are not connected
A network glitch my very rarely cause this to happen.
Just click on the connection indicator and manually disconnect them.

Then follow the same procedure outlined above for "Student connection indicator has turned red before they can connect" .
Now all of your students should be connected to the Interactive Classroom session and you can begin using it's features.
What's Next?
The power of Interactive Classroom as a teaching tool comes from your ability to control activities and get instant feedback on student progress.
Check out these sections in the main documentation for more detailed usage instructions:
-
Setting Class Activities
-
Real-time Monitoring
-
Group Activities
-
Instant Messaging
-
Homework
-
Raise Hand
-
Quizzes
Fun stuff
Our Bingo games and Number Guess games run differently in the Interactive Classroom environment.
To play Bingo with the whole class, go to the "Instant Activities" section in the Action sidebar, then start a Class Instant Activity.

Select "Class Games"
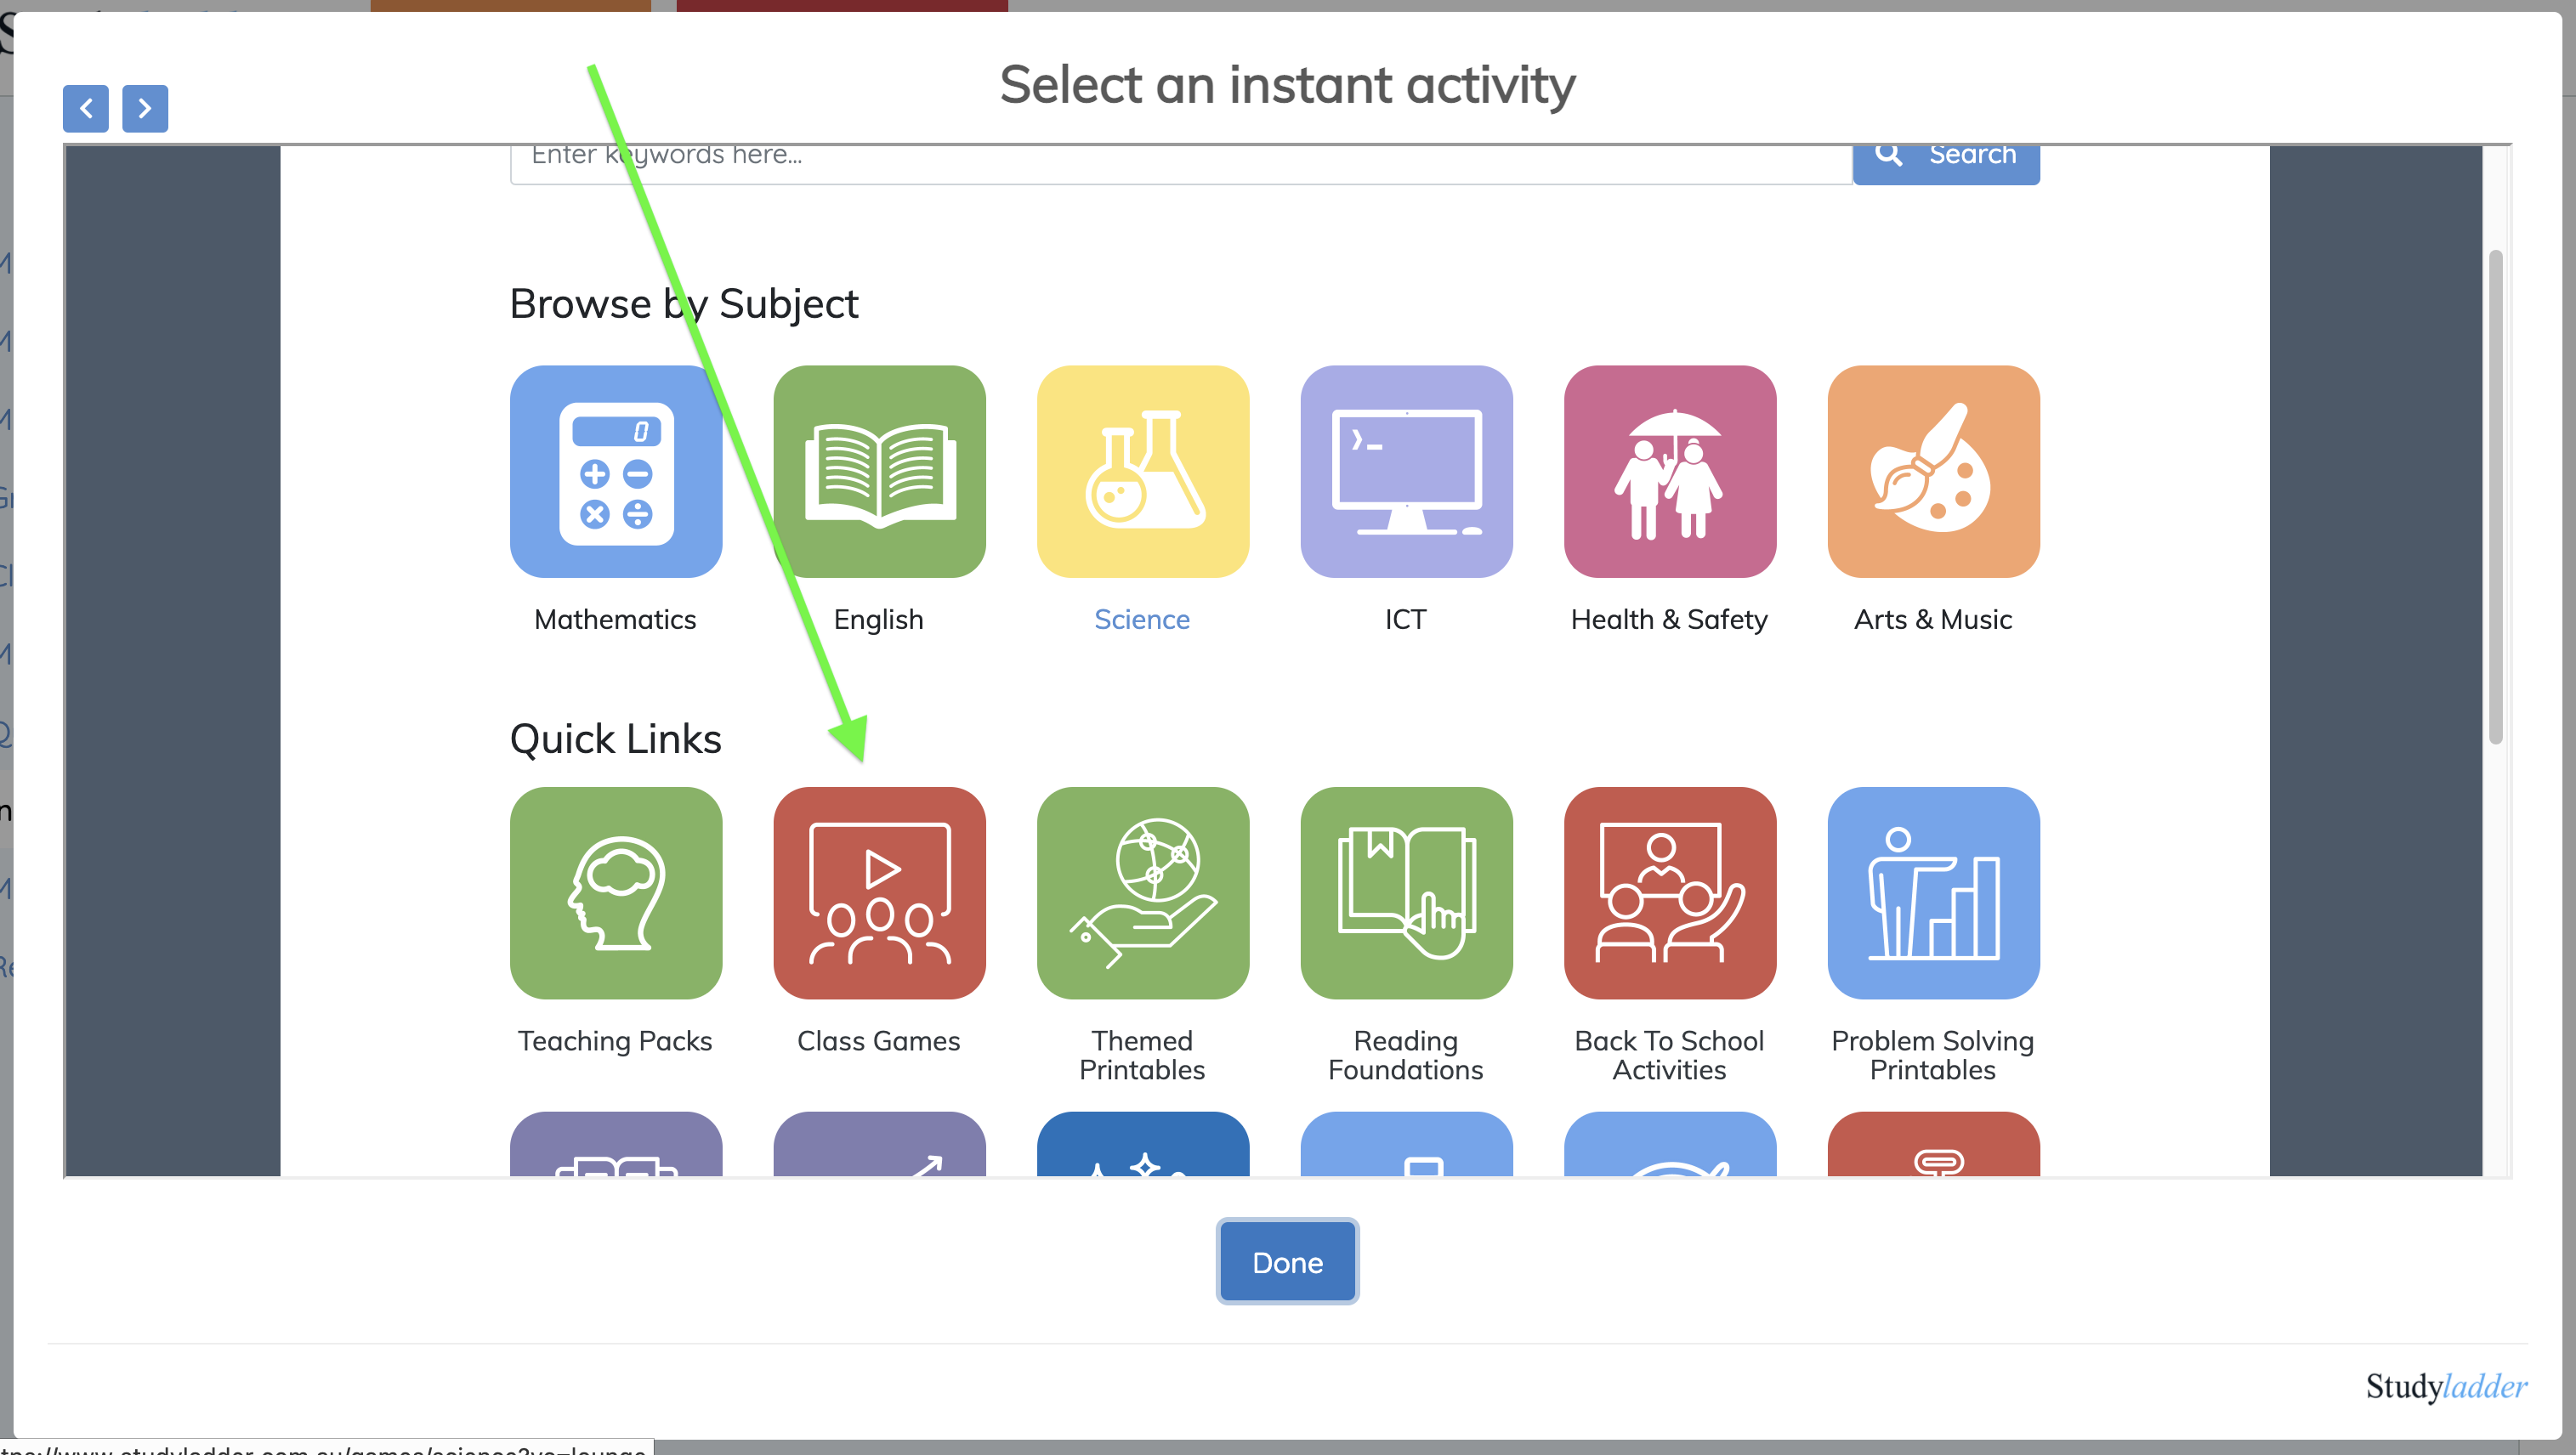
Select "Class Games" and then select the game you want to play.
When you click "Launch Instant Activity", this will override the current activity for all students and start the instant activity.
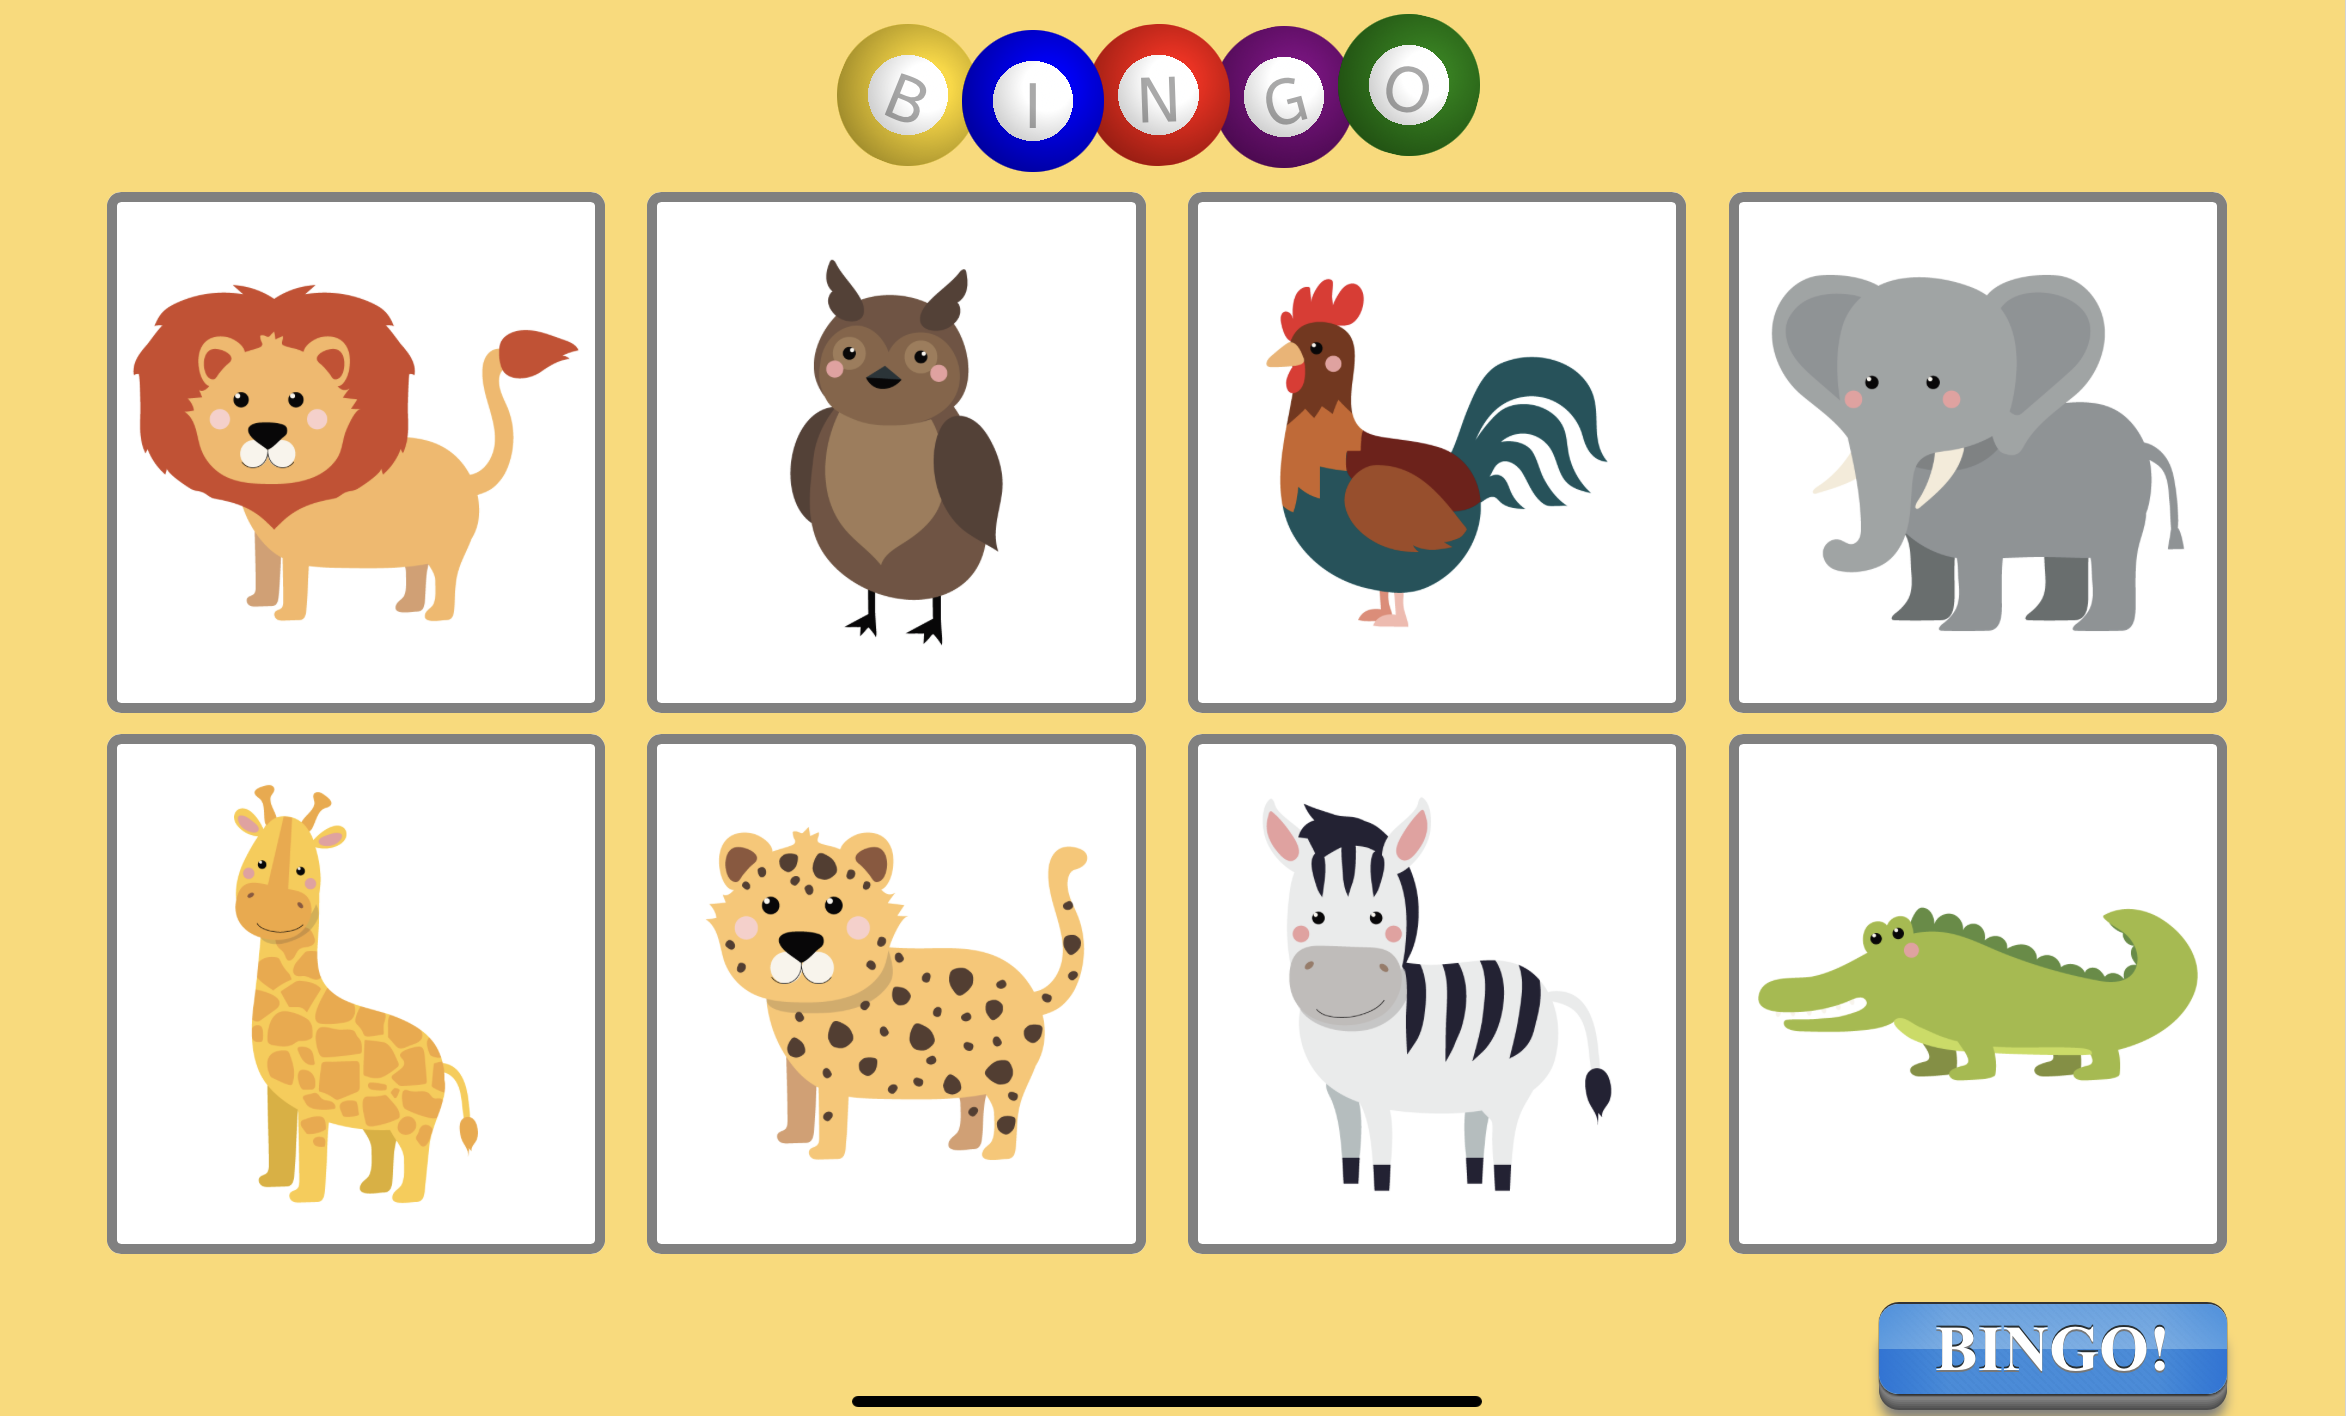
In the case of Bingo, you will see the Bingo wheel (display this on your whiteboard or similar for your class), and students will see their own bingo card.
High-low number games allow you to put students in teams (up to 6 teams) and have them take turns with high-low guesses interactivly from their devices.
More...
Selecting "Hands Up Activity" from the "Instant Activities" section in the Action sidebar allows you to override the normal "Hands up" function of the Interactive Classroom and use it for students to do any type of class activity or game where they need to raise their hand... and you want to see who was first!.
It can also be used to play "Hands down if..." by getting all of the students to put their hands up (virtually!) and lower them when you ask "Hands down if..." until you have your winner / winners.
It is also good for tallying - "Click on hand up if you have your own mobile phone" etc.
Self-marking Assessments
The Instant Assessment Tool can be used in a number of ways to conduct asssessments and produce instant results both on-screen and in a spreadsheet you can download.
Click here to see an example of a "self marking" spelling test!