
Interactive Classroom is a new way of using existing StudyLadder resources in an interactive way.
It allows you to set work for your class and monitor results in real time, with clear indicators showing student progress and results as each question is answered.
You can queue up activities for the day ahead of time and set unfinished activities as homework.
There are interactive class games, as well as the ability to create and share interactive class quizzes.
There is no additional setup required for Interactive Classroom. It uses the same classes and groups that the rest of StudyLadder does.
Once you have completed the normal setup for classes and groups, you are done! Interactive Classroom uses the same structure.
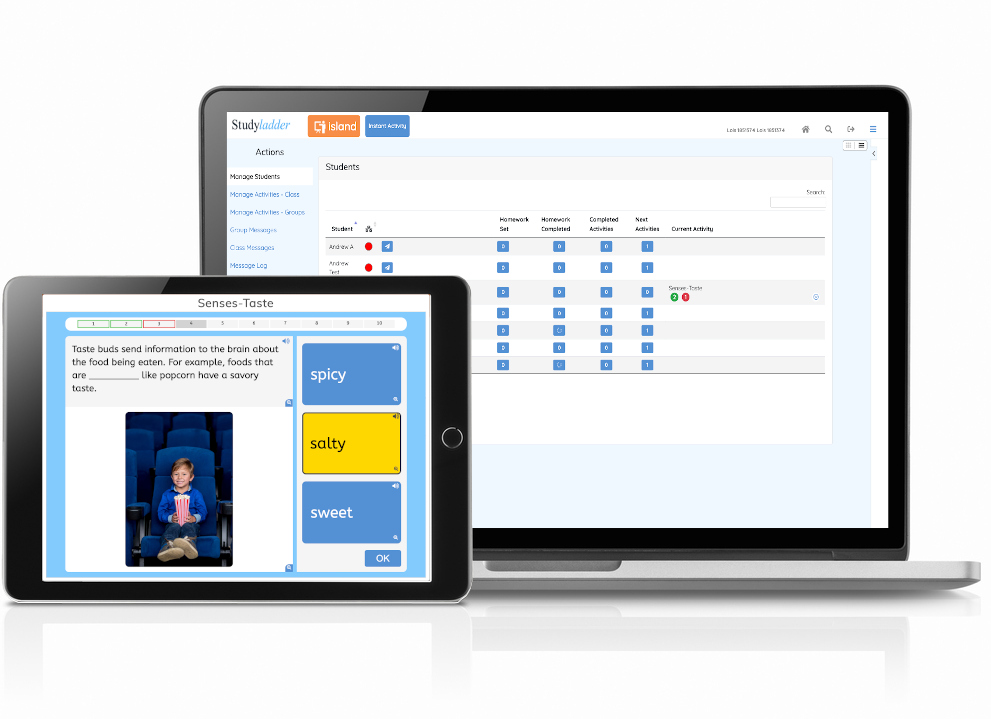
Each class has it's own Interactive Classroom management console. This is accessed from the Teacher homepage (just click the home link from any other teacher page).
In the "Manage Class" area for each of your classes, you will see a Interactive Classroom button. Click this to activate the management console for this class.
The management console should now open in a new tab.
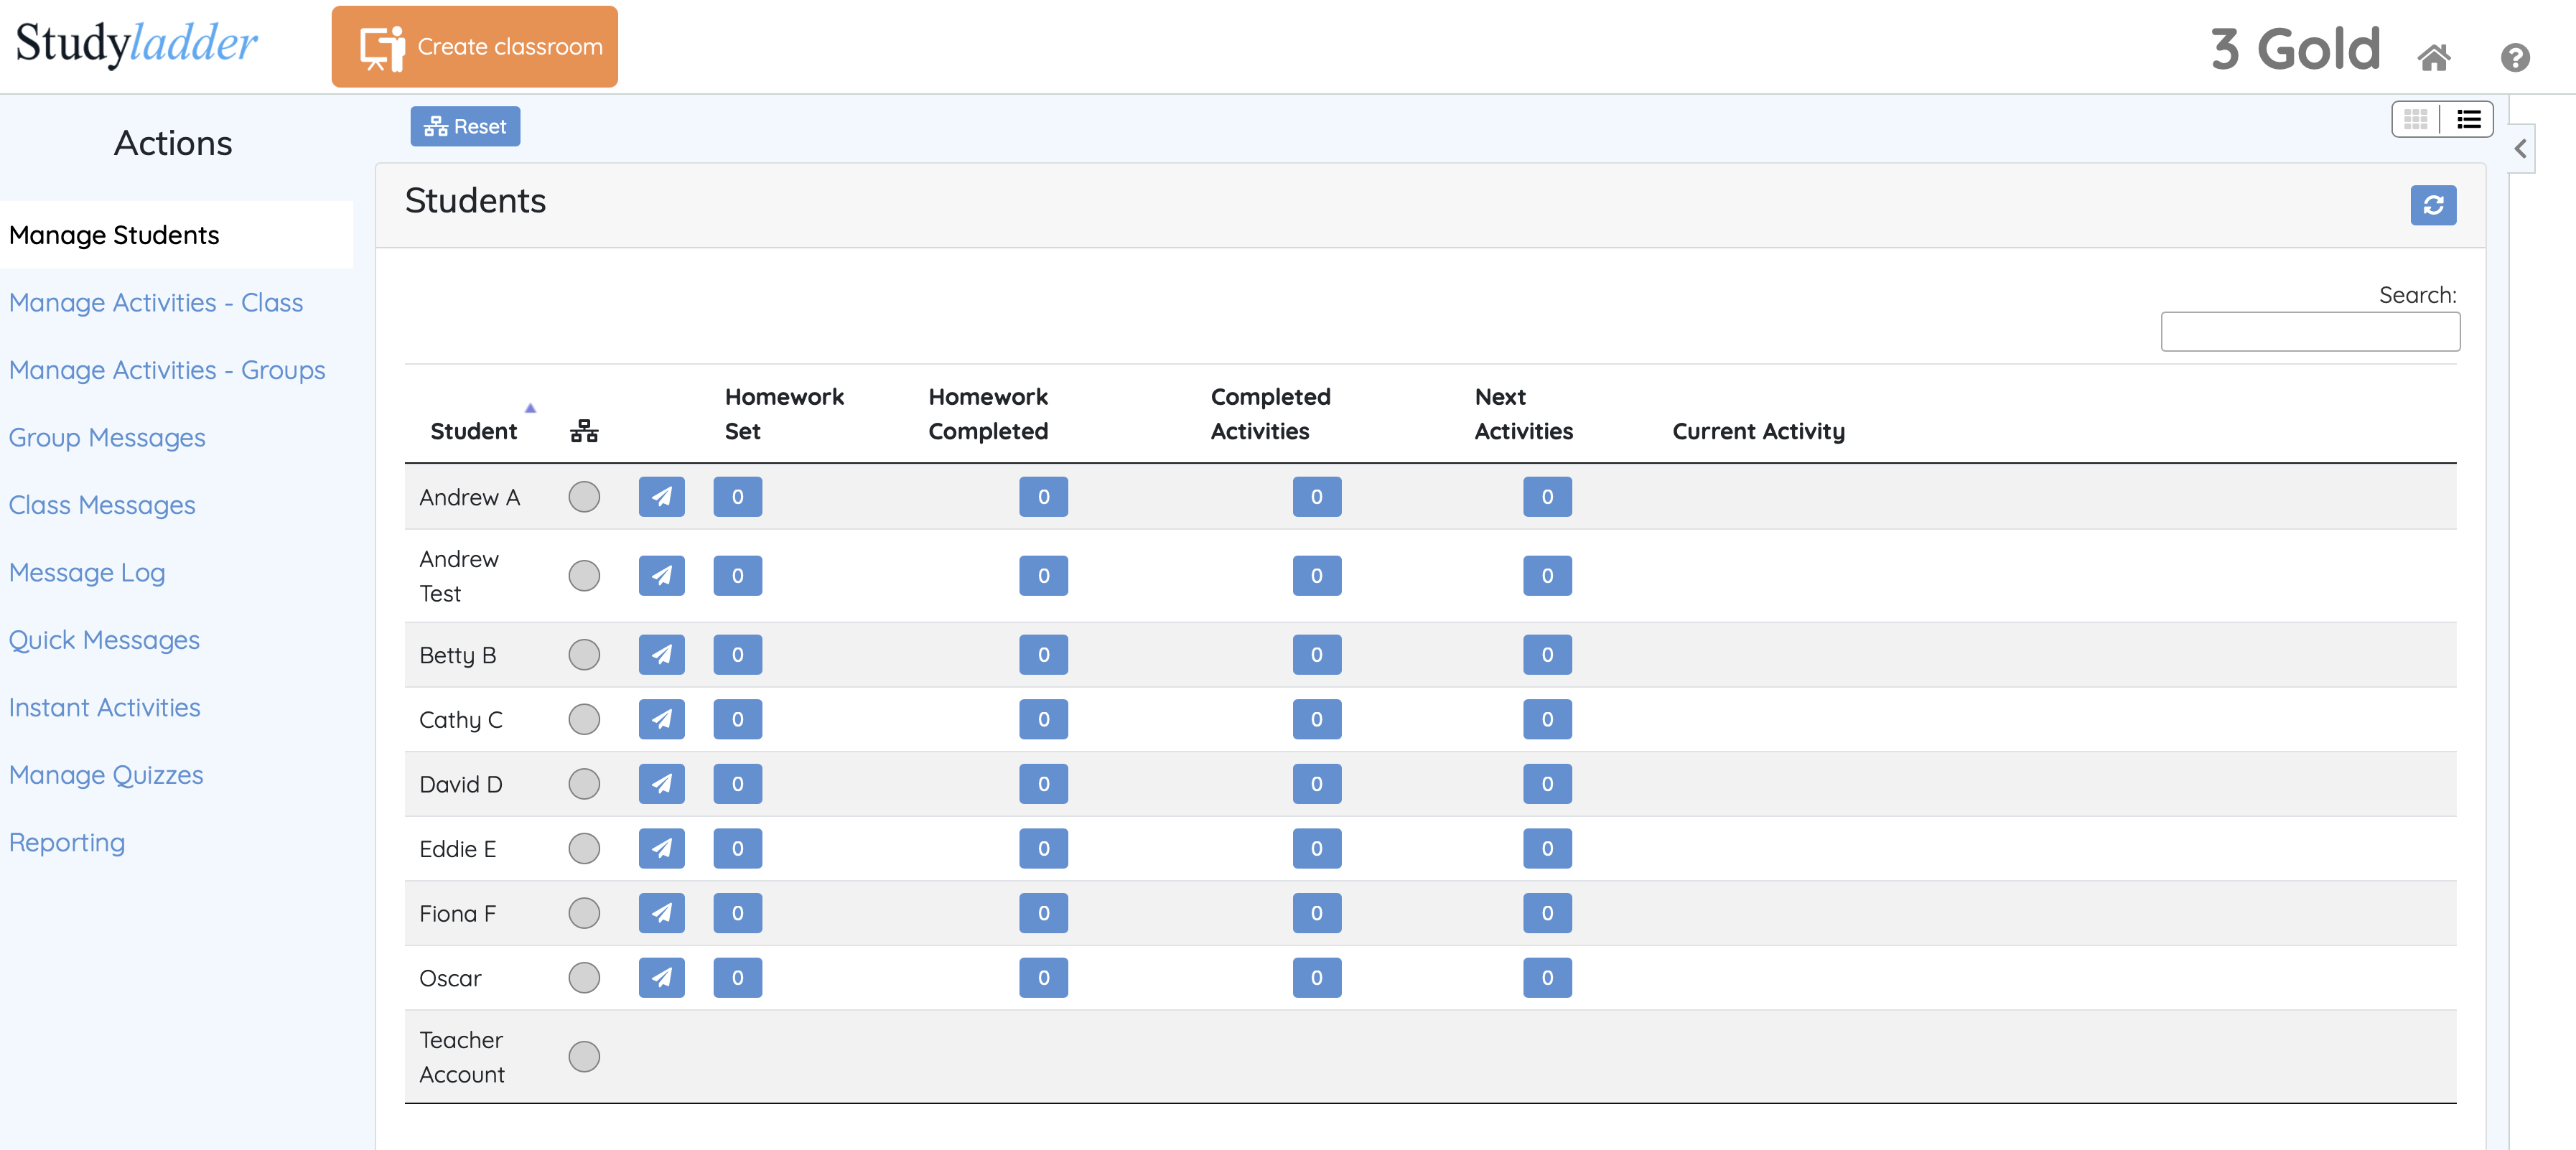
You can switch between list view and grid view at any time by clicking the view toggle at the top-right or the screen
Grid view allows more students to be displayed at once. This view is useful for ensuring all students are connected and for monitoring progress.
While it contains less detail than the list view, it still allows monitoring of real-time progress and viewing of results for completed activities, without needing to scroll.
Note:
It is possible do a number of preparation tasks at this stage even before the interactive classroom is created. All of these actions are saved automatically and will be available next time the management console is opened.
These include*:
Ensure that students are all successfully logged into the StudyLadder website using their own user name and password before creating your Interactive Classroom. This will help prevent connection issues and timeouts when the students connect to the classroom.
To create a new Interactive Classroom live session, just click on the ![]() Create classroom button
at the top of the management console window.
Create classroom button
at the top of the management console window.
There are 2 possible modes of operation for Interactive Classroom:
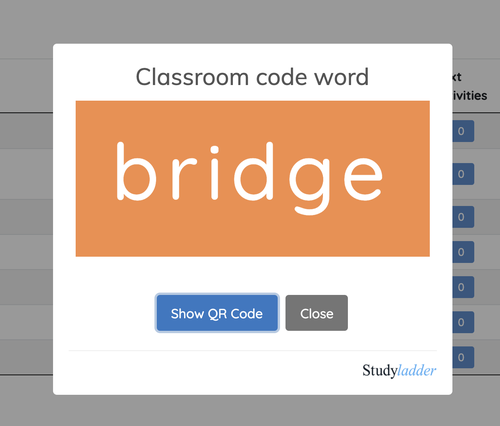
This button should now change to show a 6 letter randomly selected word that is the code word for the live session you have created.
Clicking the button again will show an enlarged version of the code word for easy display on an electronic whiteboard or similar.
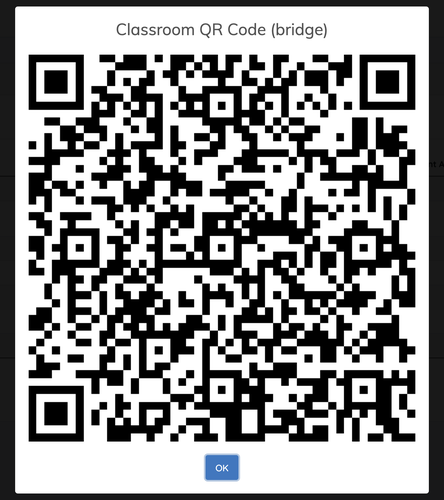
Clicking Show QR Code will show a QR Code that can also be used to connect to the Interactive Classroom live session. However the effectivness of this method will depend a great deal on the quality of the camera in the student devices, as well as the electronic whiteboard and the ambient lighting.
Note:
The QR Code is a simpler way to log in - provided that the technology on hand and the ambient conditions allow it.
For security reasons, the QR Code generated is unique to the current session. You cannot print it for later use.
Try Standard Mode first, and if you experience connection difficulties, switch to HTML mode.
The Interactive Classroom will operate when students are on the same network as the teacher, or students and teacher are connected to the internet (i.e. in a remote learning situation).
For this reason, there is a limited time within which students need to connect (about 2 minutes). That is why it is good practice to have all of the student devices operating and logged in before starting an Interactive Classroom session.
If using the QR Code is not an option, then students will need to log in manually.
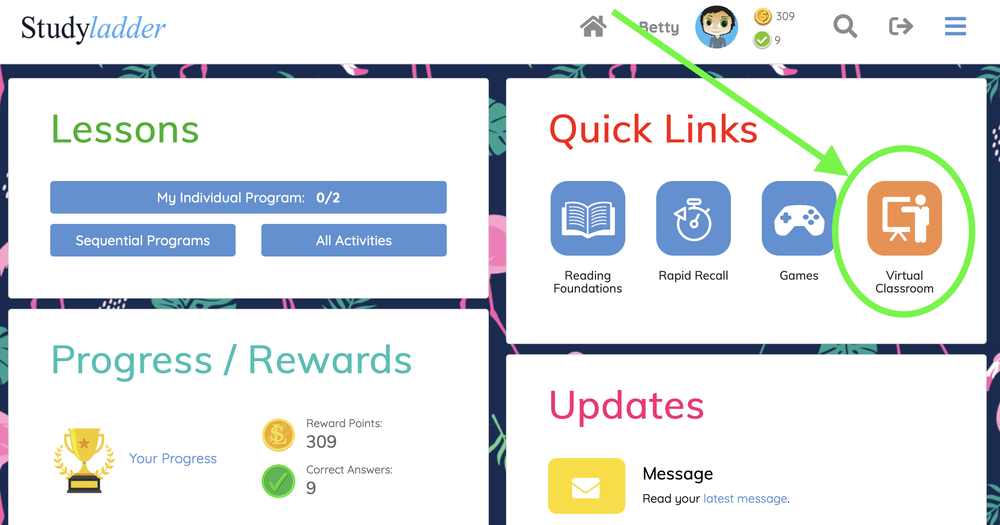
For a student to log in manually, they need to go to their home page and click the ![]() button in the Quick Links section.
button in the Quick Links section.
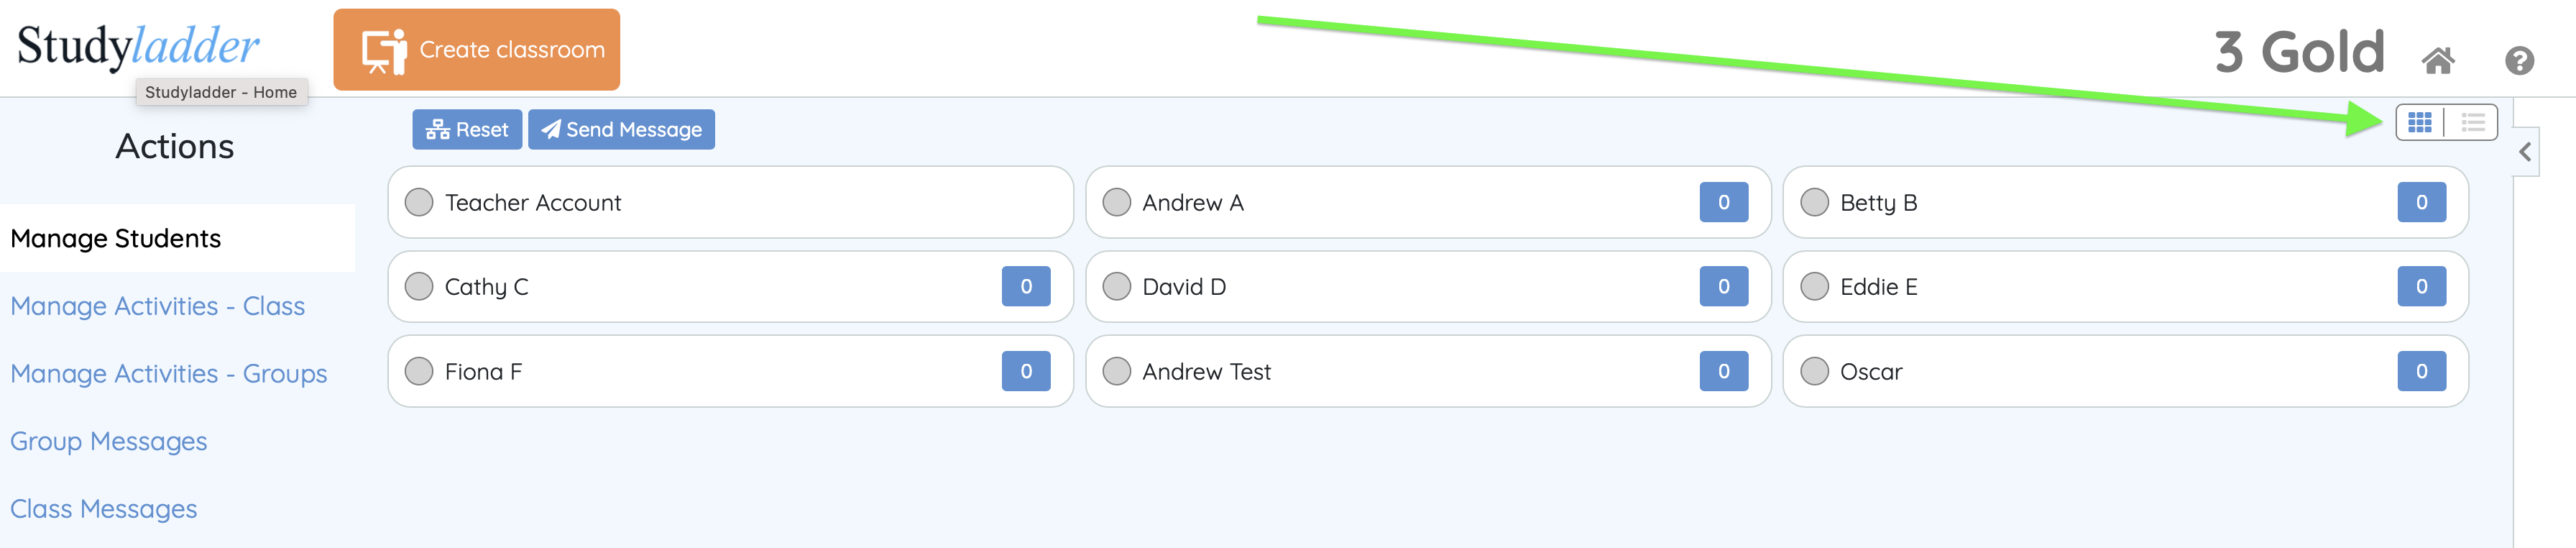
This will open the Interactive Classroom window and prompt the student to enter the class code word ("bridge" in the example).
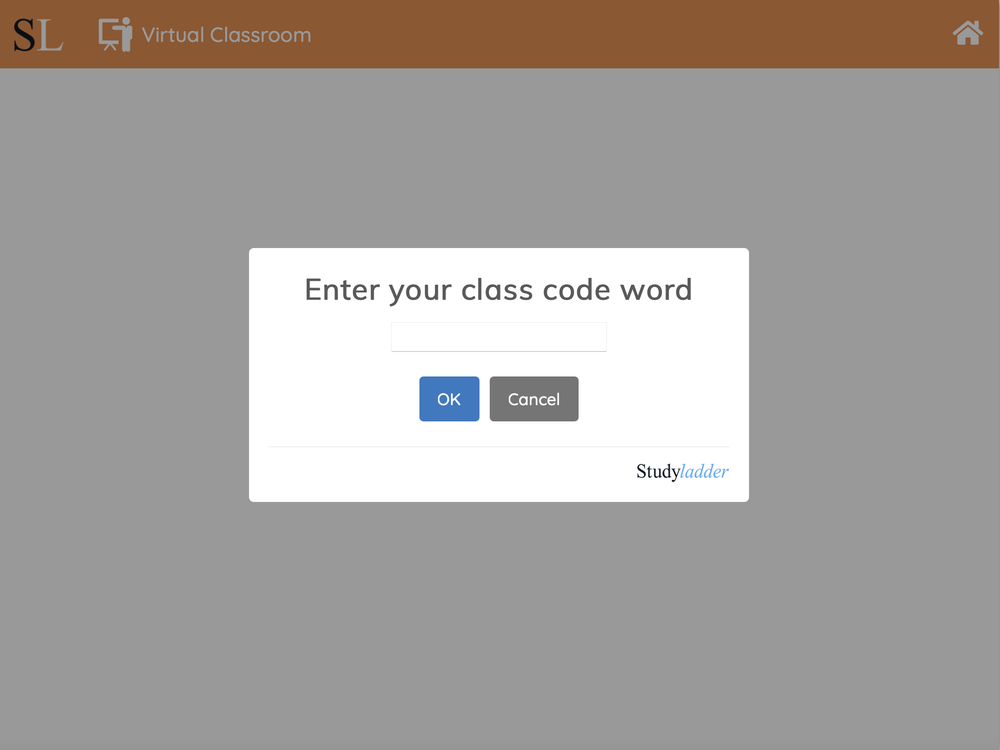
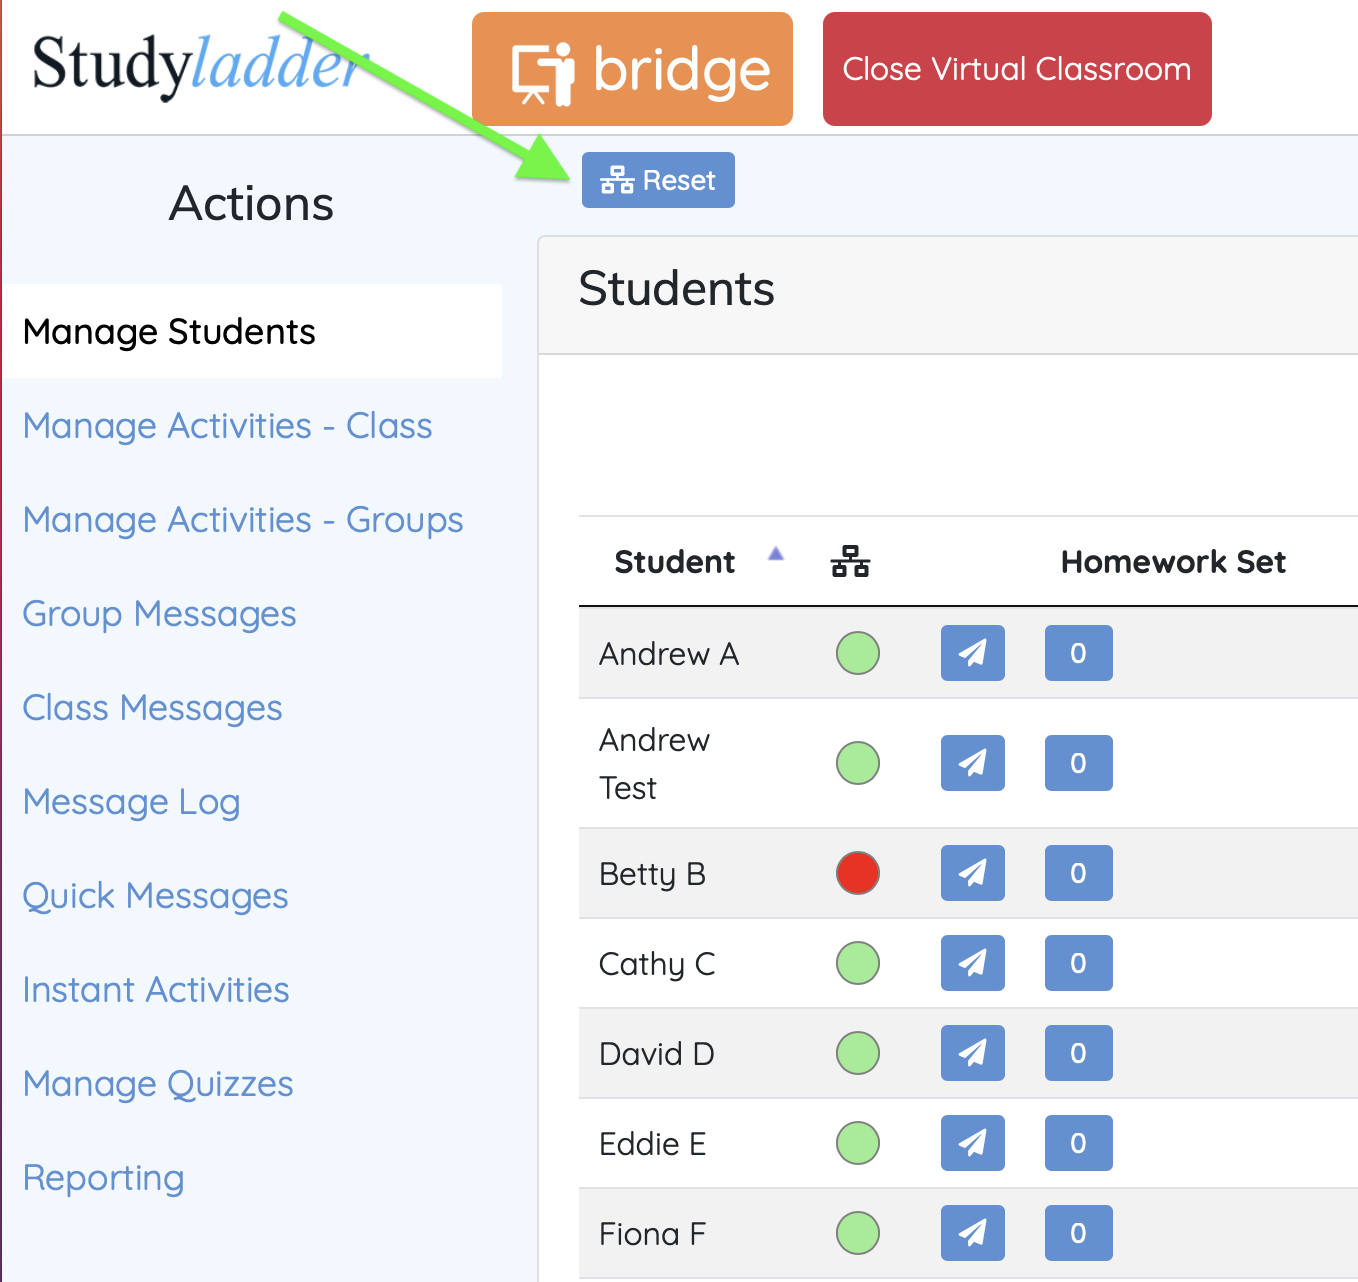
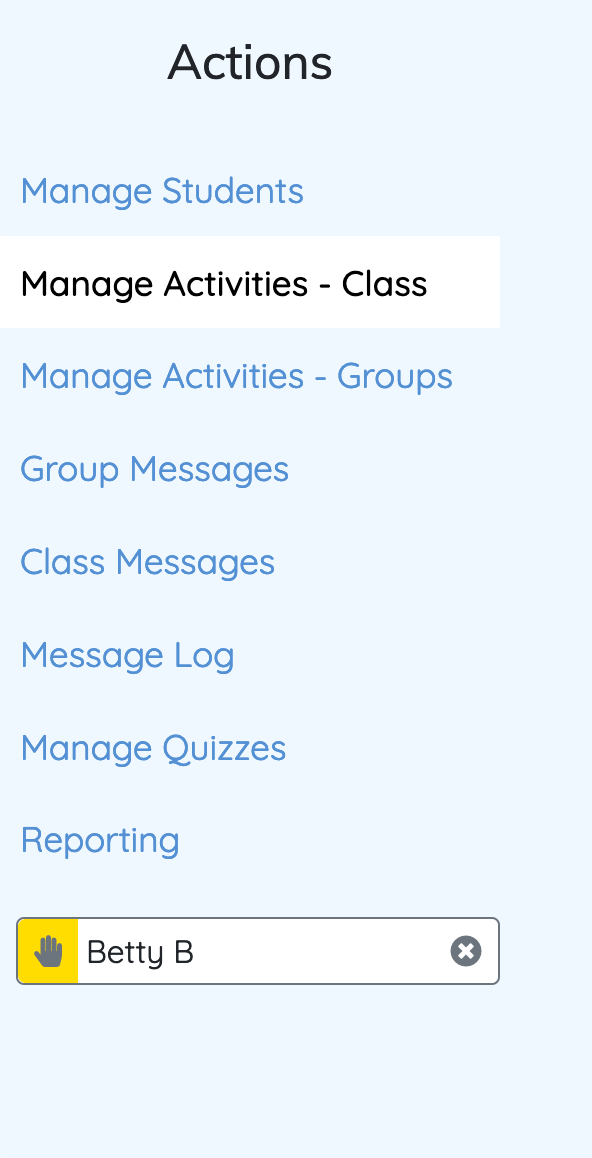
The student's device should now connect to the Interactive Classroom you have created. This is shown by the coloured indicator next to their name turning from yellow to green.
You can see this on Betty B in the example below.
Once connected, students are ready to receive activities, messages and quizzes.
Please note that HTML mode connects differently and should not require trouble-shooting. Just allow about 10 seconds for students to show as logged in after they have connected.
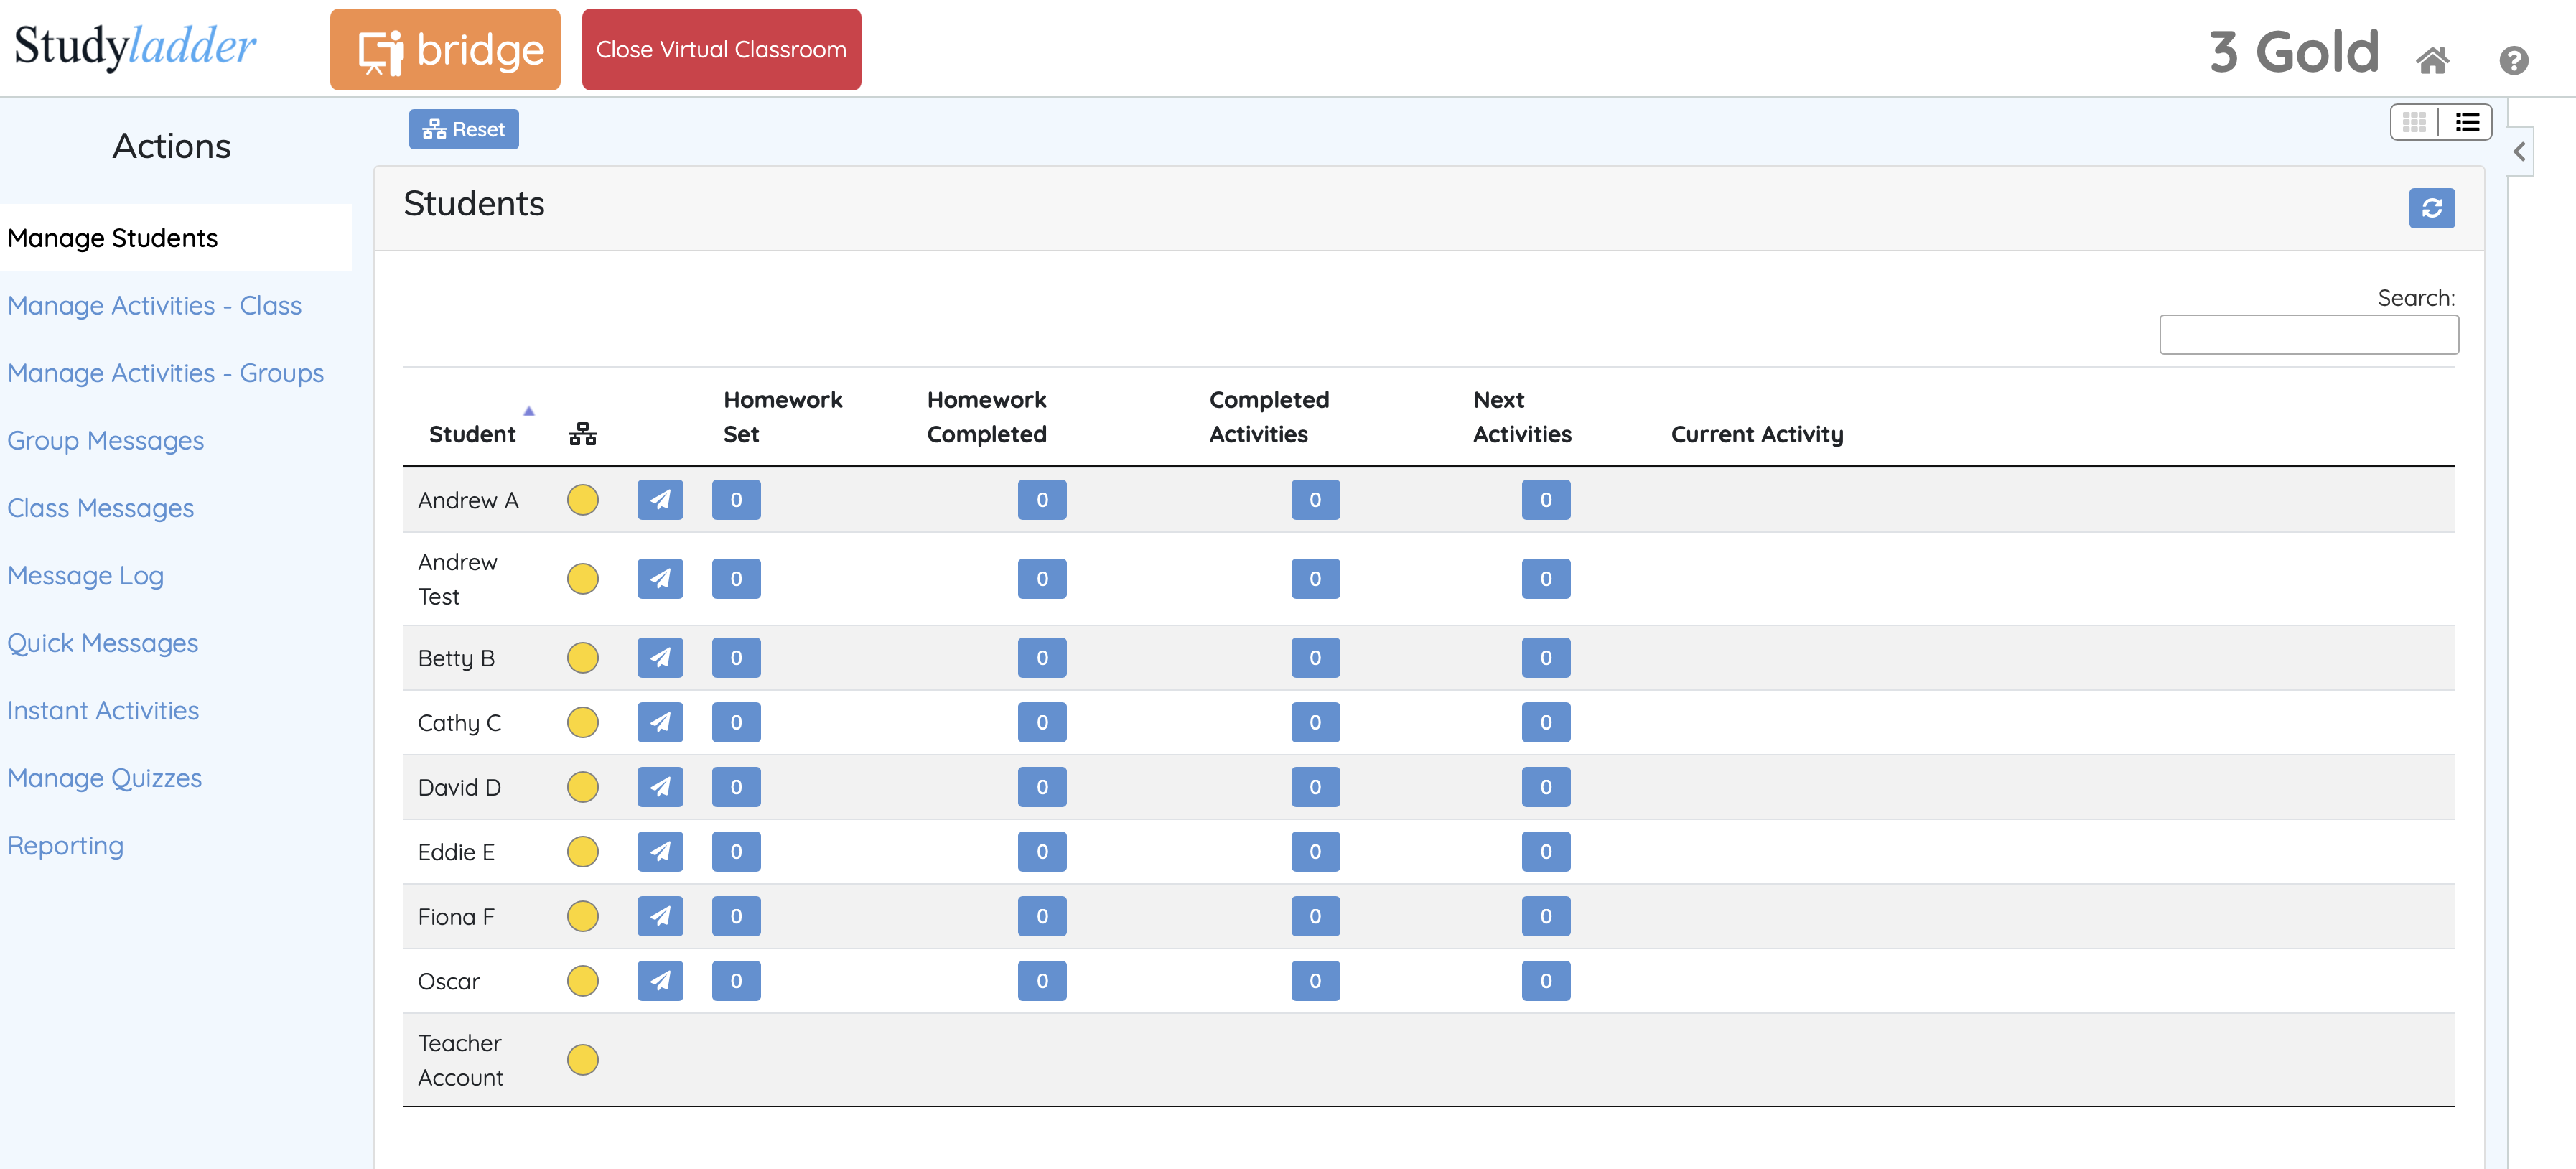
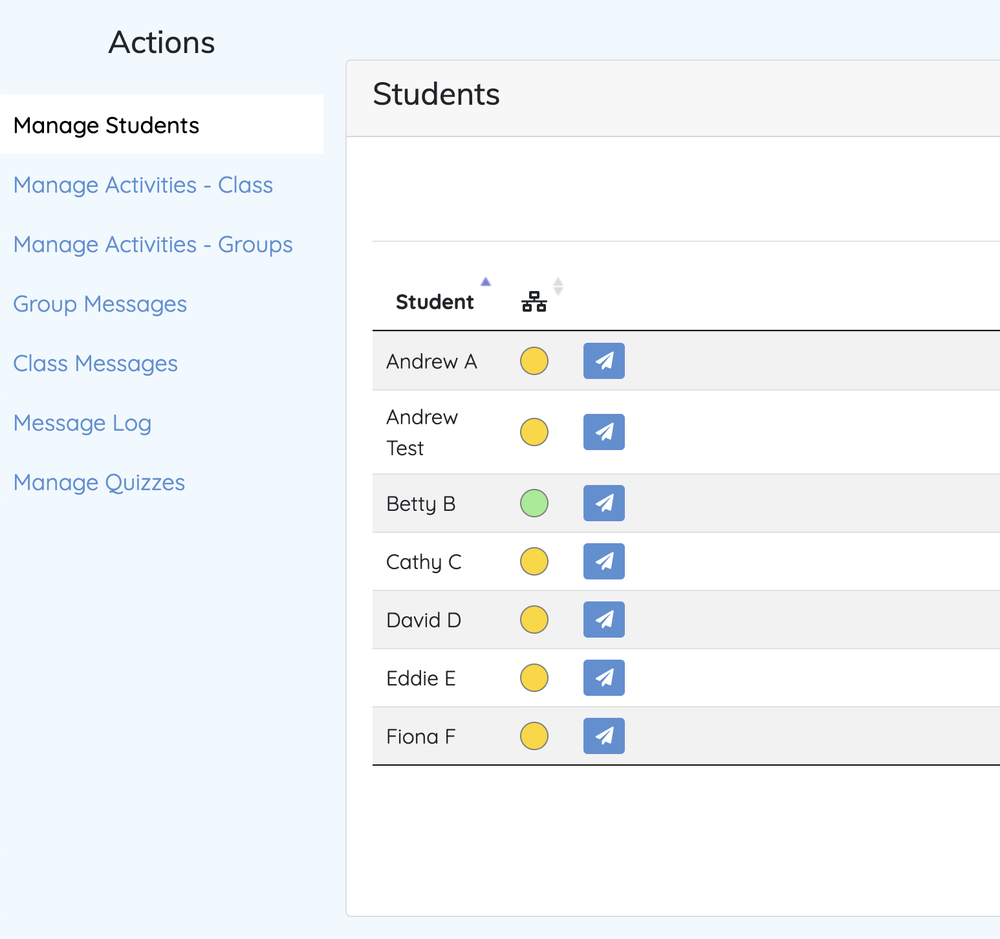
The current state of a student connection can be seen by selecting "Manages Students" from the Actions sidebar and checking the connection indicator next to their name.
The possible states for the indicator are:
| Student has an active, live connection to this Interactive Classroom session. | |
| Waiting for the student device to connect - this state will listen for the student for 2 minutes. | |
| The student is disconnected - either they have closed the Interactive Classroom page or closed the browser or powered down their device or moved out of WiFi range. | |
| You have not created an Interactive Classroom yet. You will need to click the "Create Classroom" button. This will also happen if you refresh the interactive classroom page. |
This usually happens when a student is having difficulty with their device or the login process and the connection times out (about 2 minutes)
To fix this you will need to do the following:
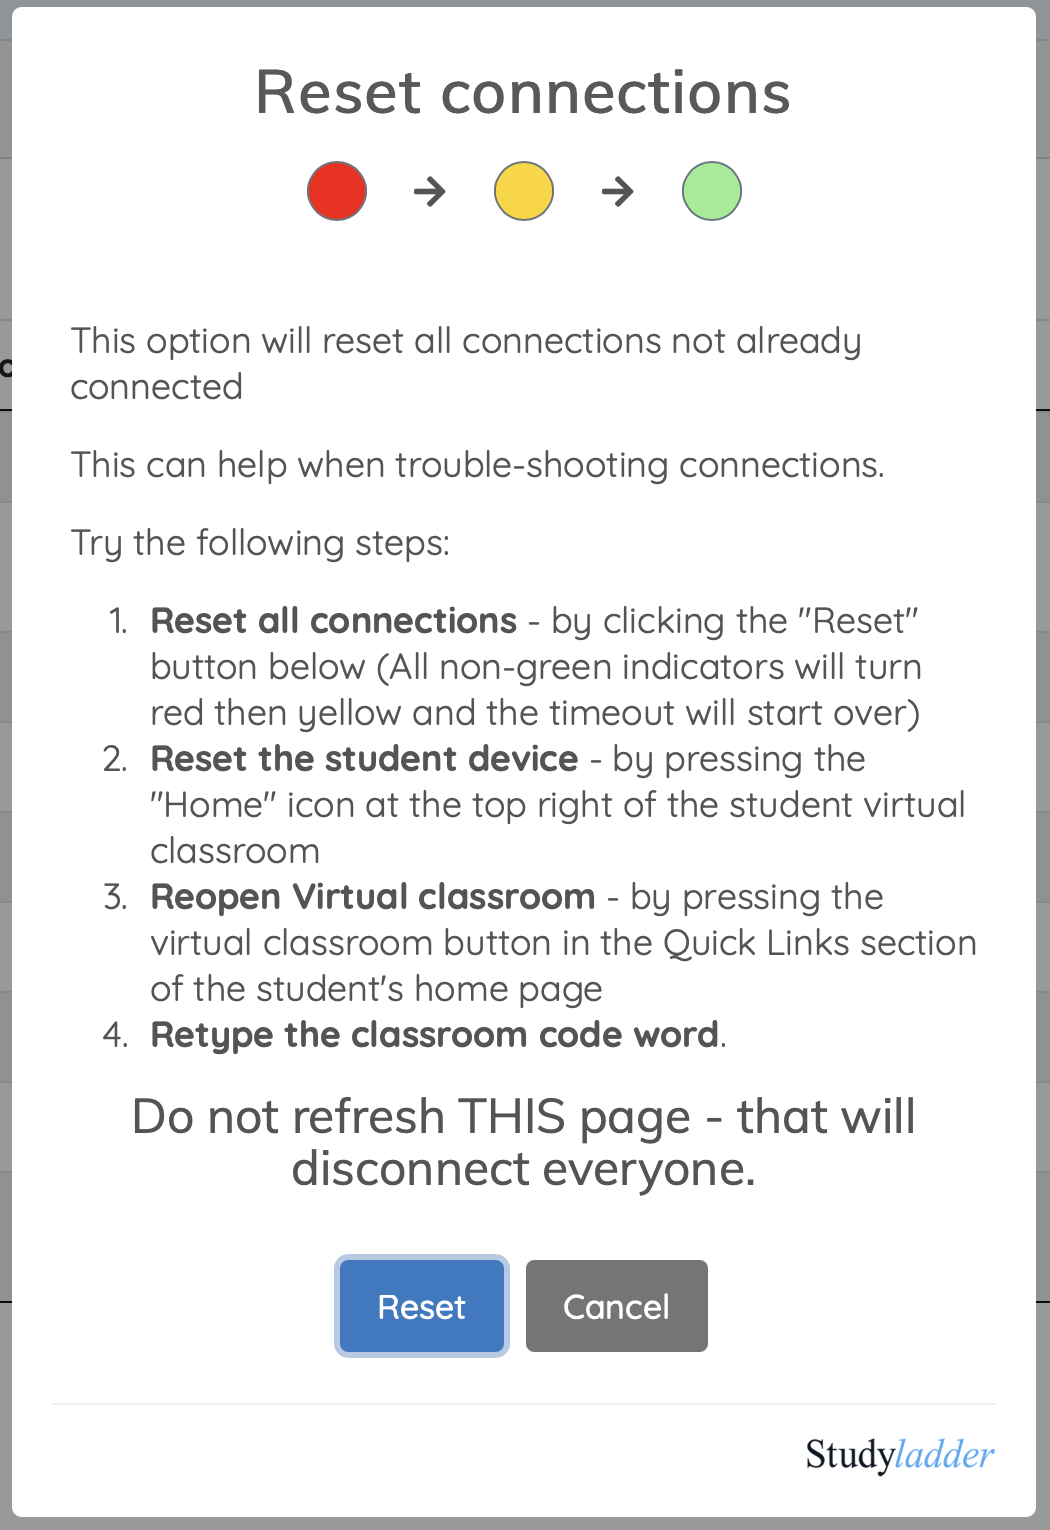
If you follow these instructions, all student connection indicators for students who have not connected yet, will turn red very briefly and then turn yellow (indicating that the student connection is ready for them to try again).
You will know this has happened if their connection indicator turns yellow again.
Normally, they can just reopen the Interactive Classroom page and re-enter the class code word.
A network glitch my very rarely cause this to happen.
Just click on the connection indicator and manually disconnect them.

Then follow the same procedure outlined above for Student connection indicator has turned red before they can connect.
One of the main uses of the Interactive Classroom is to control and monitor the use of StudyLadder activities in an interactive class session.
In order to do this, you will need to select the activities you want the students to complete and then make them "live" to push them to the students' devices.
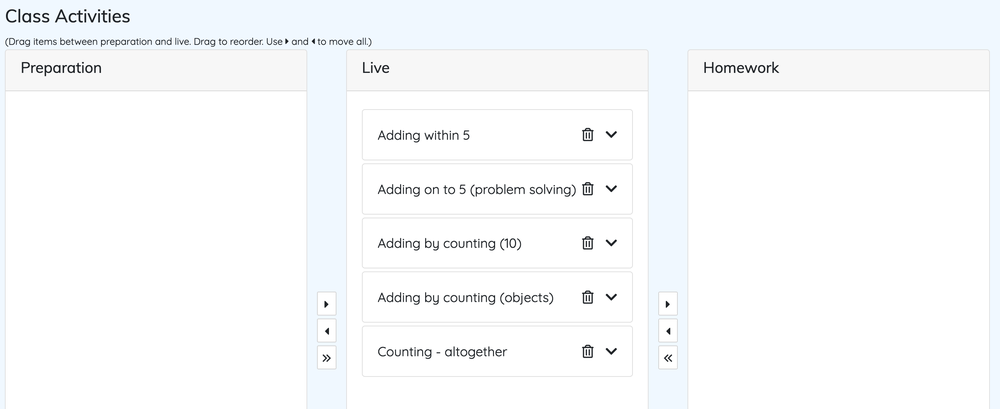
Select "Manage Activities - Class" from the Actions sidebar to open up the Class Activities panel.
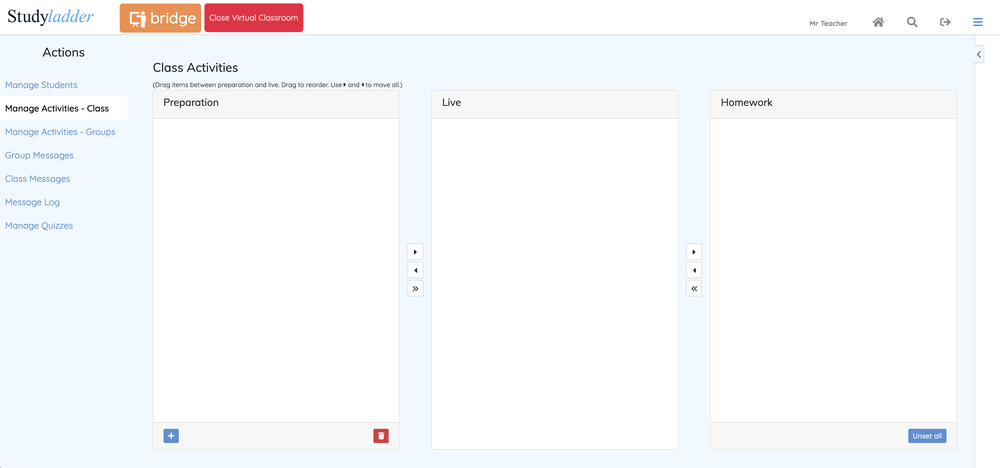
You will notice that there are 3 sections on this panel:
To add a new activity, click on the button at the bottom left of the Preparation section. This will open a window that will allow you to select resources as you normally would in StudyLadder. The only difference here is that the activities will have an button next to them that you will need to click to load the activity into the preparation section. You can select multiple items and then click Done when you are finished.
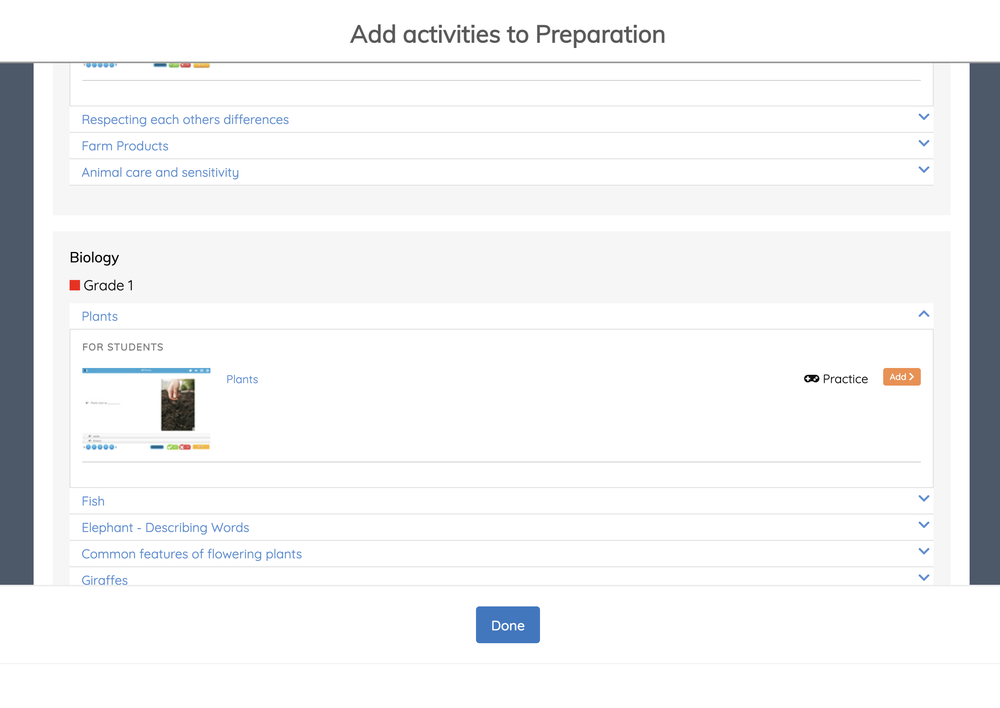
In this example, 7 activities have been selected.
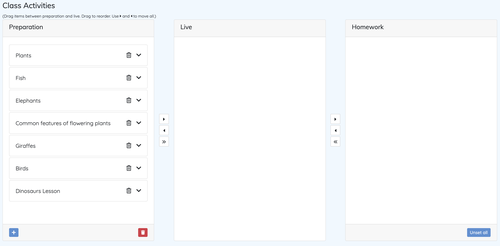
Activities can be dragged from section to section and dragged to re-order or you can use the shortcut buttons between each section to move all of the items at once.

Note:
Once you add, move or delete an activity, your changes are saved. This means that you can log in at any time from any device to load activities in advance for all of your classes and groups.
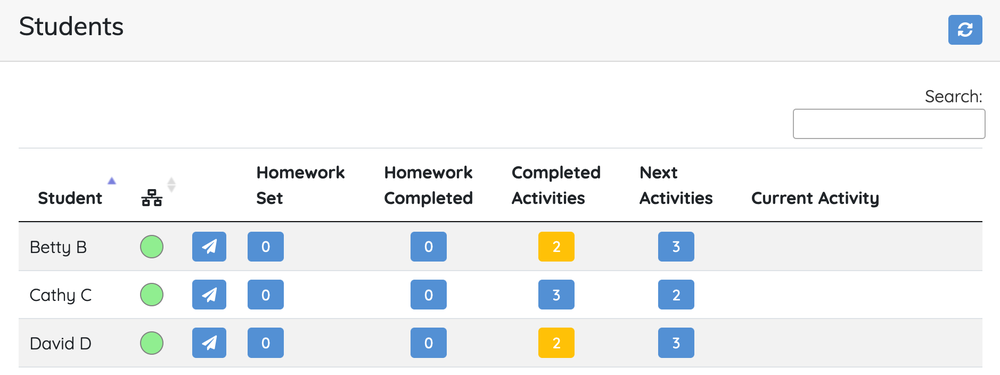
One of the strengths of the Interactive Classroom environment is the ability to monitor students' progress through the "live" activities in real time
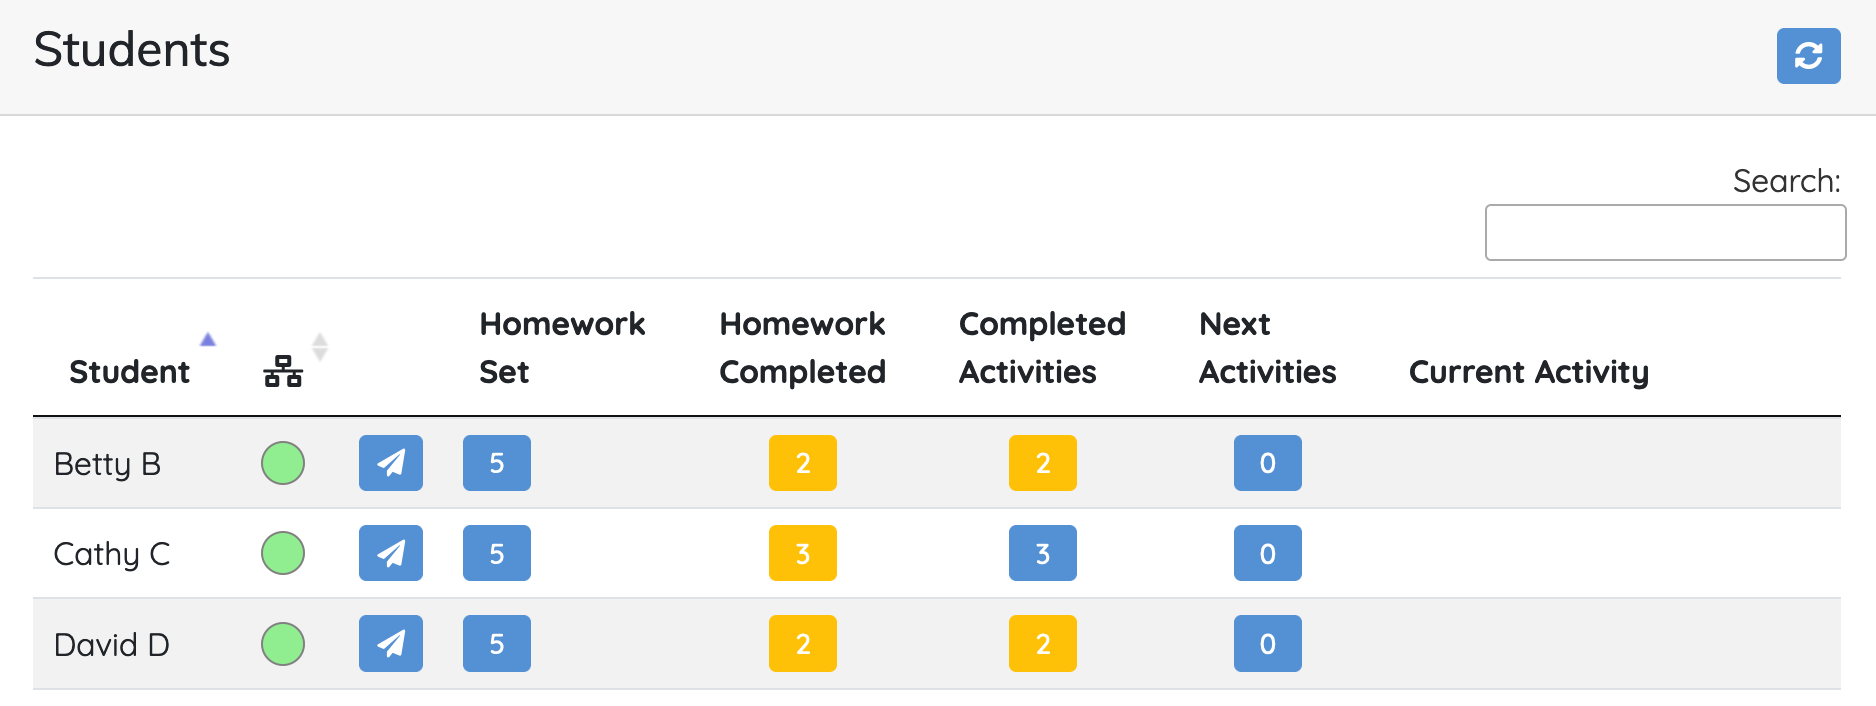
As each question is answered you will see the results on the "Manage Students" panel.
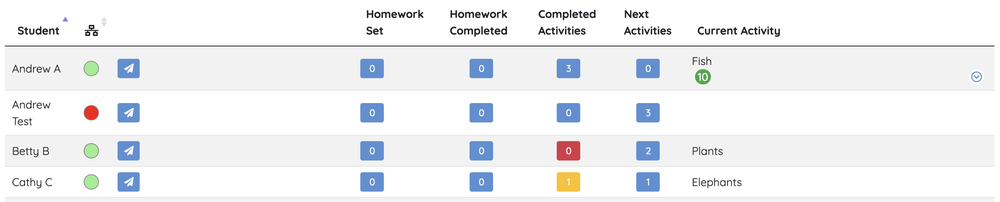
As soon as activities are pushed live, you will see the number of activities queued for each student in the "Next Activities" column.

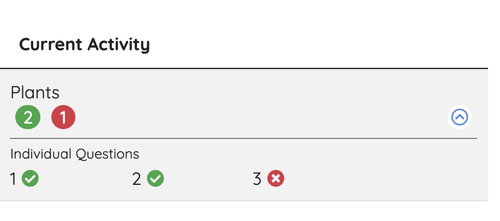
Once the student starts answering questions in the activity, the results will show in real-time in the "Current Activity" column - and the "Next Activities" count will decrease.

Expanding the "Current Activity" will show the results for individual questions. You will be able to see if a particular question or concept is causing an issue for a student / students.
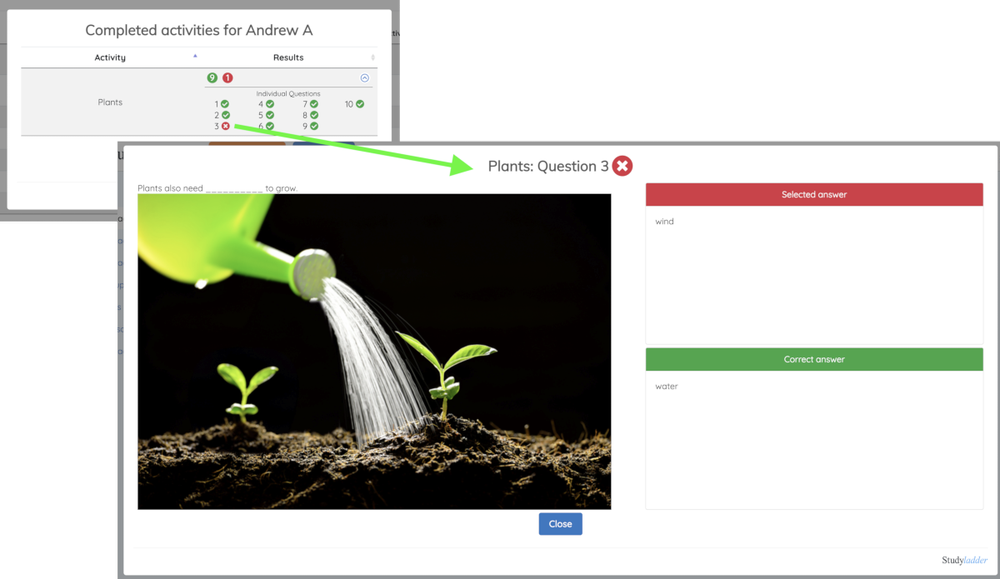
When an activity has been completed, the "Completed Activities" column will update to show the number of completed activities. Clicking on the number button in "Completed Activities" will show details for that activity.

With completed activities, it is possible to drill down further and view the question by expanding results and clicking the individual question number result icon ( or ).
The "Completed Activities" column also indicates relative progress. The column entry for a student will turn yellow when they are behind by one complete activity and red when they are behind by more than one complete activity. Allowing you to see at a glance how well students are keeping up.
In your normal classroom setup, you are able to create groups within each class. Interactive Classroom allows you to make use of these groups to assign activities and homework that are only visible for the group.
So, for instance, if you were using Interactive Classroom for reading groups, you could assign different readers to different groups.
Using your existing class groups - or adding new ones - opens up a range of creative possibilities for designing your Interactive Classroom sessions.
As with class activities, it is possible to assign activities to groups ahead of time as all additions, changes and deletions to the sections on the group panel are saved automatically.
Setting group activities uses the same methods as setting class activities.
Use the tabs across the top of the panel to select the group and then the button to add new activities, or the button to copy activities from the Class preparation section or from another group.
Move the activities to the live and homework section as required.
Use the Show Members button to see a list of students in the selected group.

Real-time monitoring works the same way as it does for normal class activities (see Real-time Monitoring above), with some additional features. These are best illustrated by example.
The following groups and activities have been set up:
Reading Group A

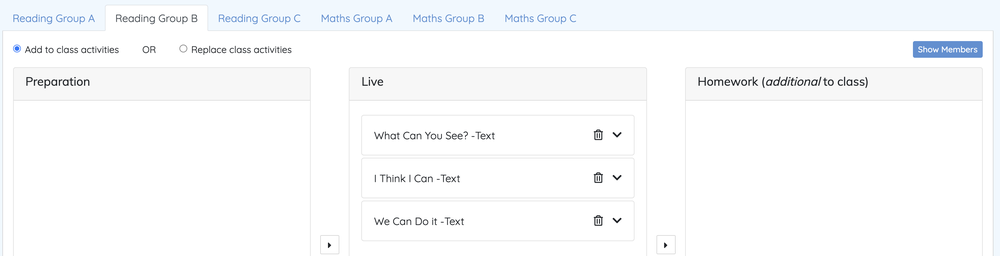
Reading Group B
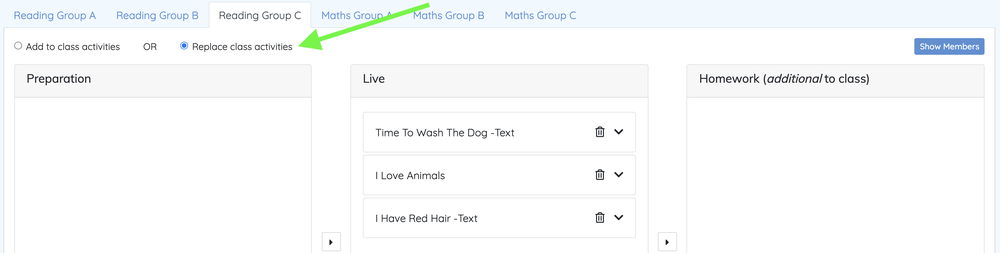
Reading Group C

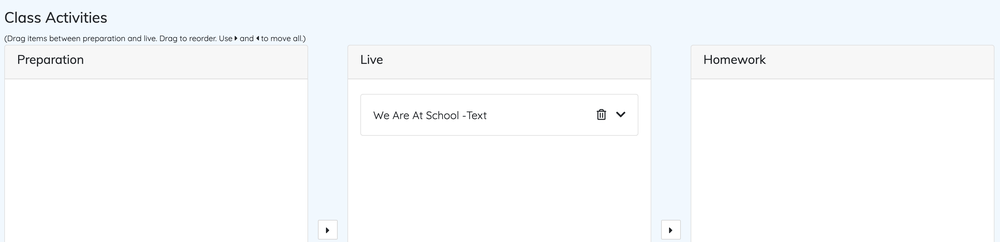
Class Activities
Reading Group A is Andrew A and Betty B.
Reading Group B is Cathy C and David D.
Reading Group C is Eddie E and Fiona F.
Andrew T is not in a group.
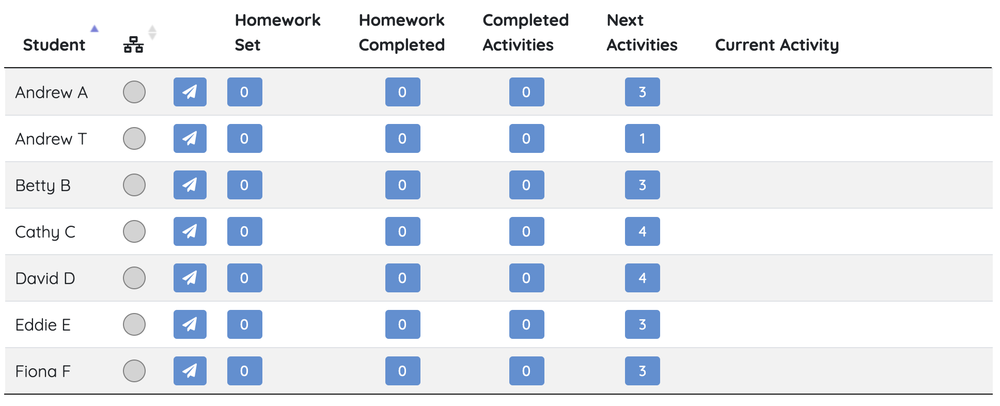
Now or Students panel looks like this:
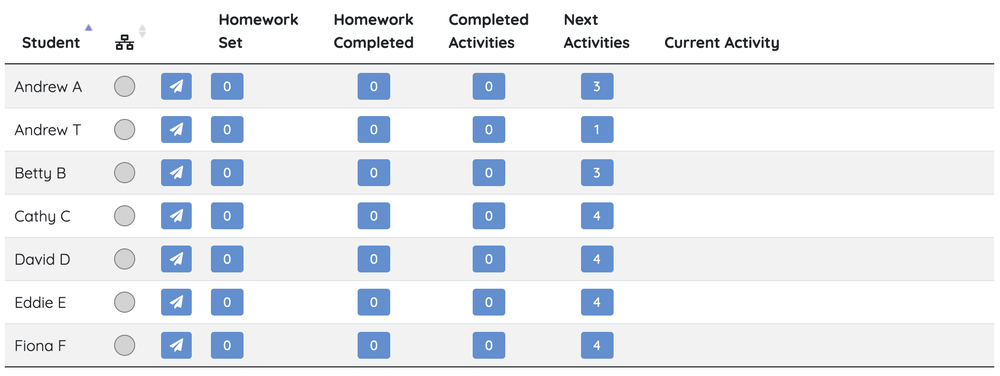
Students have different numbers of activities assigned depending on the group they belong to - Andrew T only has 1 activity as he is not in a group and the class only has 1 activity assigned.
Now lets say we don't want the students in Reading Group C to do the activity set for the class. We can change the setting at the top of the group activity panel for group C to "Replace class activities". This will remove the class activities from the queue for this group.
Now or Students panel looks like this:
Eddie E and Fiona F are now only showing the 3 activities assigned to Reading Group C, not 4 activities as before.
Interactive Classroom allows you to send instant messages to a students who are currently connected to an Interactive Classroom live session.
Messages can be sent to individuals, groups or the entire class.
Students cannot send messages to each other or to the teacher. It is a one-way message system.
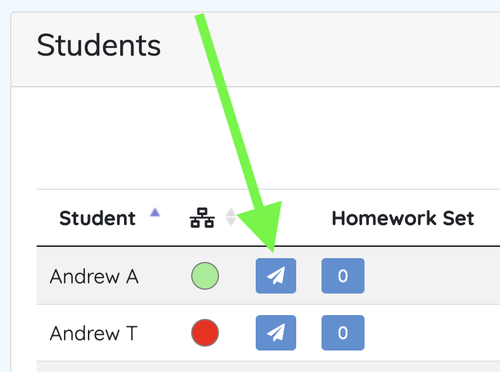
Click any button to send a message. This will open the message editor.
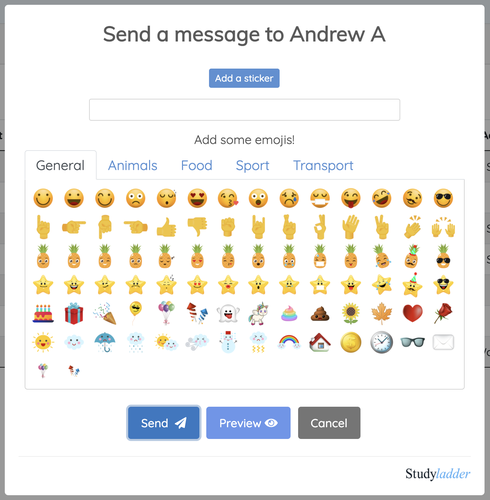
The Add a sticker button will allow you to add any emoji image as a large image at the top of the instant message.
The message itself is typed into the text field below this button. The text field allows for multi-line messages, just press the ENTER key.
Click on emojis to add them into the text of the message.
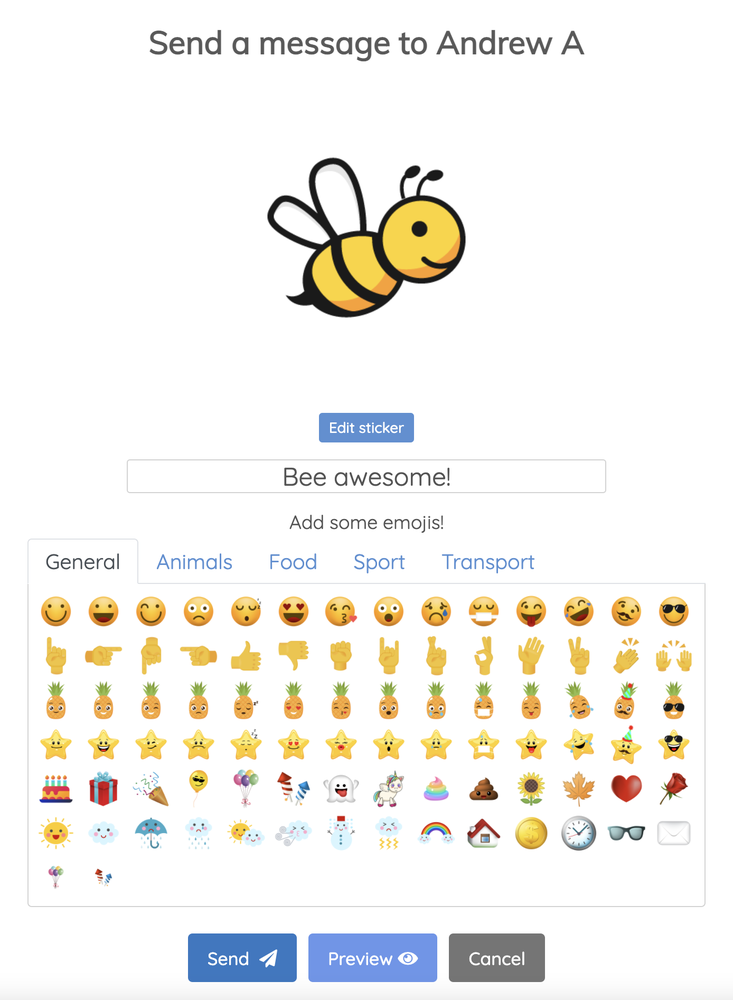
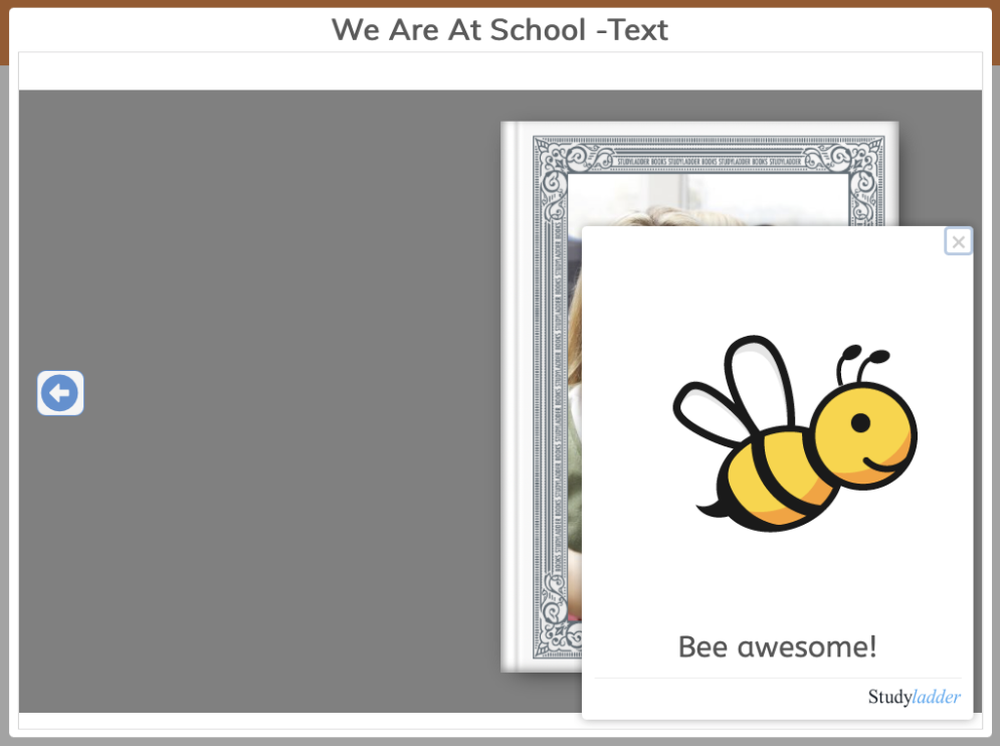
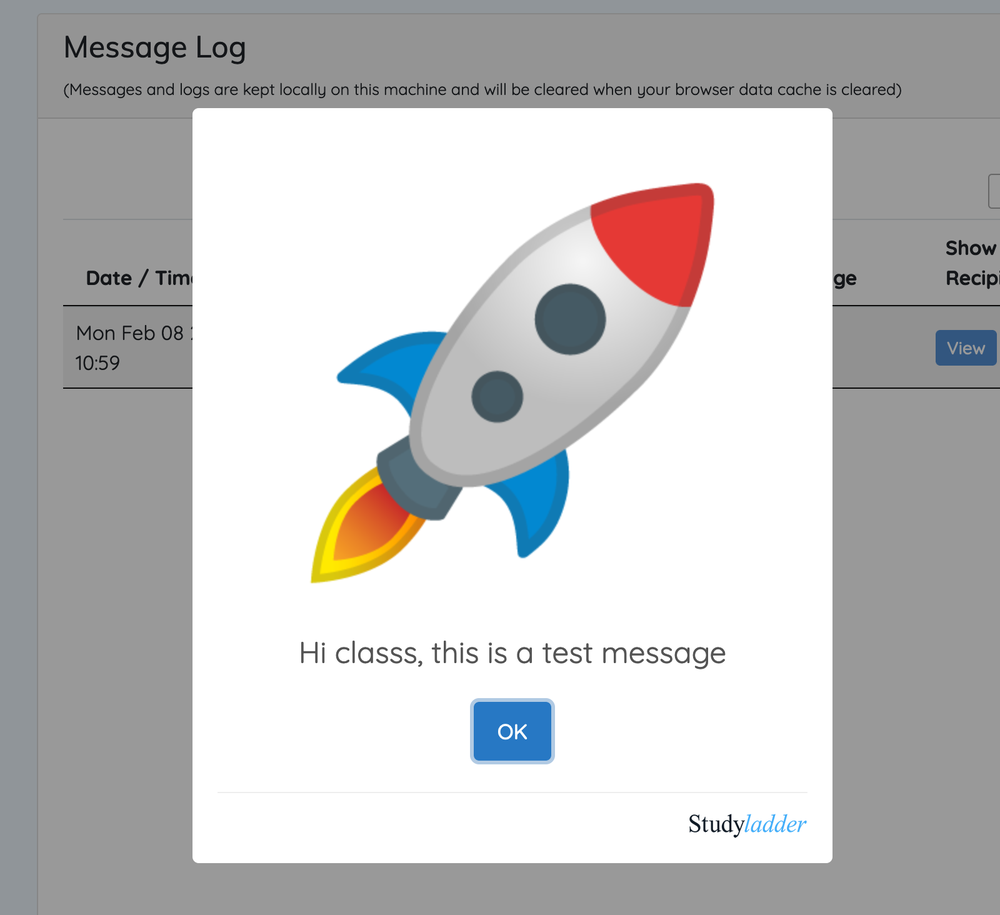
Hear is an example of a simple message with a sticker.
And the result on the students' devices.
The Preview button allows you to preview a message before sending.
You can send messages to:
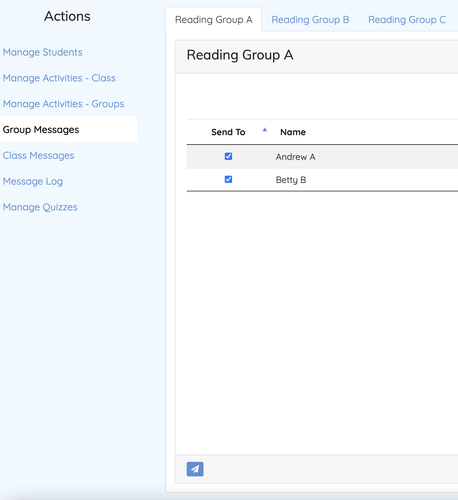
Groups - Select "Group Messages" from the Actions sidebar and then select the tab for the group you want to send a message to.
You can select / deselect recipients using the checkboxes in the "Send To" column.
To send a message, click the button in the bottom-left corner of the panel.
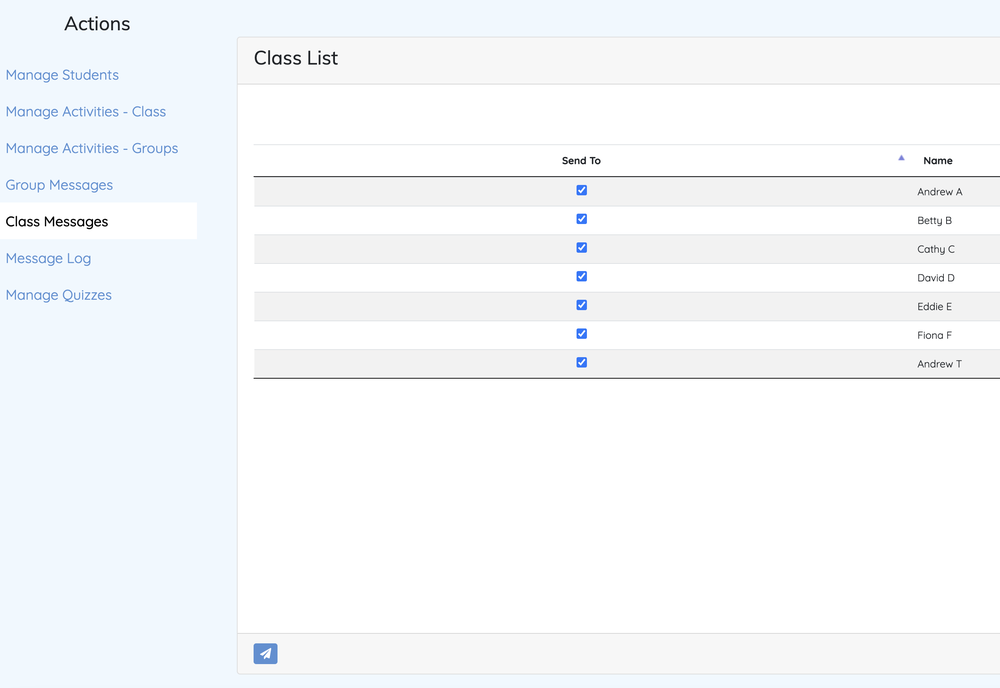
Entire Class - Select "Class Messages" from the Actions sidebar.
You can select / deselect recipients using the checkboxes in the "Send To" column.
To send a message, click the button in the bottom-left corner of the panel.
Note:
Messages are ONLY logged locally on the PC / Device used to send them. They are kept in the web browser's local storage and will be cleared whenever the web browser's cache is cleared.
Using the message log, it is possible to view messages you have sent, check the reipients and / or resend them.
Below is a sample log enrty for a class message:
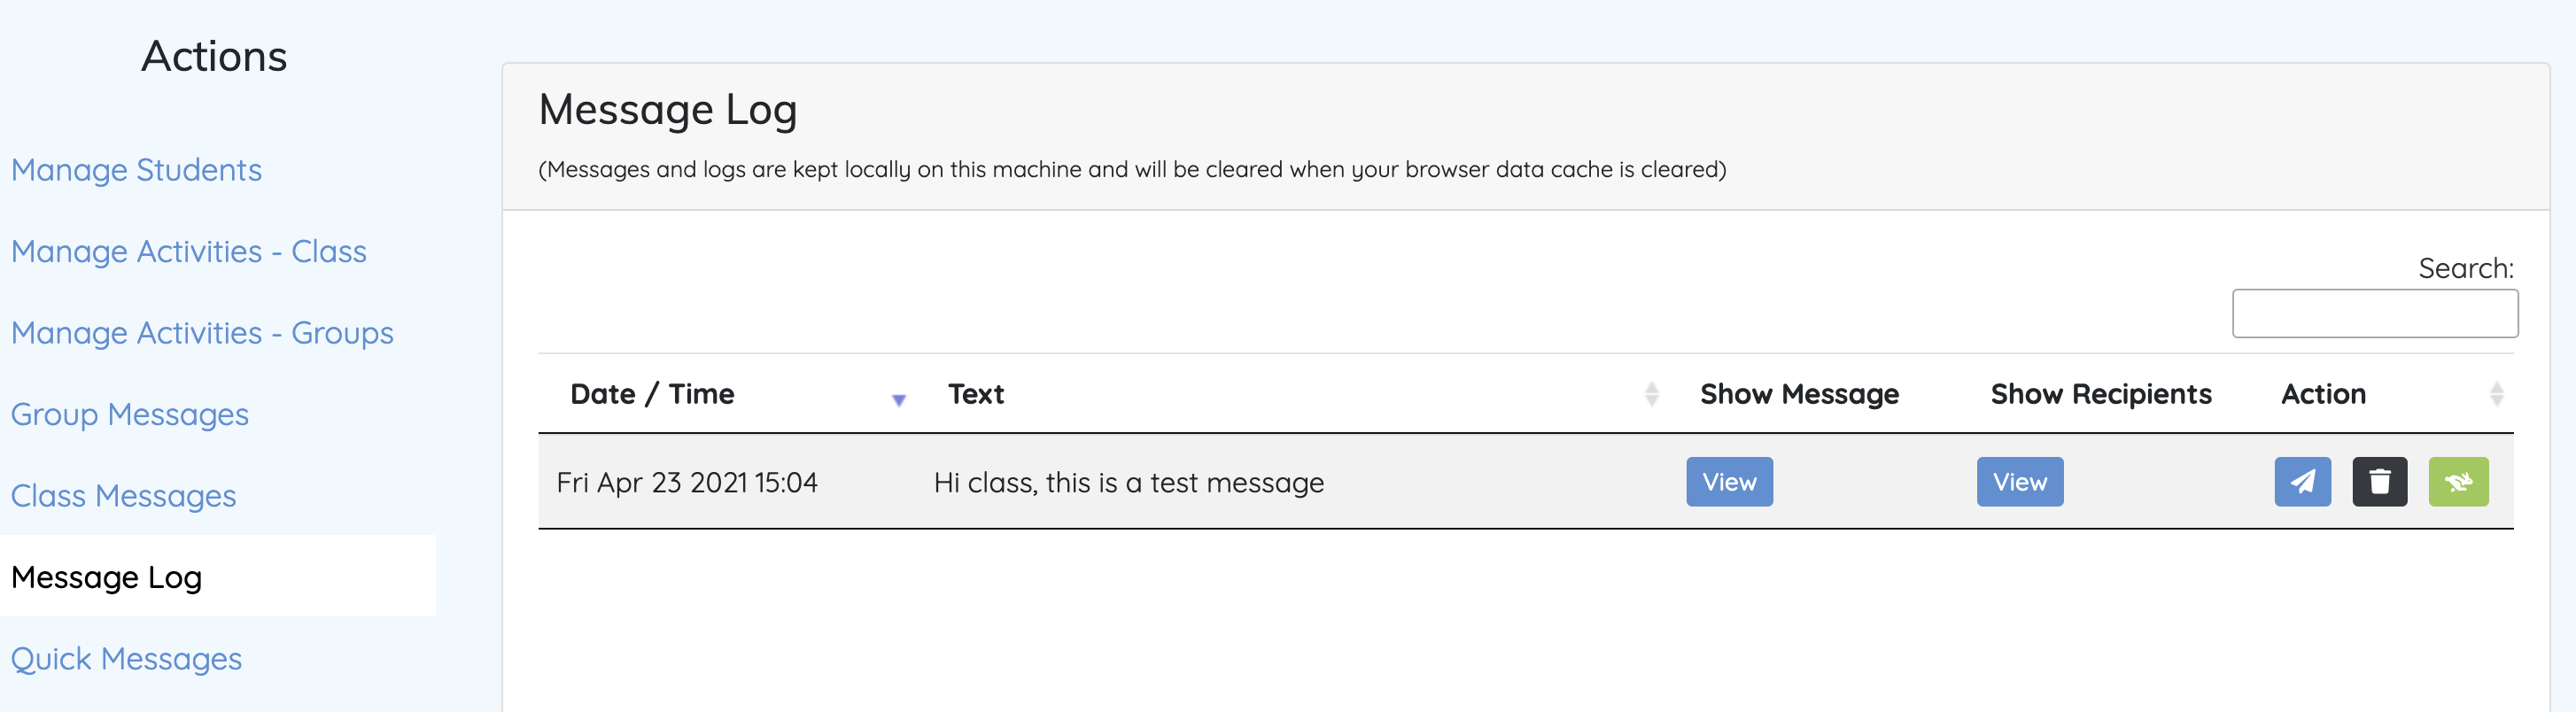
Clicking the View button in the "Show Message" column will show you the message as students would have received it.
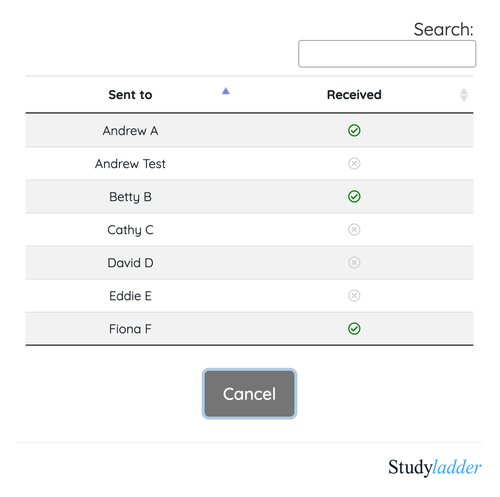
Clicking the View button in the "Show Recipients" column will show you the list of students the message was sent to and which students received it. As this is an instant messaging system, only students connected to the Interactive Classroom at the time will receive the message. In this example, only 3 students were connected. You can quickly see which students received the message.
In the "Action" column, click the button to resend the message, the button to remove it from the log, or the button to add it as a Quick Message (see next section).
This panel allows you to create pre-defined messages that you can quickly send without having to type and choose images. This is particularly useful if you are on a tablet or similar device without a physical keyboard.
To get started, click the "Quick Messages" link in the Actions sidebar and then click the Add New Message button.
You can also click the button in the Message Log to use a previously sent message.
The Quick message editor is almost identical to the normal message editor, with an additional field at the top for the message name.
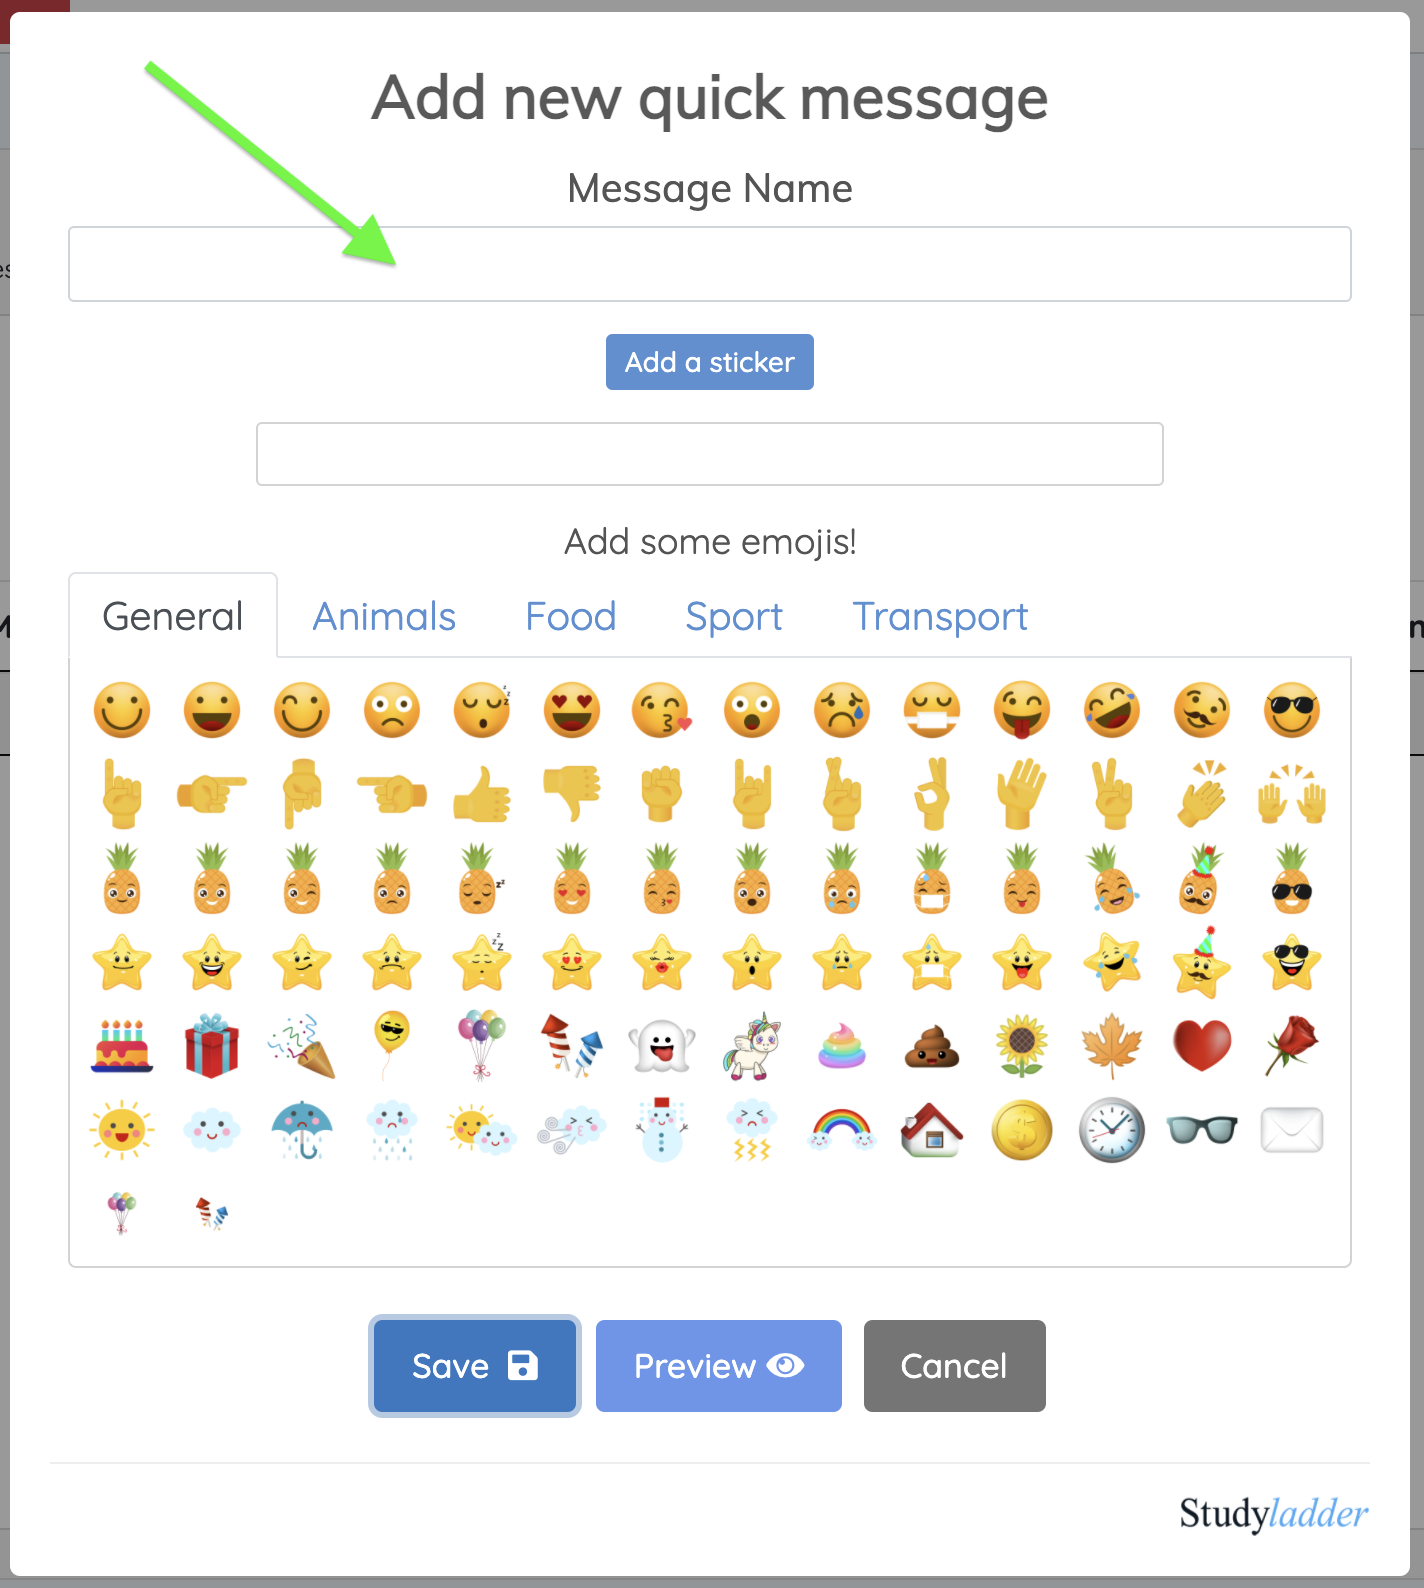
Give the message a short name (1 or 2 words is best) that will appear in the selection box when you send a message.
Then just fill it out the same as a normal message - choosing a sticker, adding text and emojis.
Once you have finished, you can preview it. When you are happy with it, click the Save button.
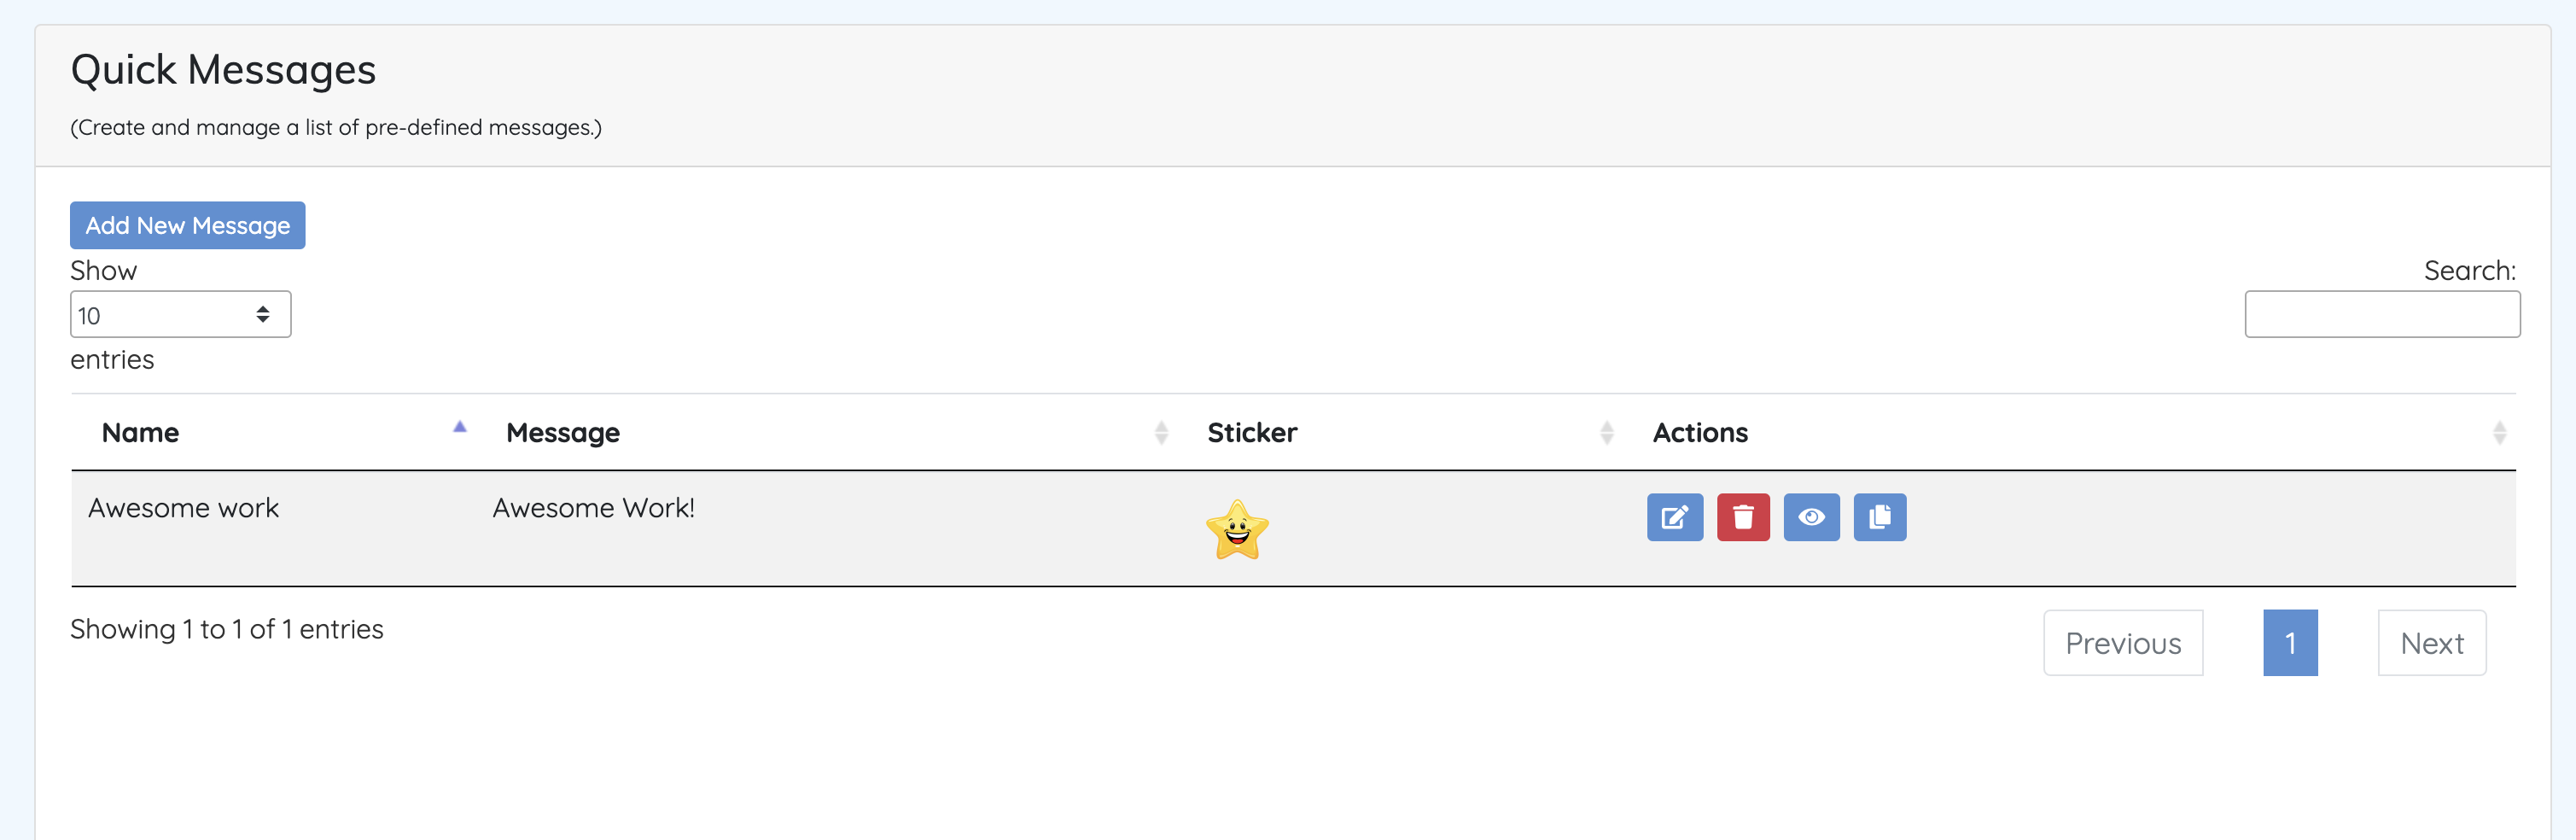
You can now manage your messages using the Actions buttons:
Your new Quick Message will appear in the list of available messages next time you sent a message.

Interactive Classroom uses existing StudyLadder functionality to create set tasks for class homework and group homework by adding dynamic pods called "Class Homework" and "Group Homework".
This means that students will see their assigned homework tasks in the "Lessons" area of their homepage under "My Individual Program", just like they would for any assigned tasks.

When homework is added to the "Homework" section of Class Activities or Group Activities, it will automatically be added to the set tasks (pods) items for Class Homework and Group Homework.
This has several consequences:
Note:
Homework activities are visible to students as soon as you drag them into the homework column (even if no Interactive Classroom session is active).
This means that you can set homework at any time - even if you are not planning to use the Interactive Classroom in class.
This is an example of how StudyLadder can be used for a teaching session and then for setting homework from the same activities
First, we will push some pre-loaded activities into the live section so that connected students will be able to start completing them.
At the end of our session, Cathy C has completed 3 activities and both David D and Betty B have completed 2.
Now, we move ALL of the activities into the Homework section.
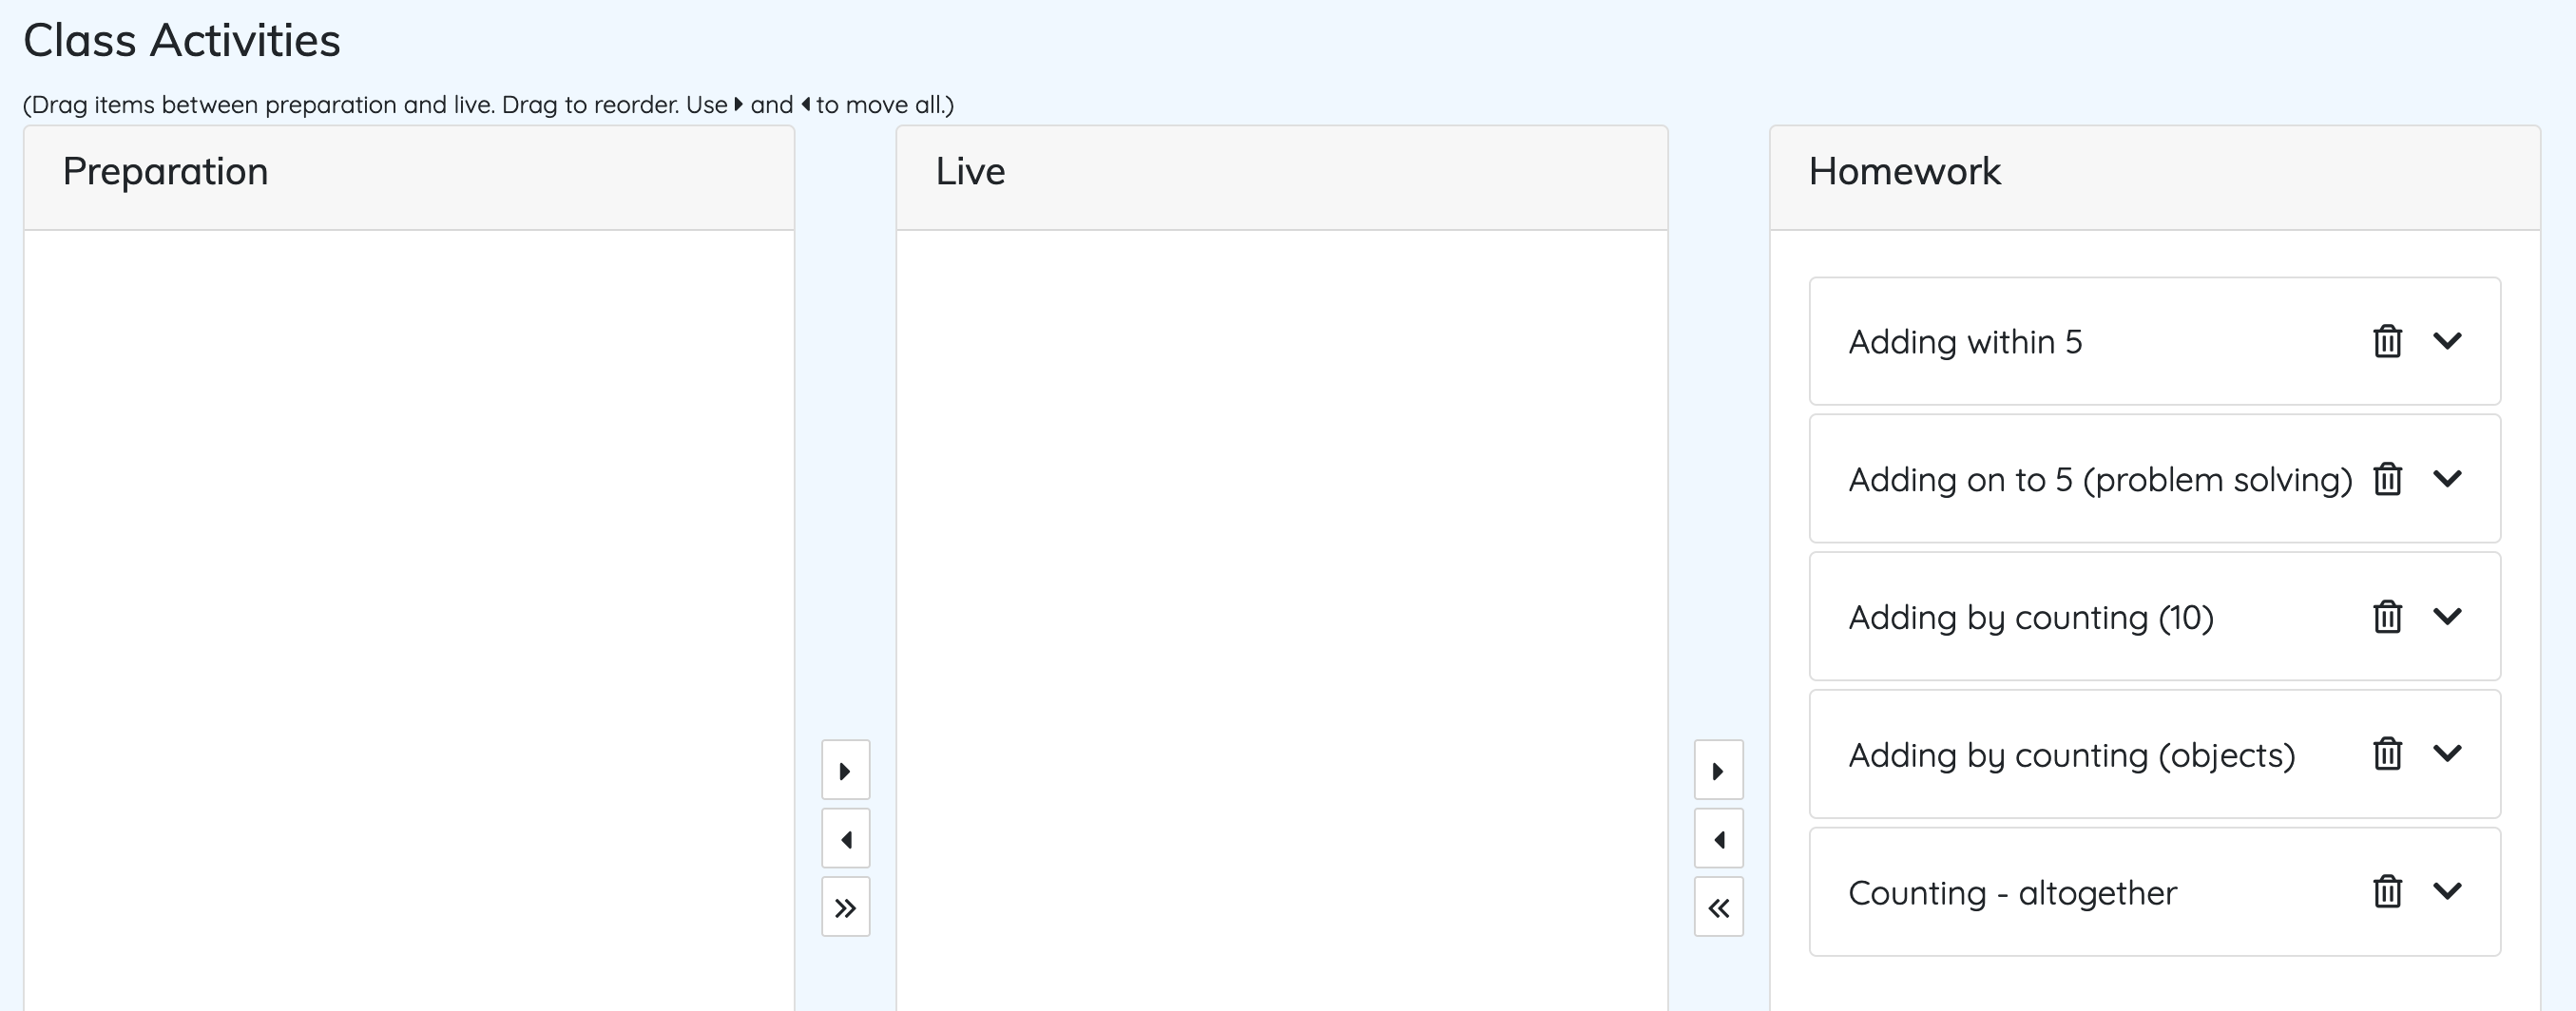
The totals in "Homework Set" and "Homework Complete" have now been updated, and are reflected in the individual set tasks for each student.
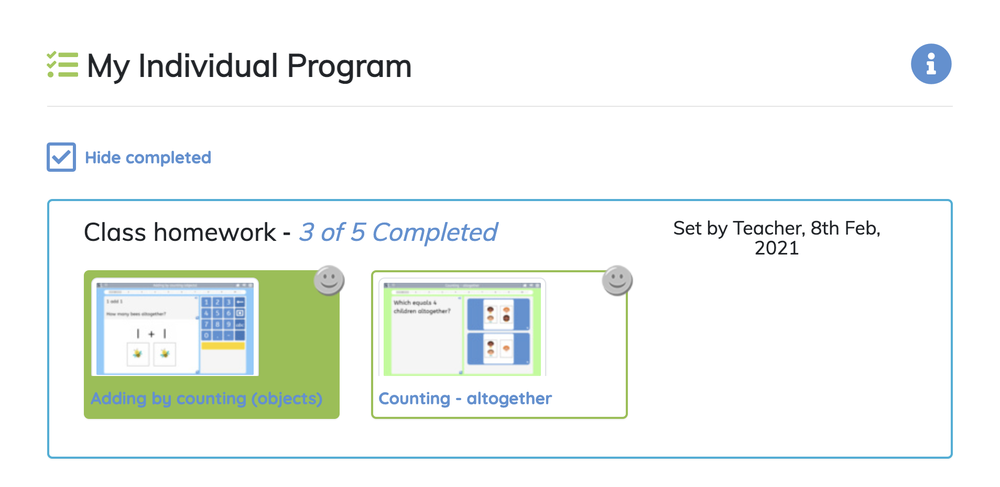
Cathy C has completed 3 activities during the lesson, so her set tasks look like this:
David D has completed 2 activities during the lesson, so his set tasks look like this:
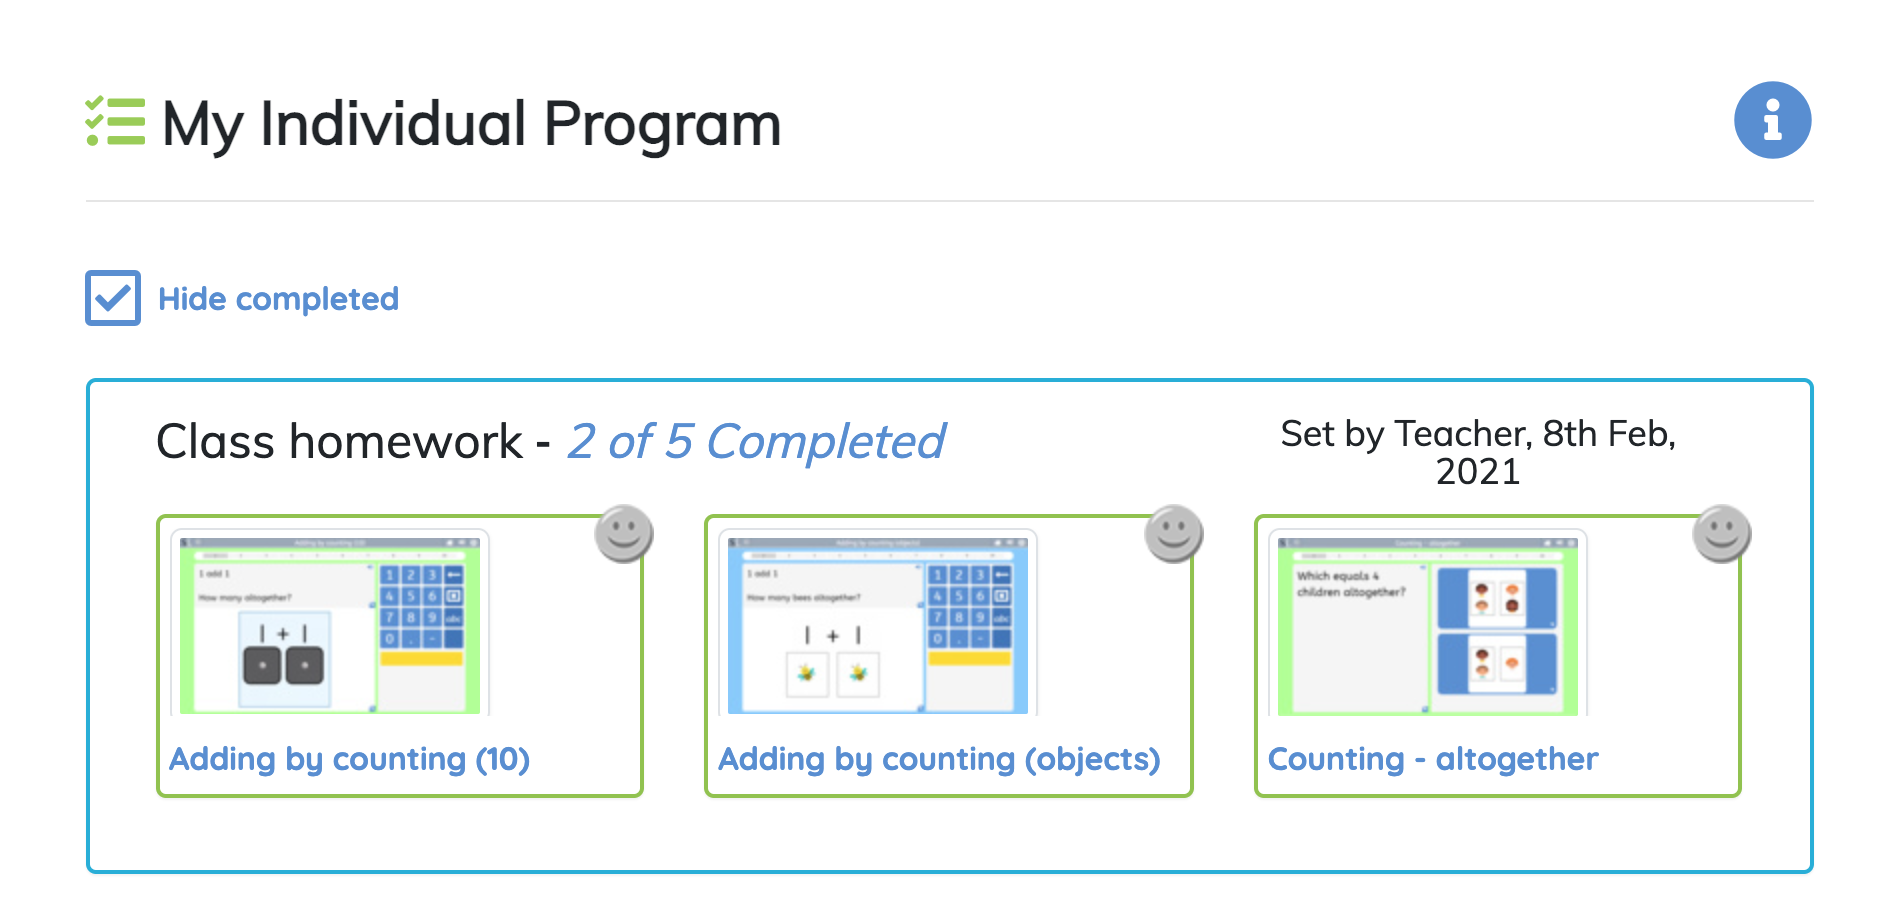
As Interactive Classroom uses the Set Tasks component of StudyLadder to set homework, it also inherits the standard functionality of Set Tasks. For example, although Betty B also completed 2 tasks, her homework will show 4 tasks to be done as she scored less than 7/10 for "Adding on to 5 (problem solving)".
Set Tasks only counts activities as complete when the score is greater than 6 / 10

The main difference between group live activities and group homework is that group homework always adds to class homework. This is because the system creates a separate homework "pod" for each class and group. As students in a group will also be a member of the class, they will receive both group and class homework.
If a student is in multiple groups, they will receive homework from each group, as well as class homework.
Note:
If you put the same homework activity in both class and group homewrok sections, it will appear multiple times in a student's Individual Program, BUT it will dissapear from all group and class homework as soon as it is completed the first time (regardless of which group / class they select it from).
Students can signal the teacher through the Interactive Classroom interface by clicking on the "Raise your hand" button.
This can be found in the upper-right corner of the student's screen (next to the home icon), and on the upper-right corner of the current activity window.


Once a student clicks on the "Raise Hand" button, you will see a notification flash up at the top-right of your screen for 3 seconds...
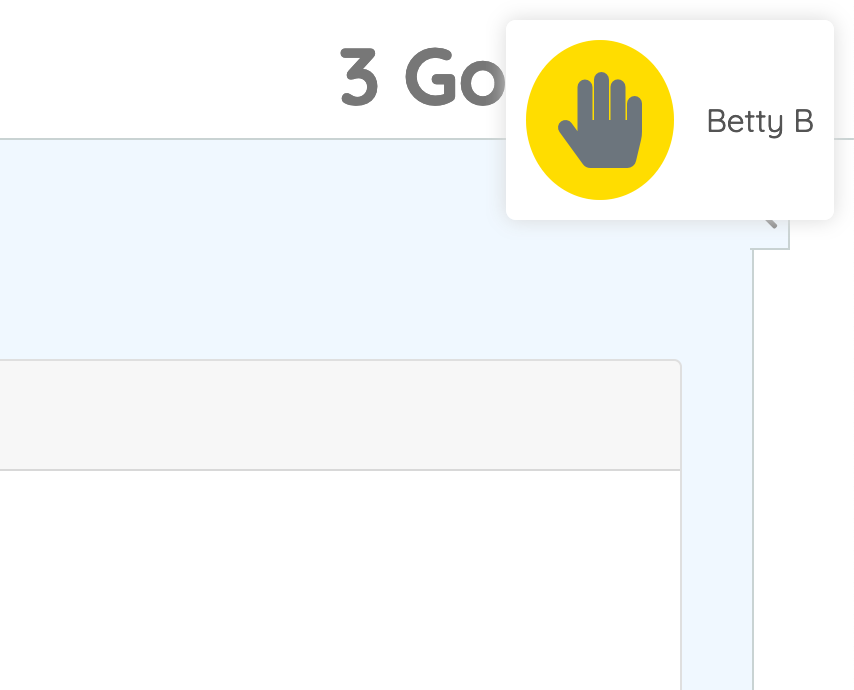
... and a fixed notification will appear at the bottom of the "Actions" sidebar.
On the student device, the hand icon will change from white to yellow.
Students can "lower" their hand by clicking the icon again. It will change from yellow to white to show it is no longer raised. The notification in the "Action" sidebar will also disappear.
You can dismiss the notification in the "Action" sidebar by clicking the button next to the student's name. This will also reset the hand icon on the student device back to white.
You could use this feature for any game where hand raising is involved. No more guessing who was first!
The names appear in the order the button was pushed.
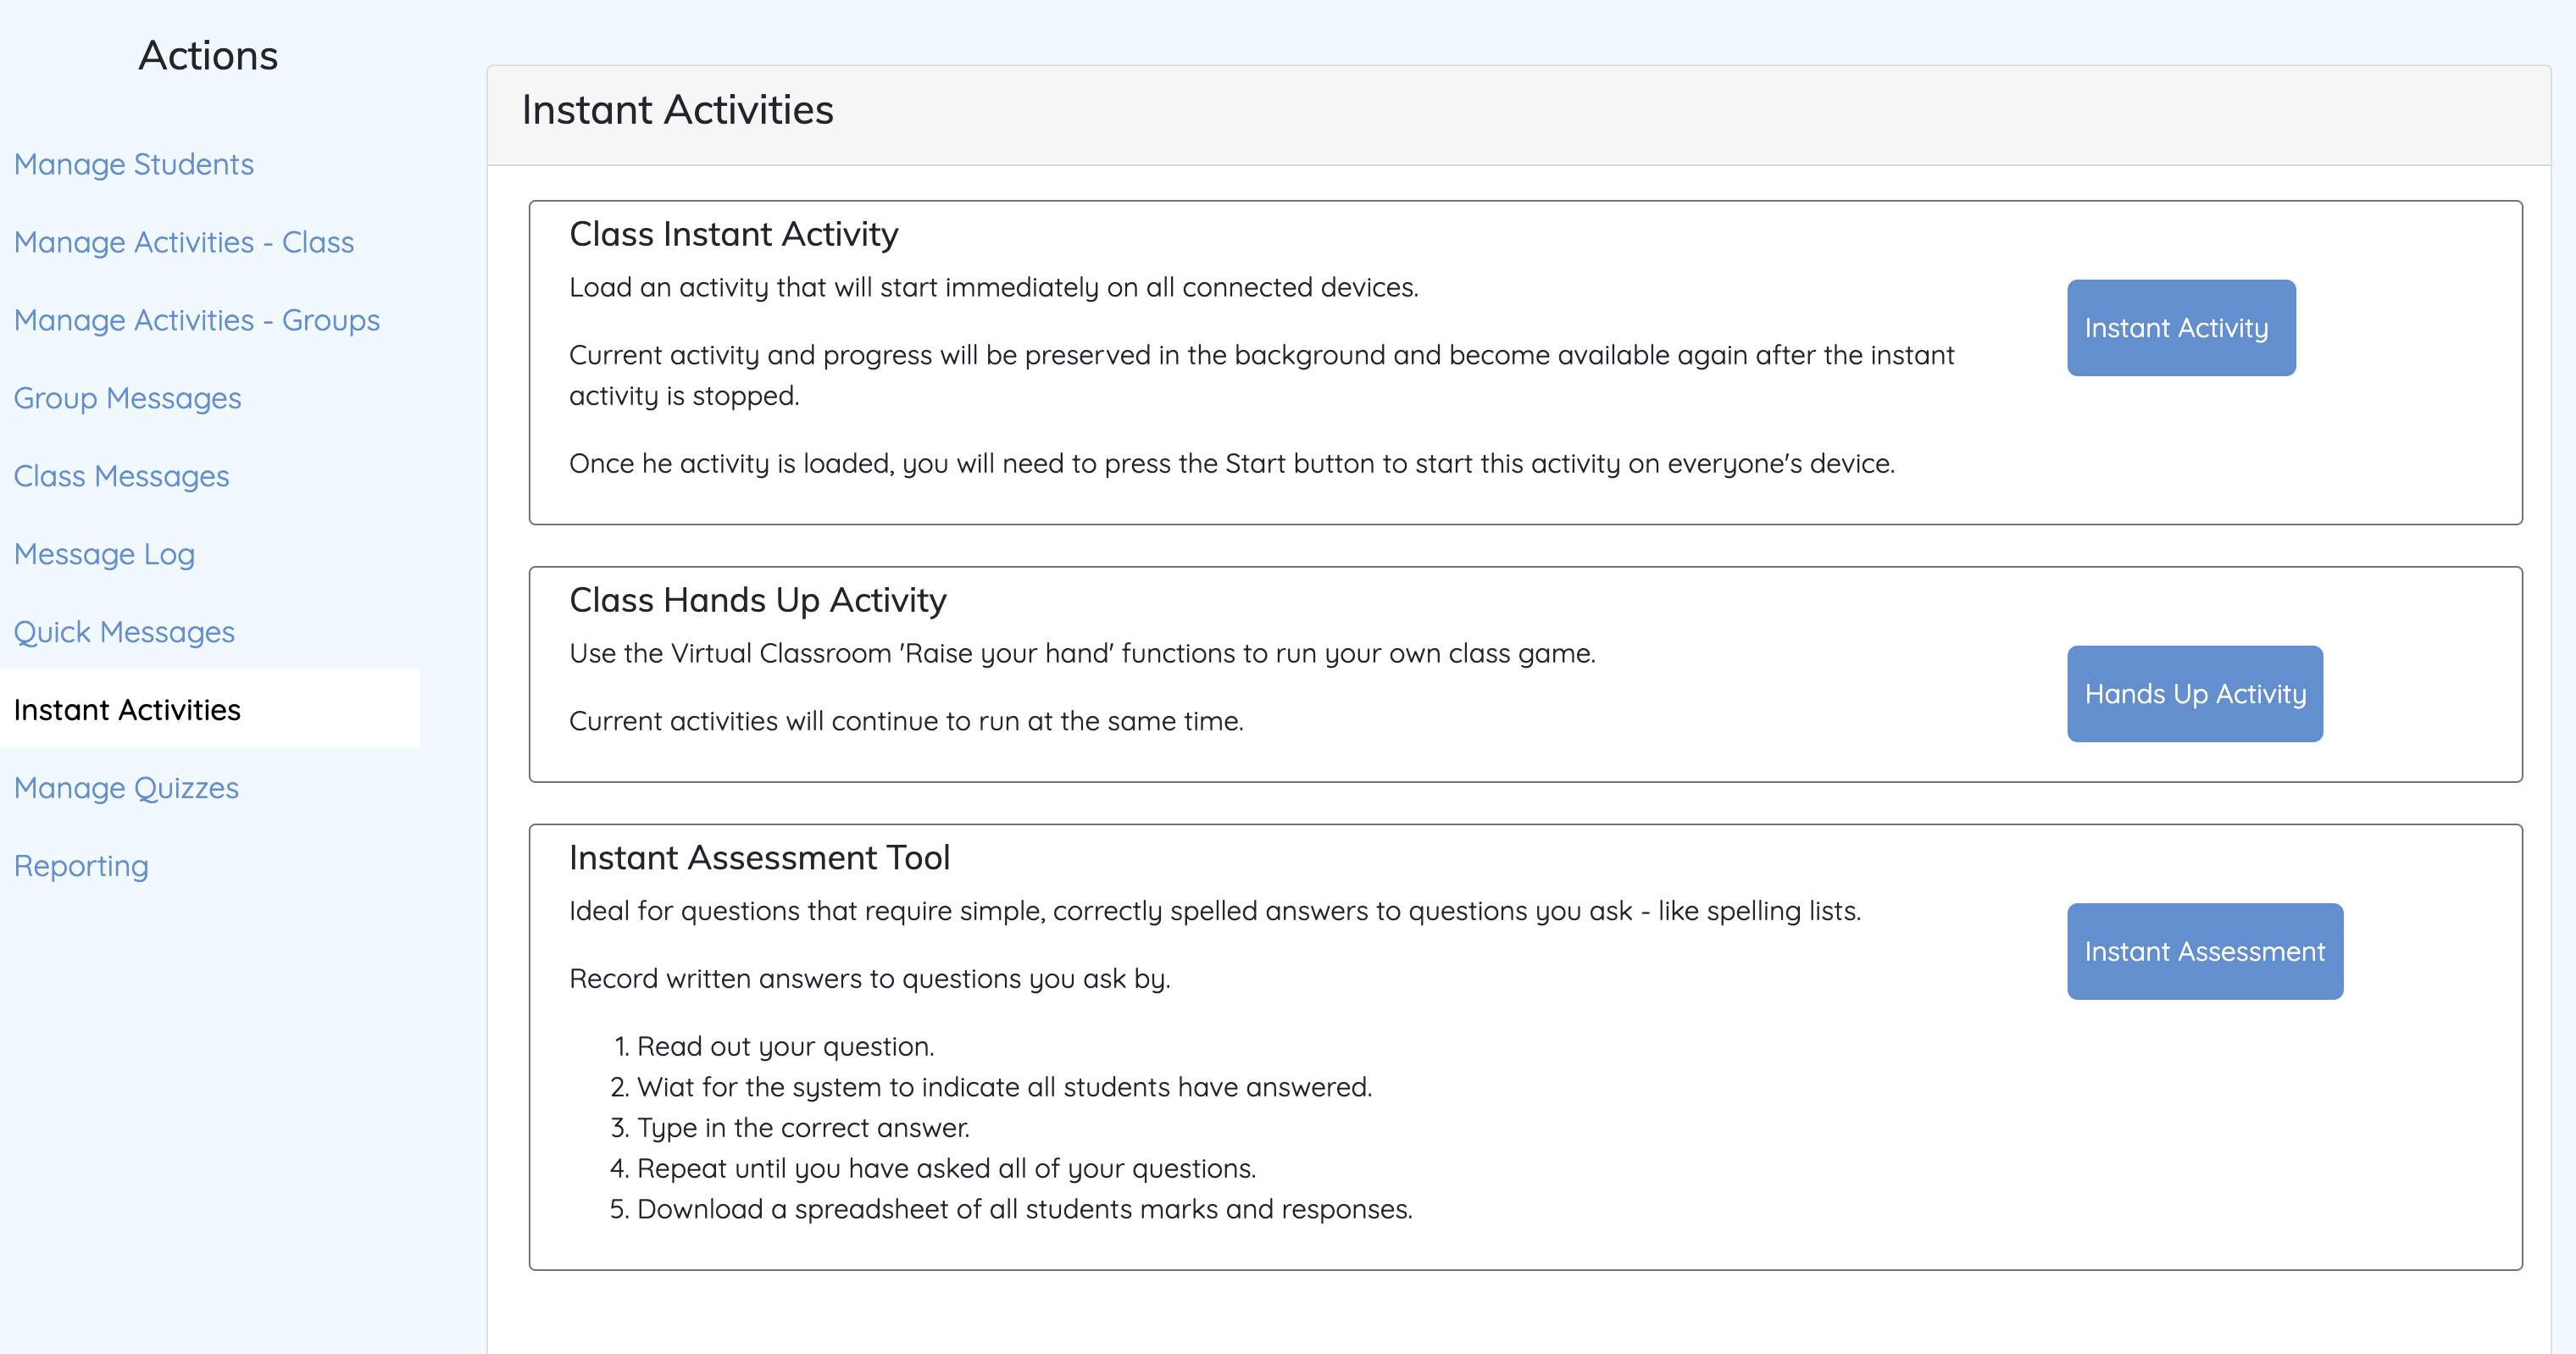
These are a group of activities that override the normal flow of the Interactive Classroom allowing you to have all students attempt the same activity or game at the same time.
If the student is currently working through an activity, this will be placed in the background and they will be able to resume it after the instant activity is complete.
There are 3 types of instant activity:
Interactive Classroom quizzes are a fun, interactive way to reinforce learning (and fill those last 10 minutes before the bell).
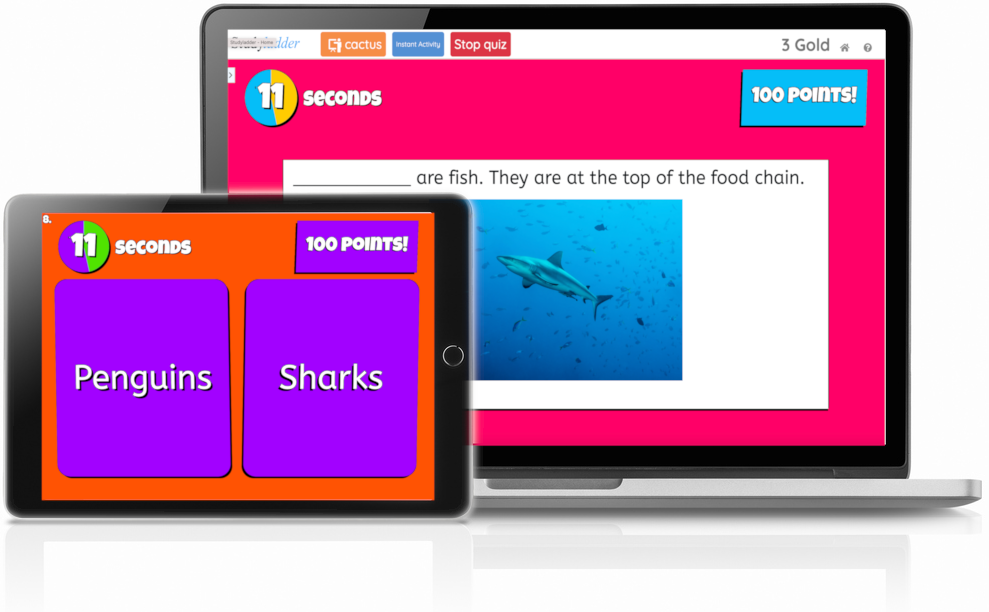
Quizzes are a fun way to test and reinforce learning outcomes.
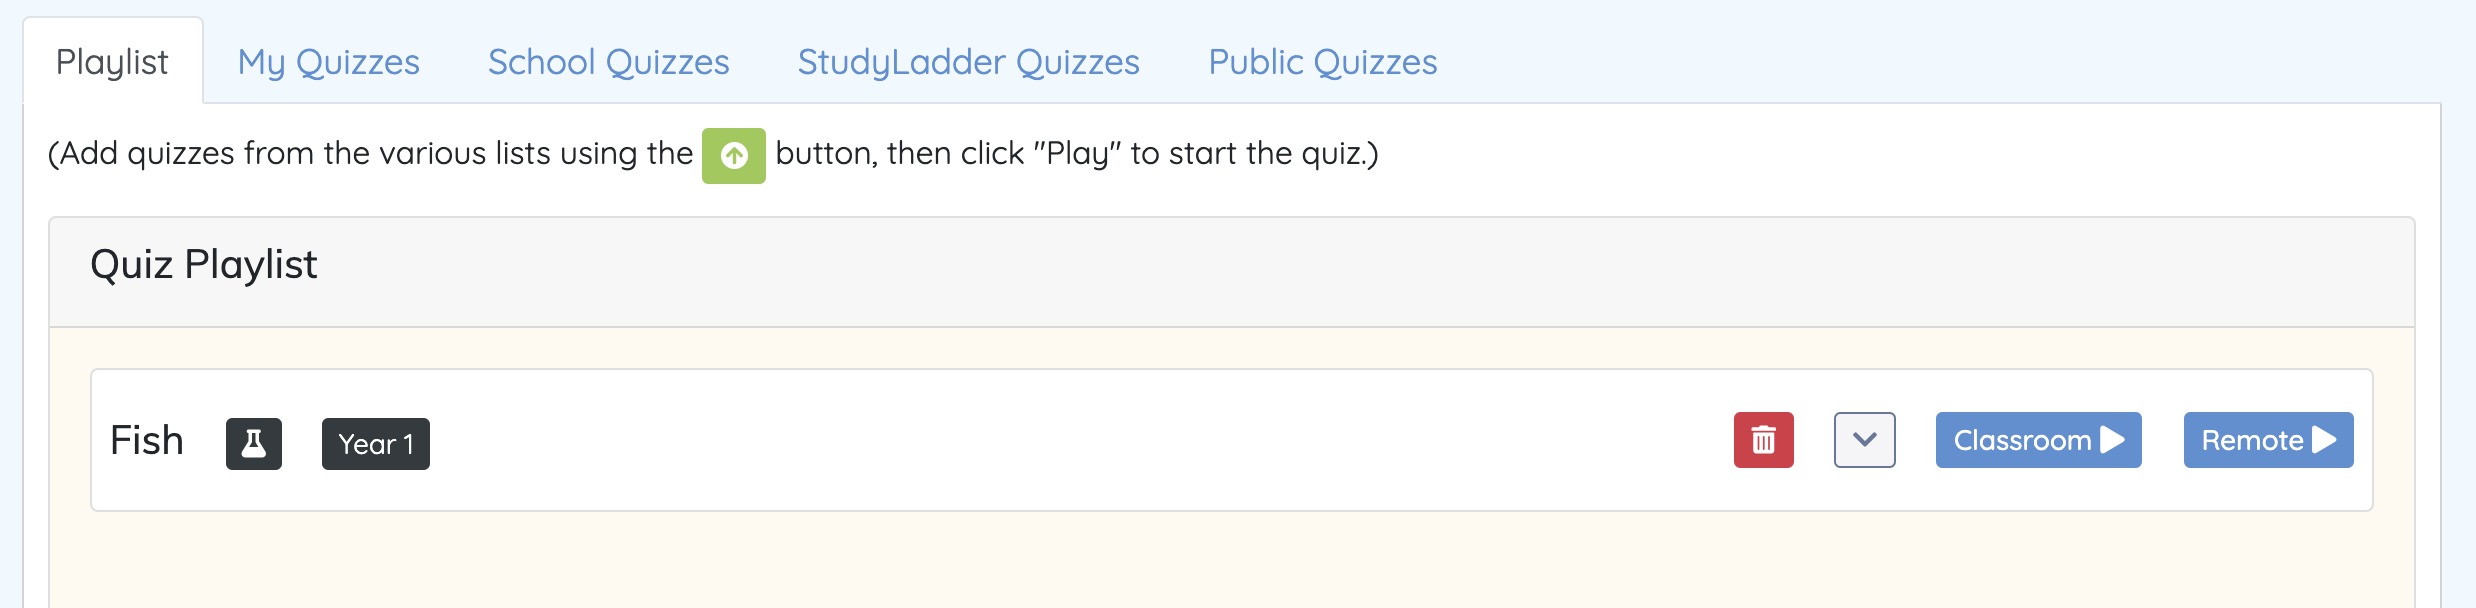
There are 5 tabs at the top of the Quizzes page:
Before you can play a quiz, it must be added to the playlist
Do this by going to any of the lists of available quizzes and clicking the button in the "Actions" column next to the quiz you want to play.
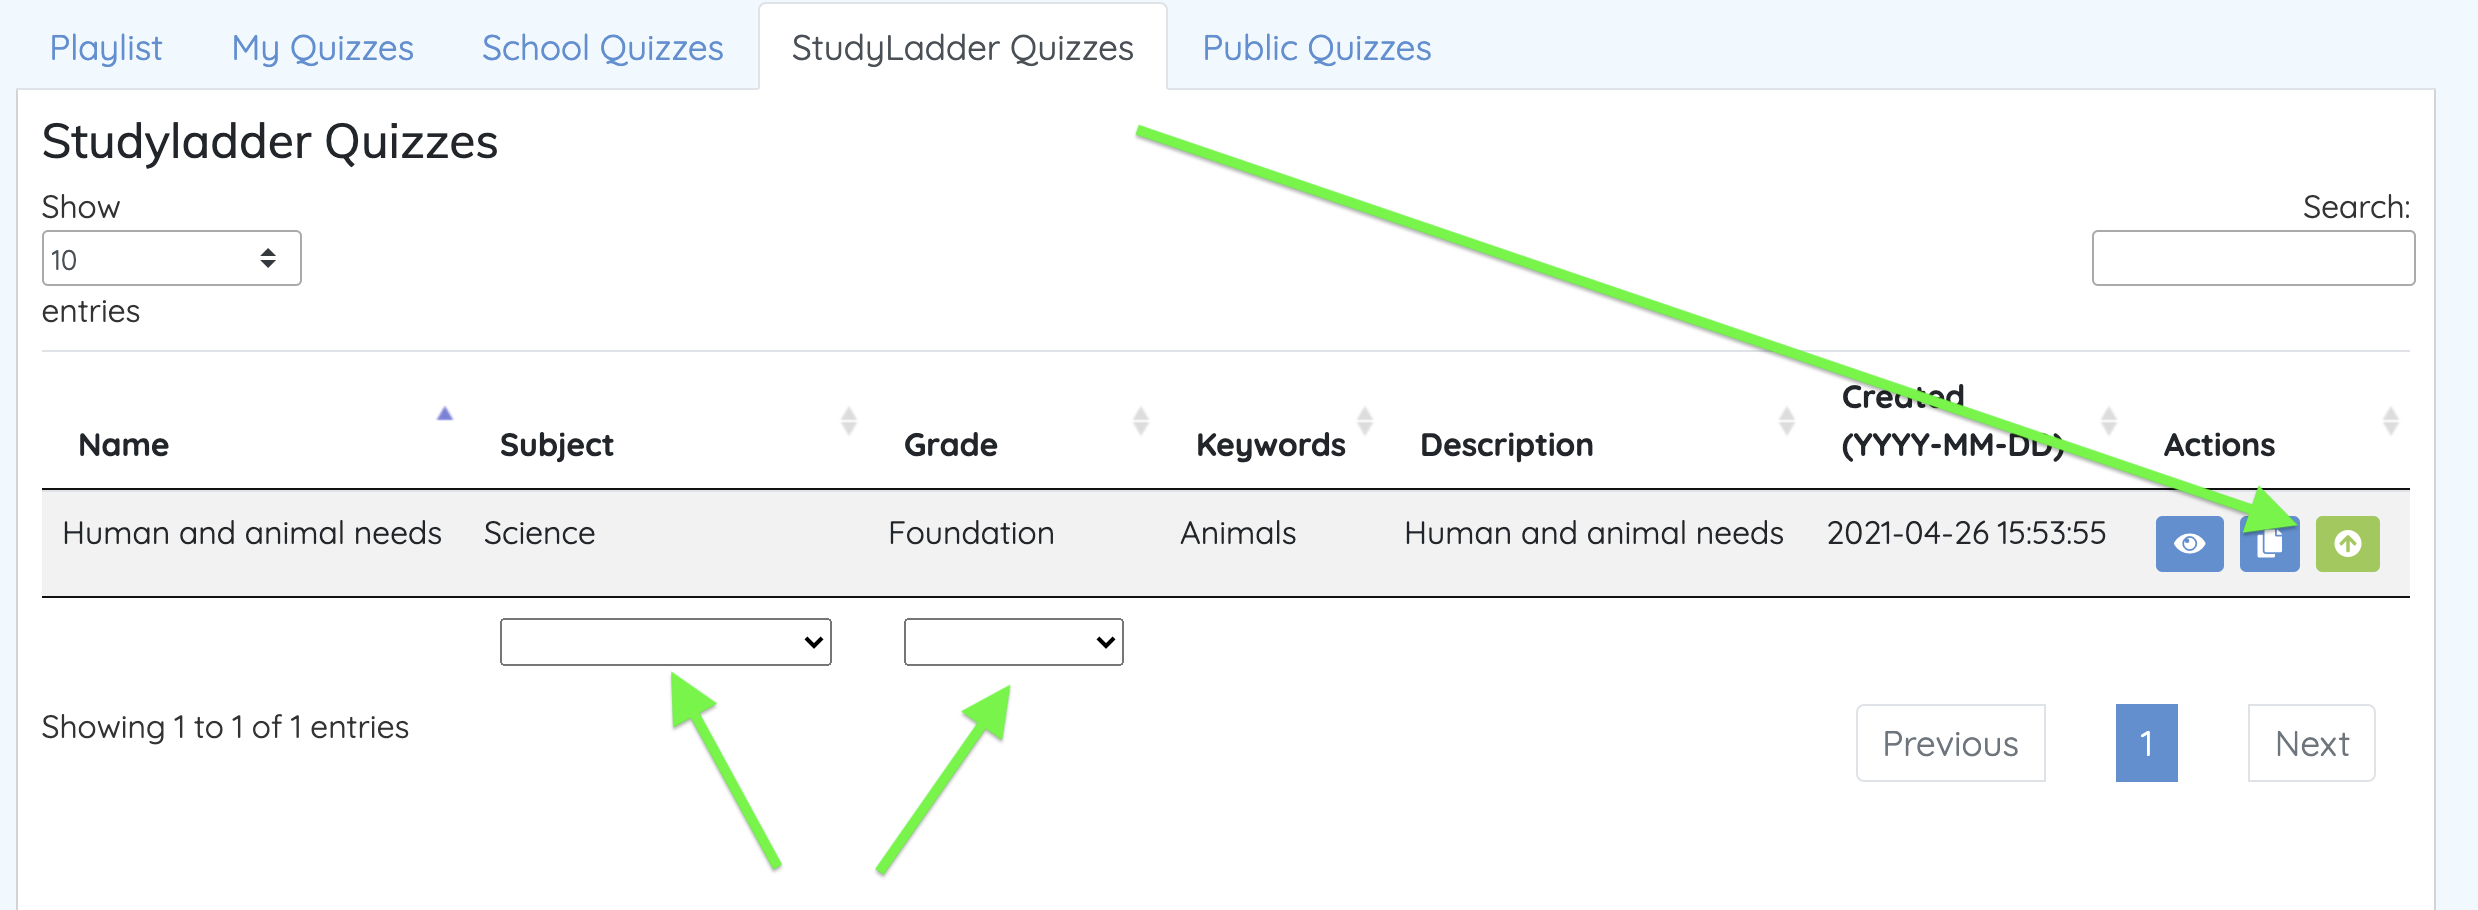
(You can filter any list by subject and / or grade by using the drop-downs below the columns)
Once you have selected a quiz, it will appear in the play list and you have 2 options for playing it:
Once you have started a quiz, it will put the current student activity into the background to be continued after the quiz is finished.
When all student devices have reported back as being ready
Your screen will show the button for the first question

Click the question button to show the question. Once you do this, a timer will start indicating how long the students have to answer the question.
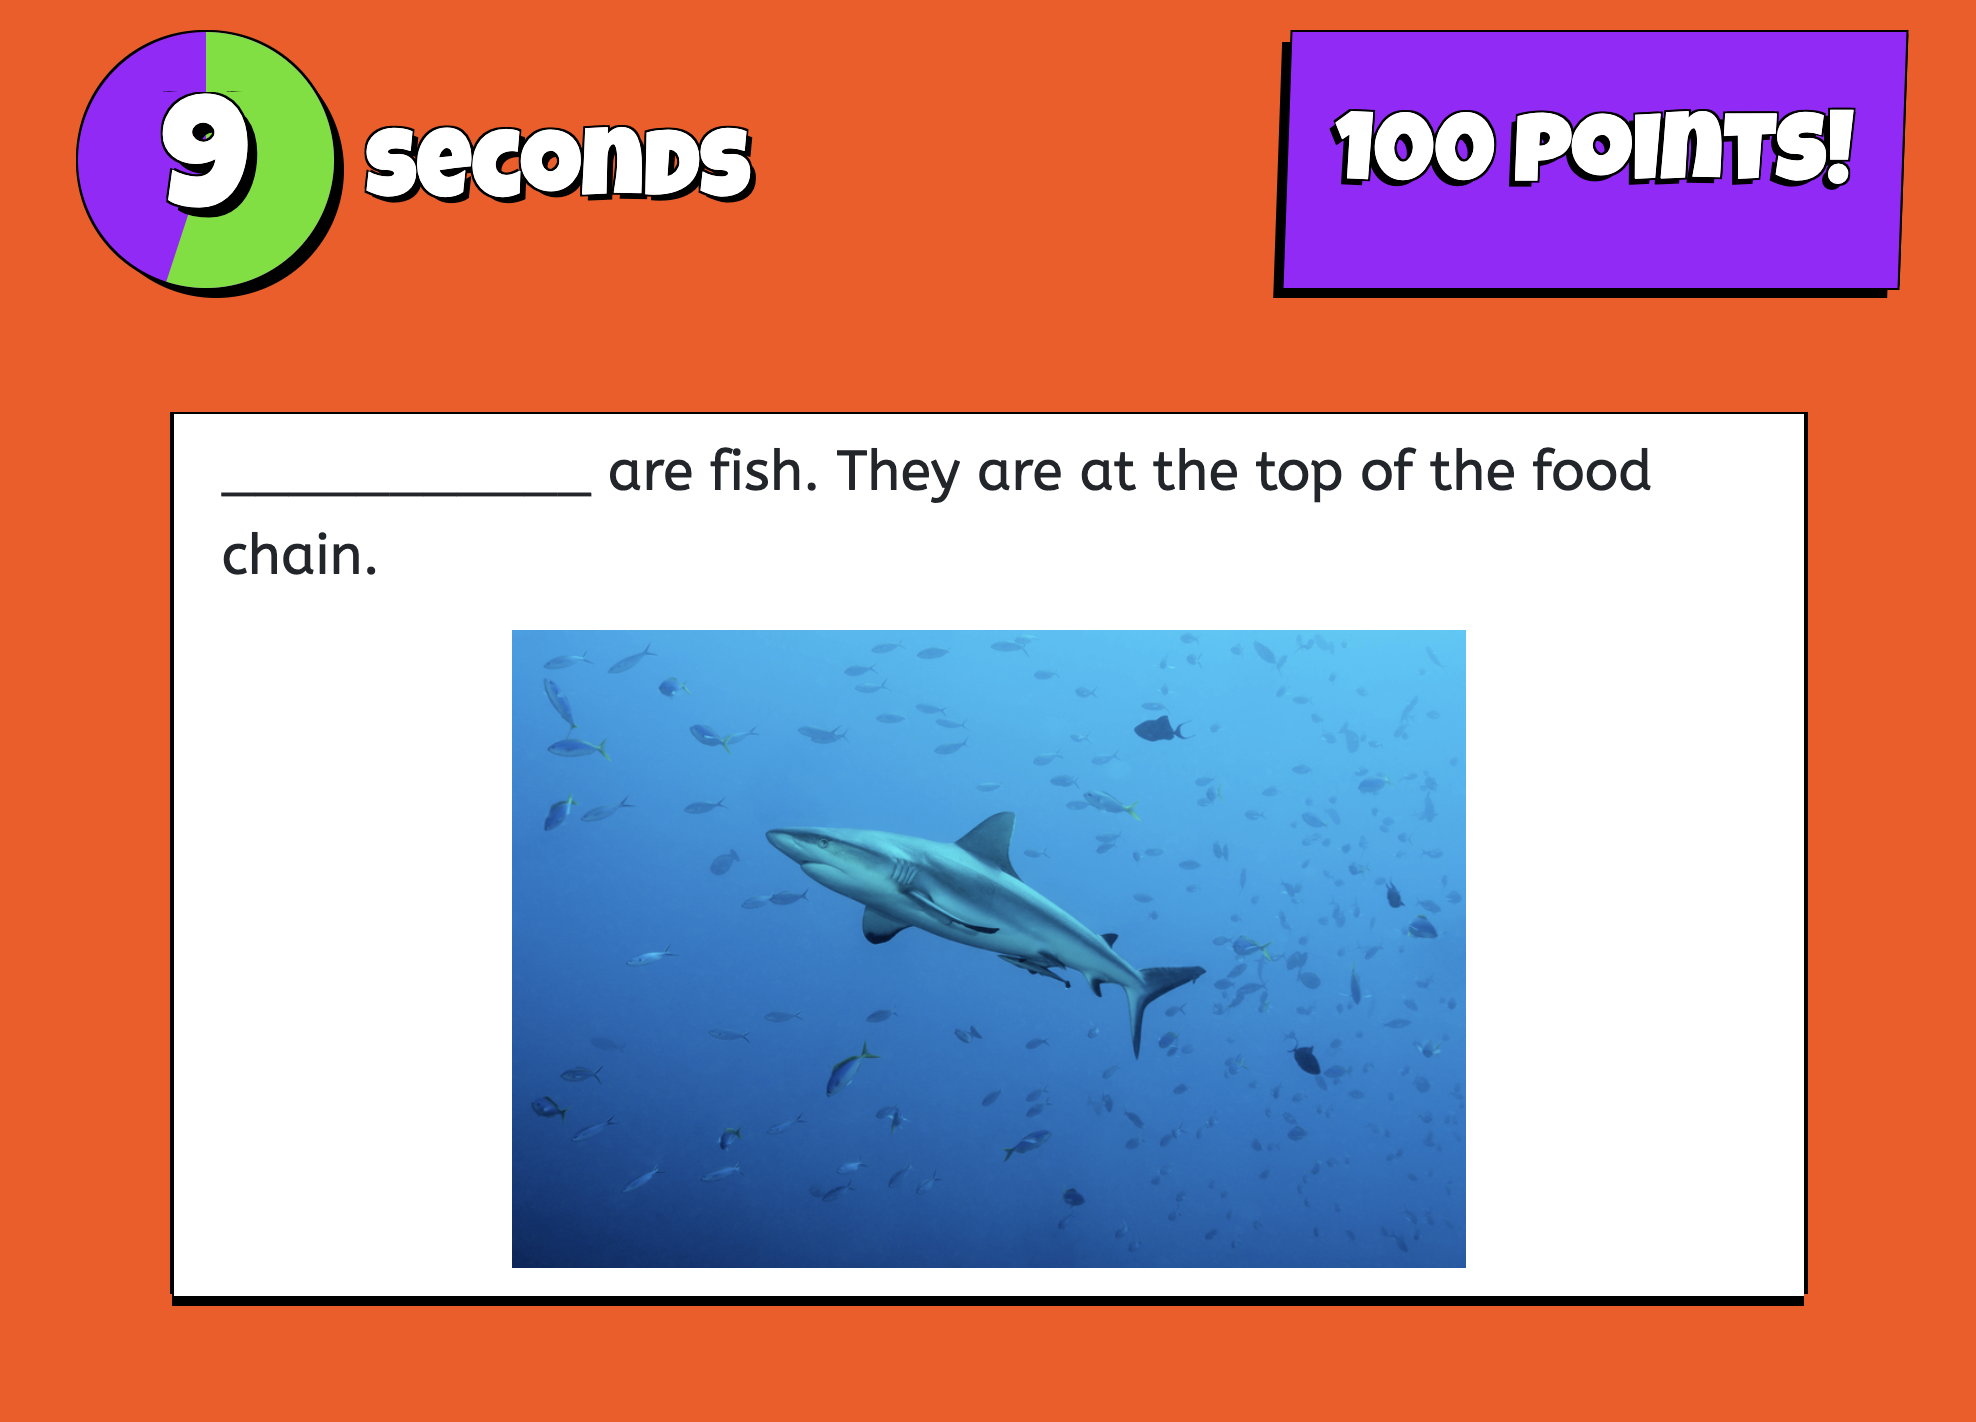
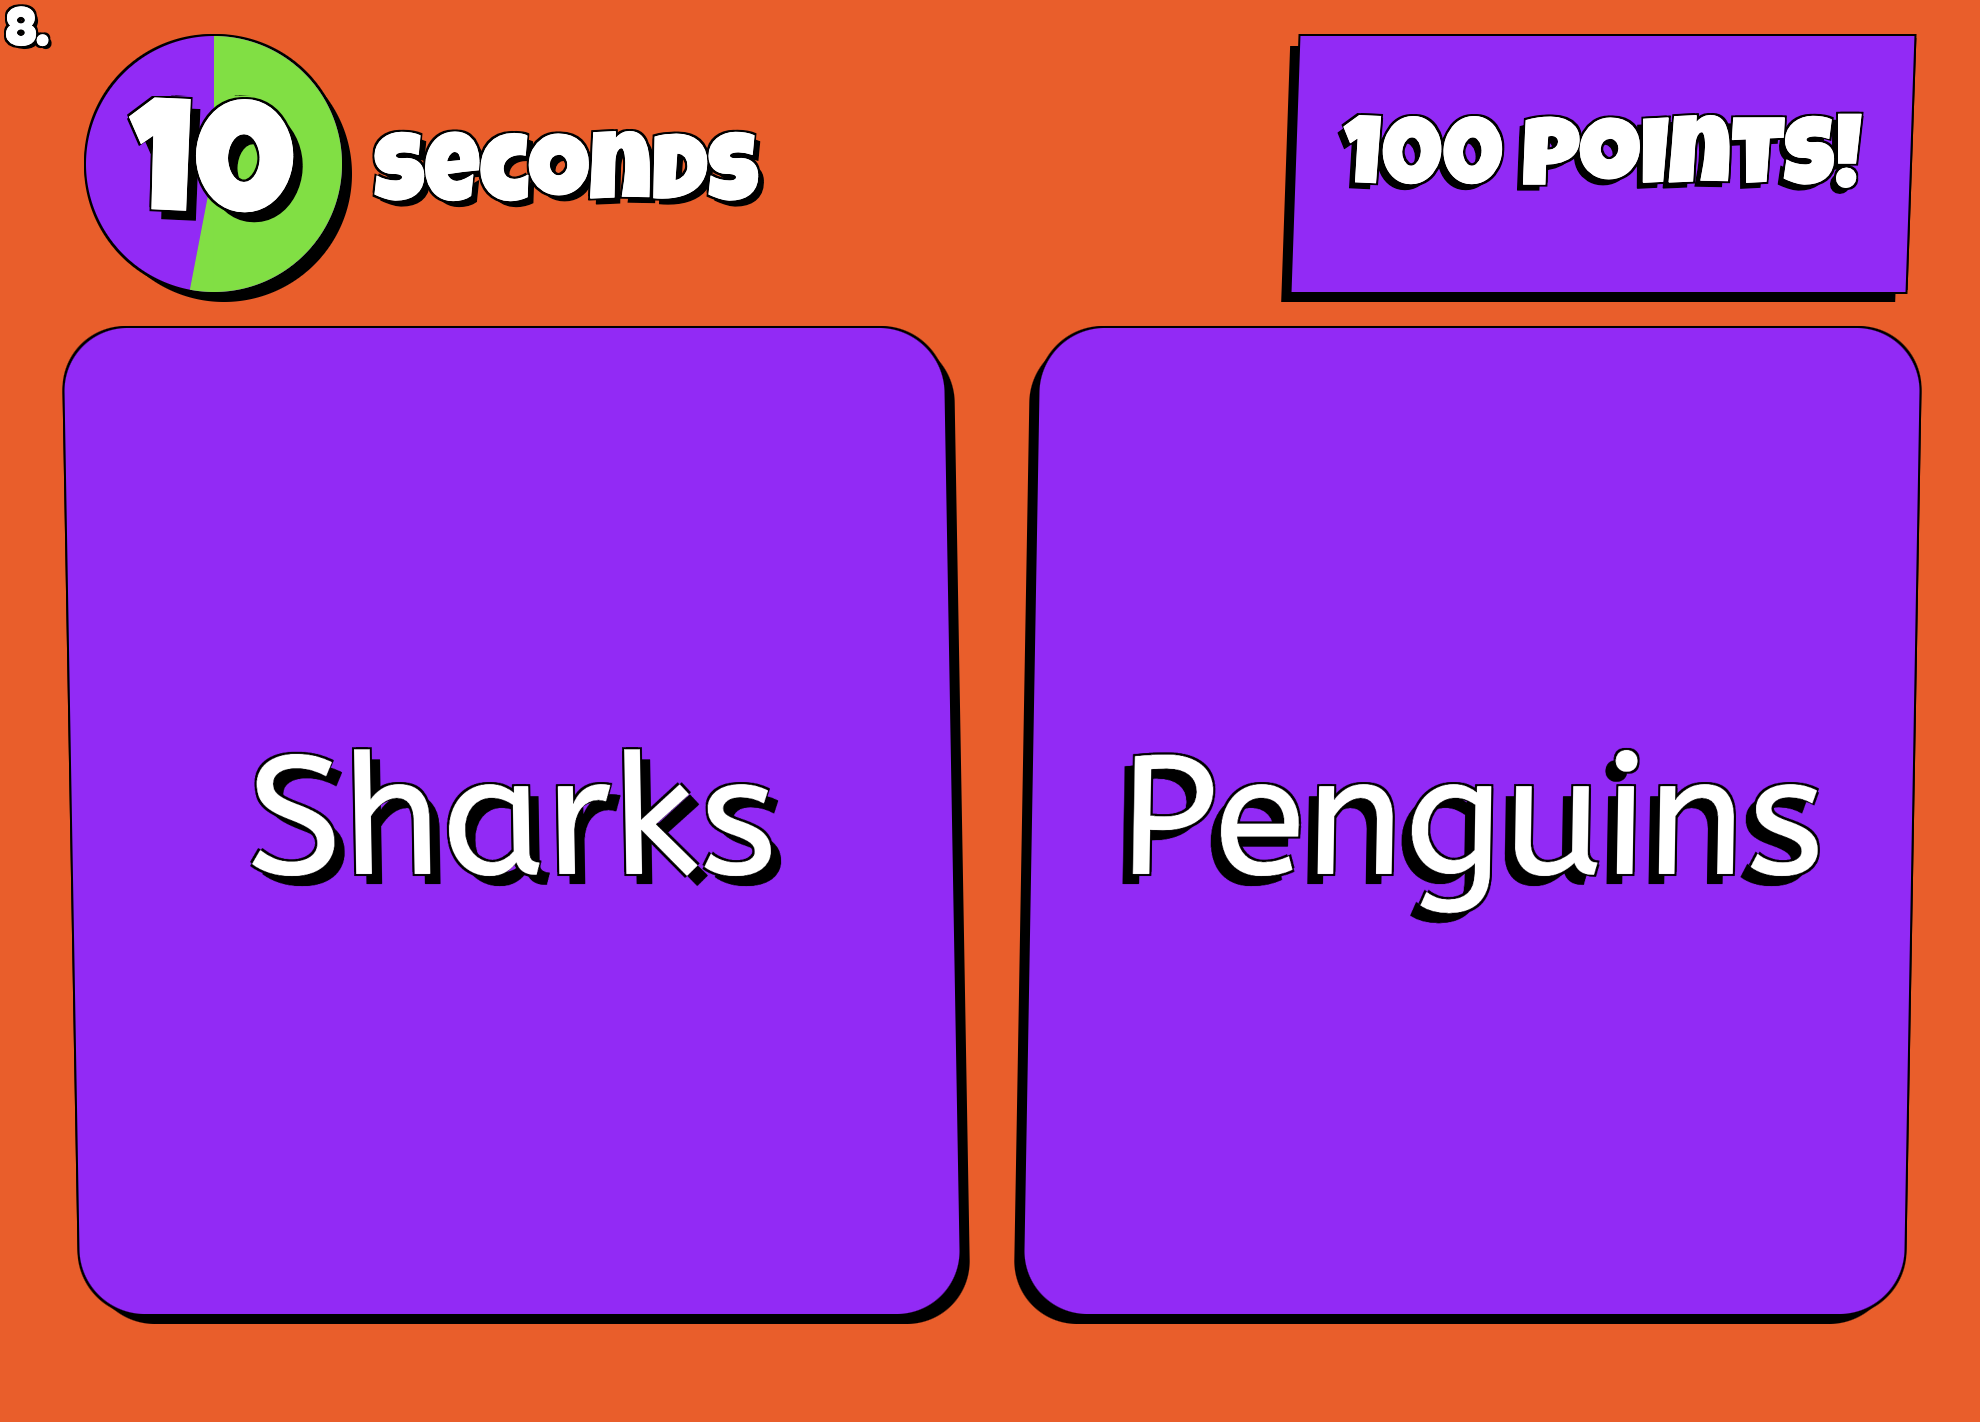
Students will then have to select an answer.
Once all students have selected their answer, you will see "All in" on your screen... click the "Next" button to continue.

This will display the correct answers on the whiteboard and on the student device
Teacher:

Student:

Progressive leader board (top 10 only):

Points are awarded based on the correct answer being given AND the time taken to answer the question.
Once all questions have been answered, the results are revealed starting with 3rd place, then second, then first, then the "Top 10"
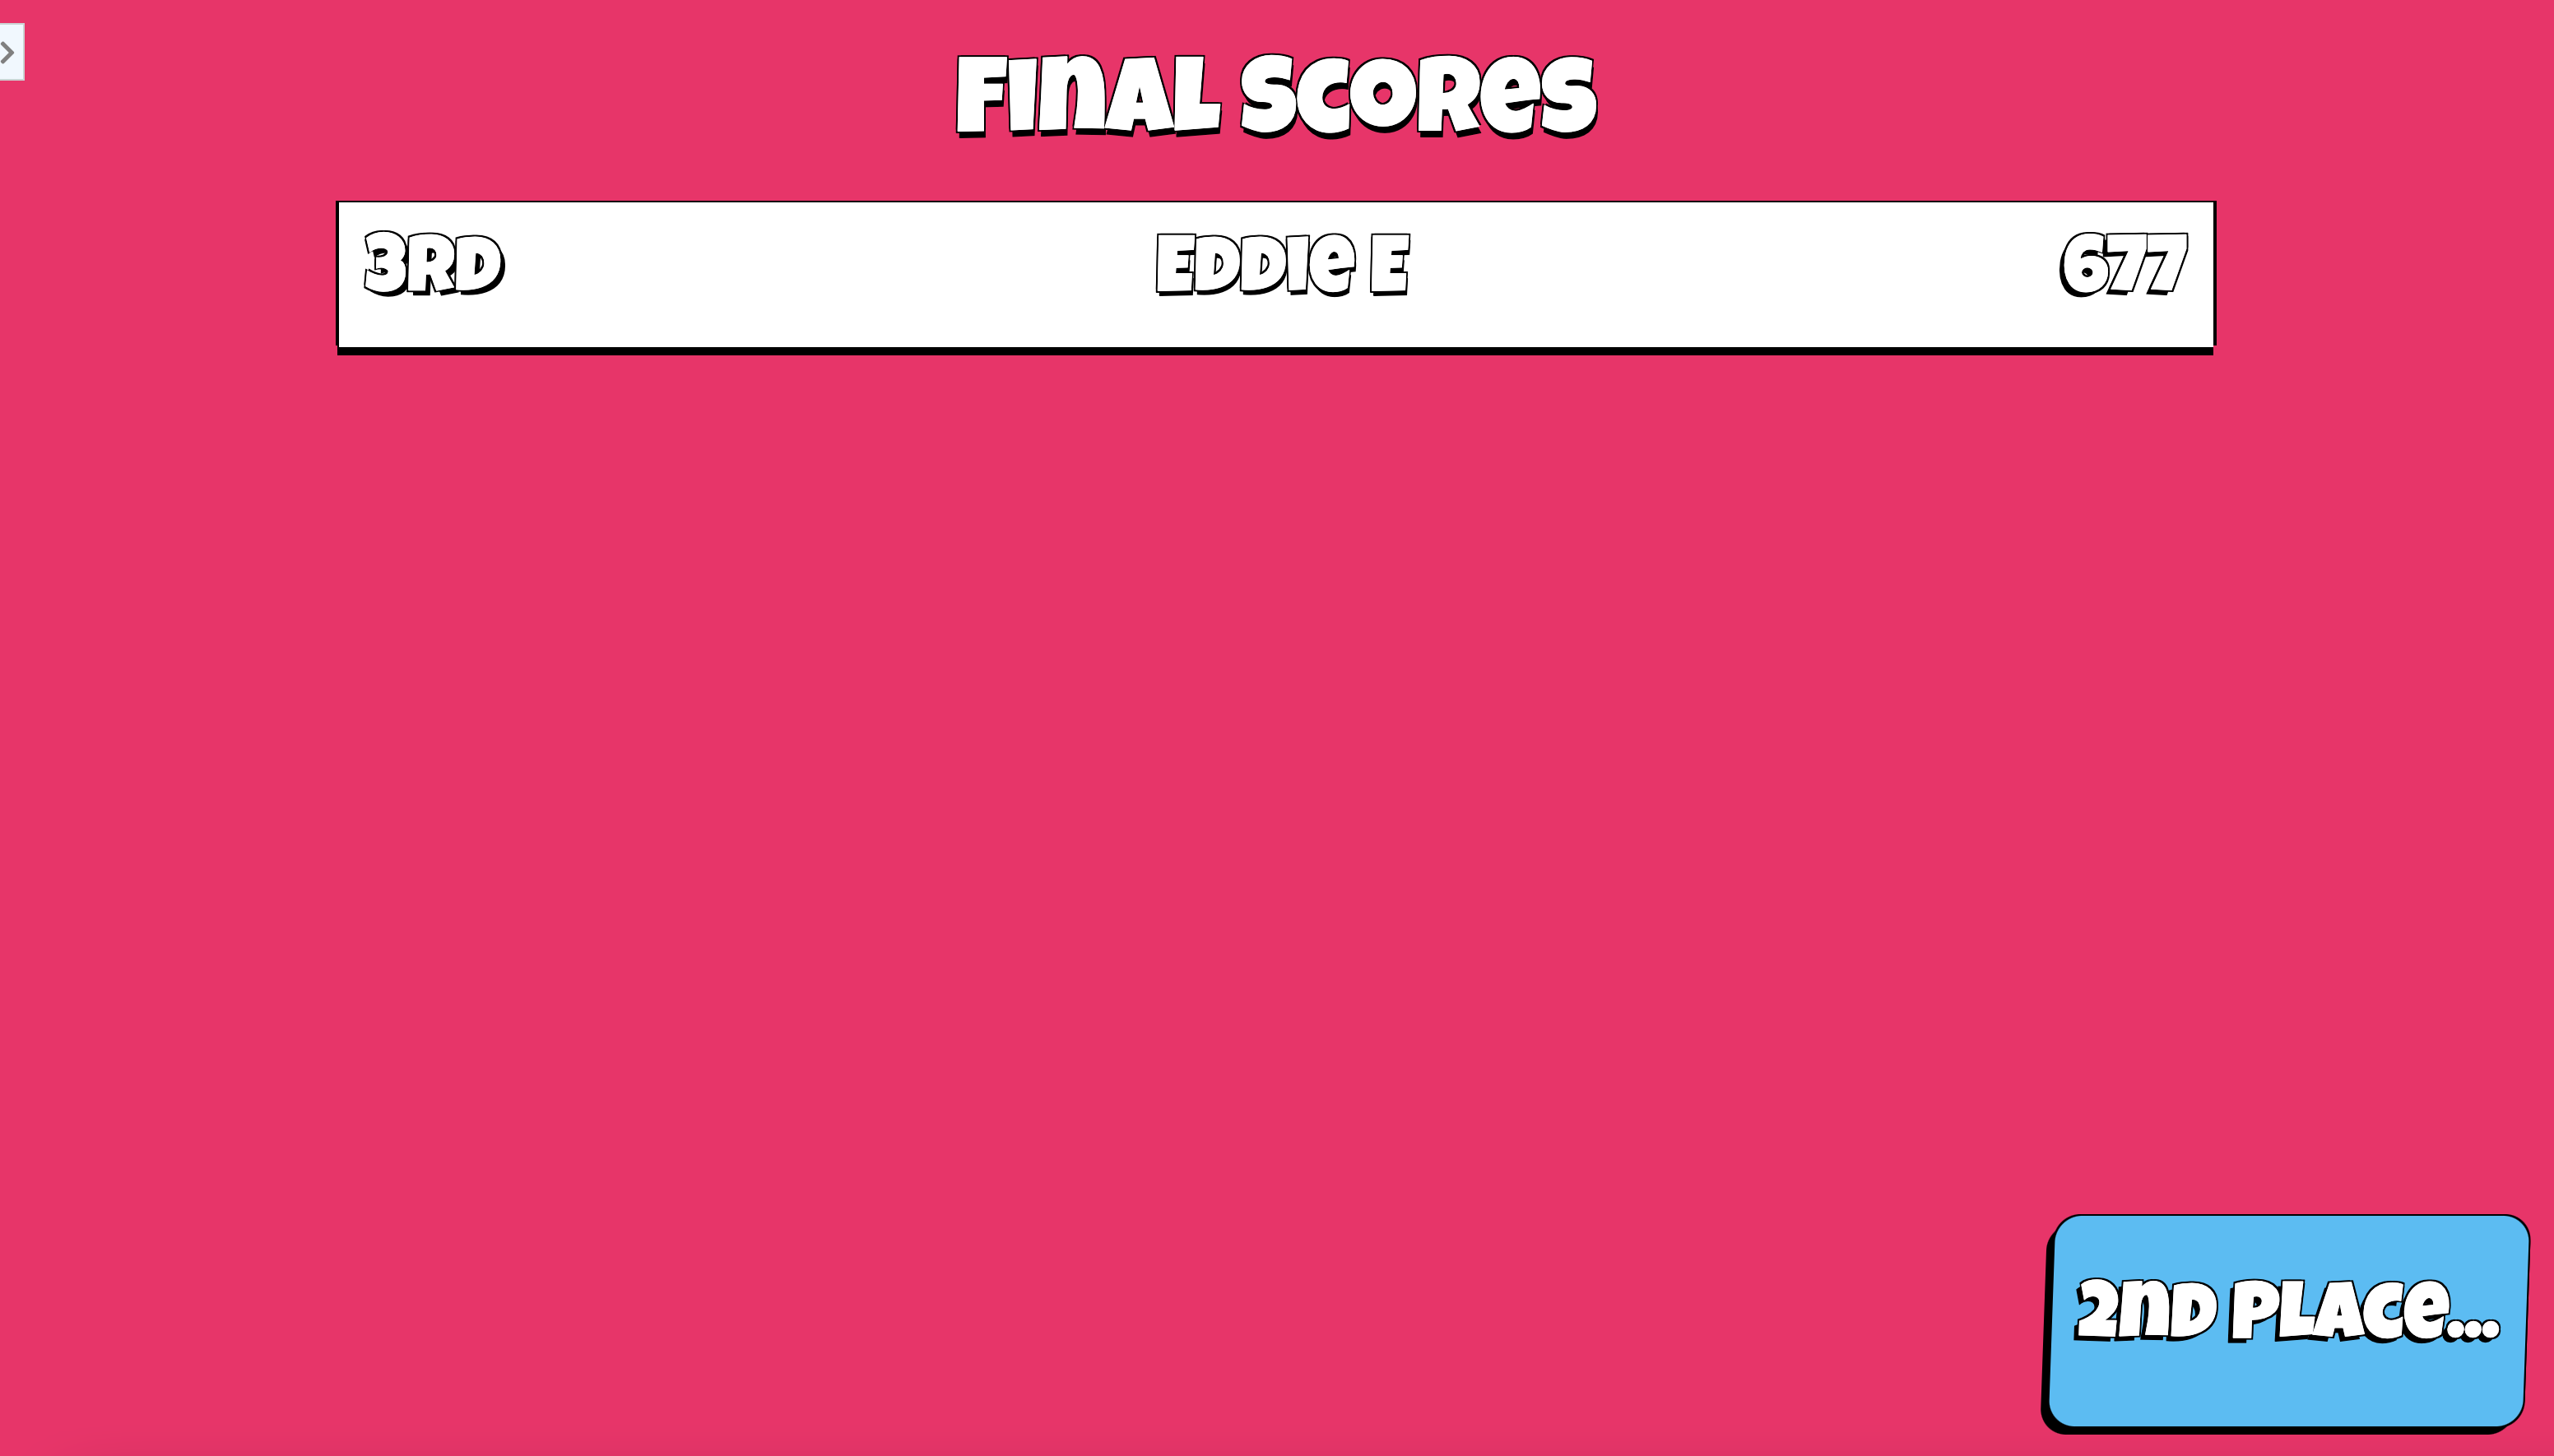
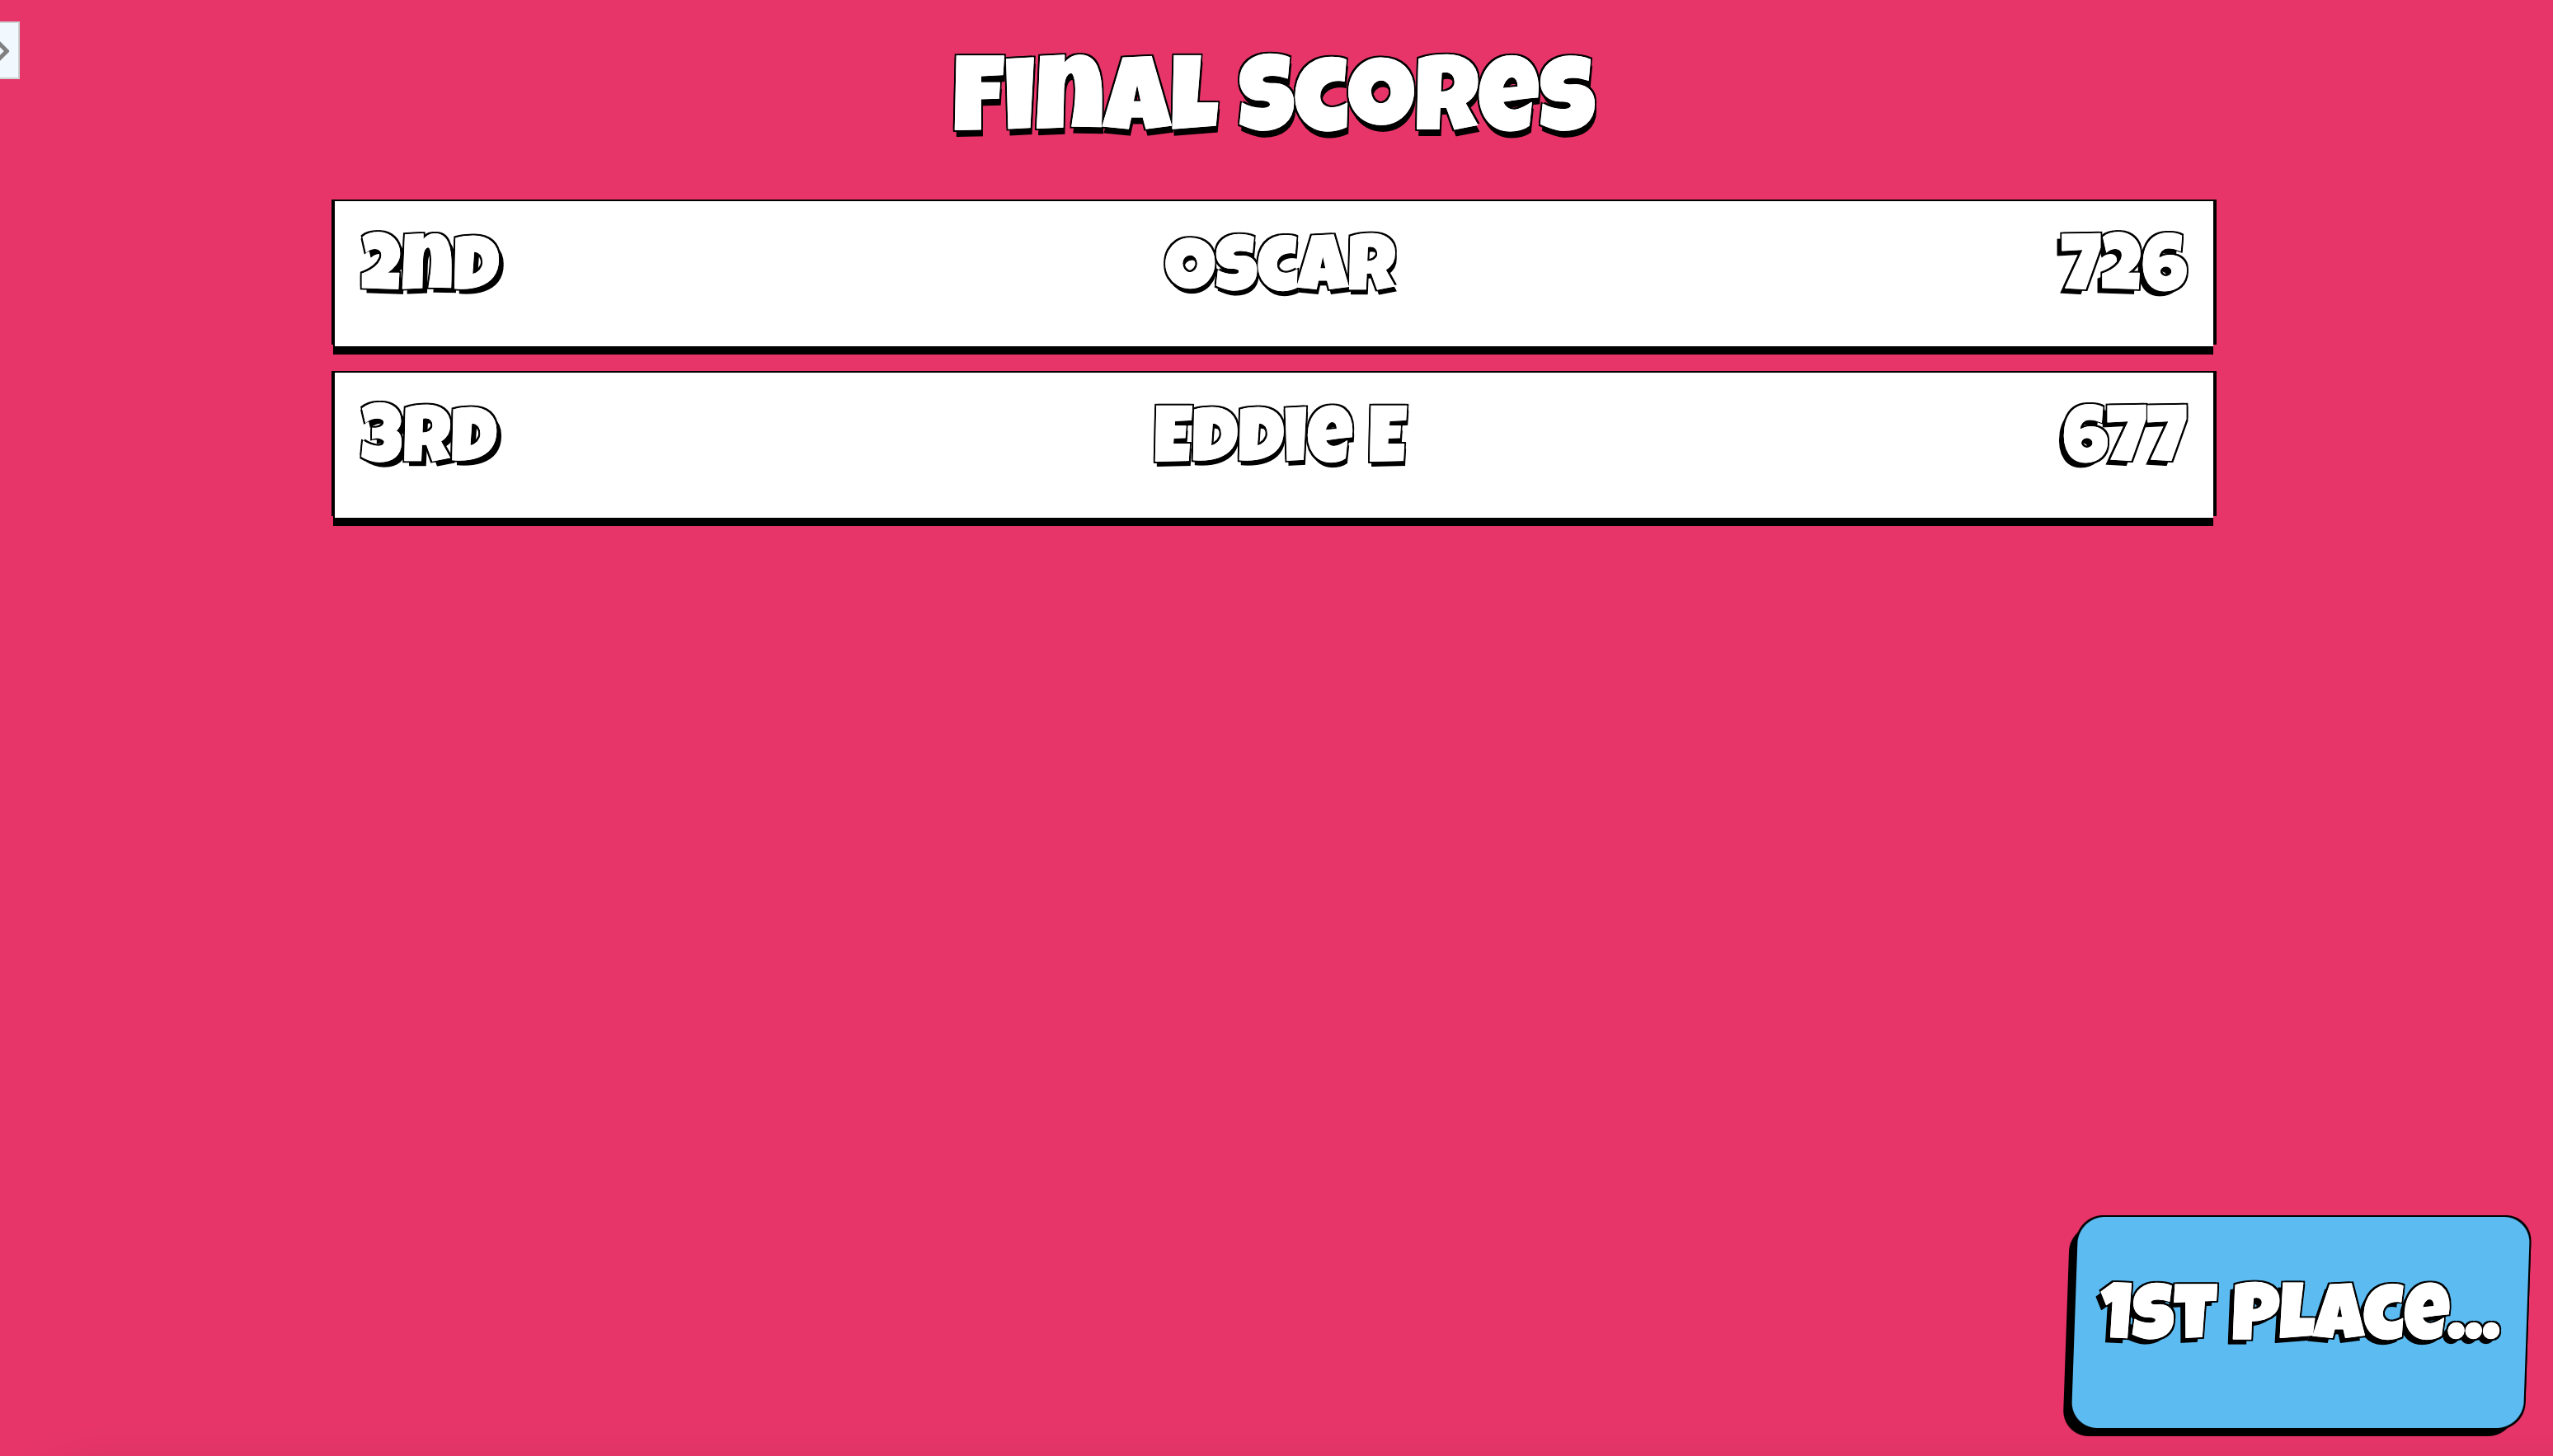
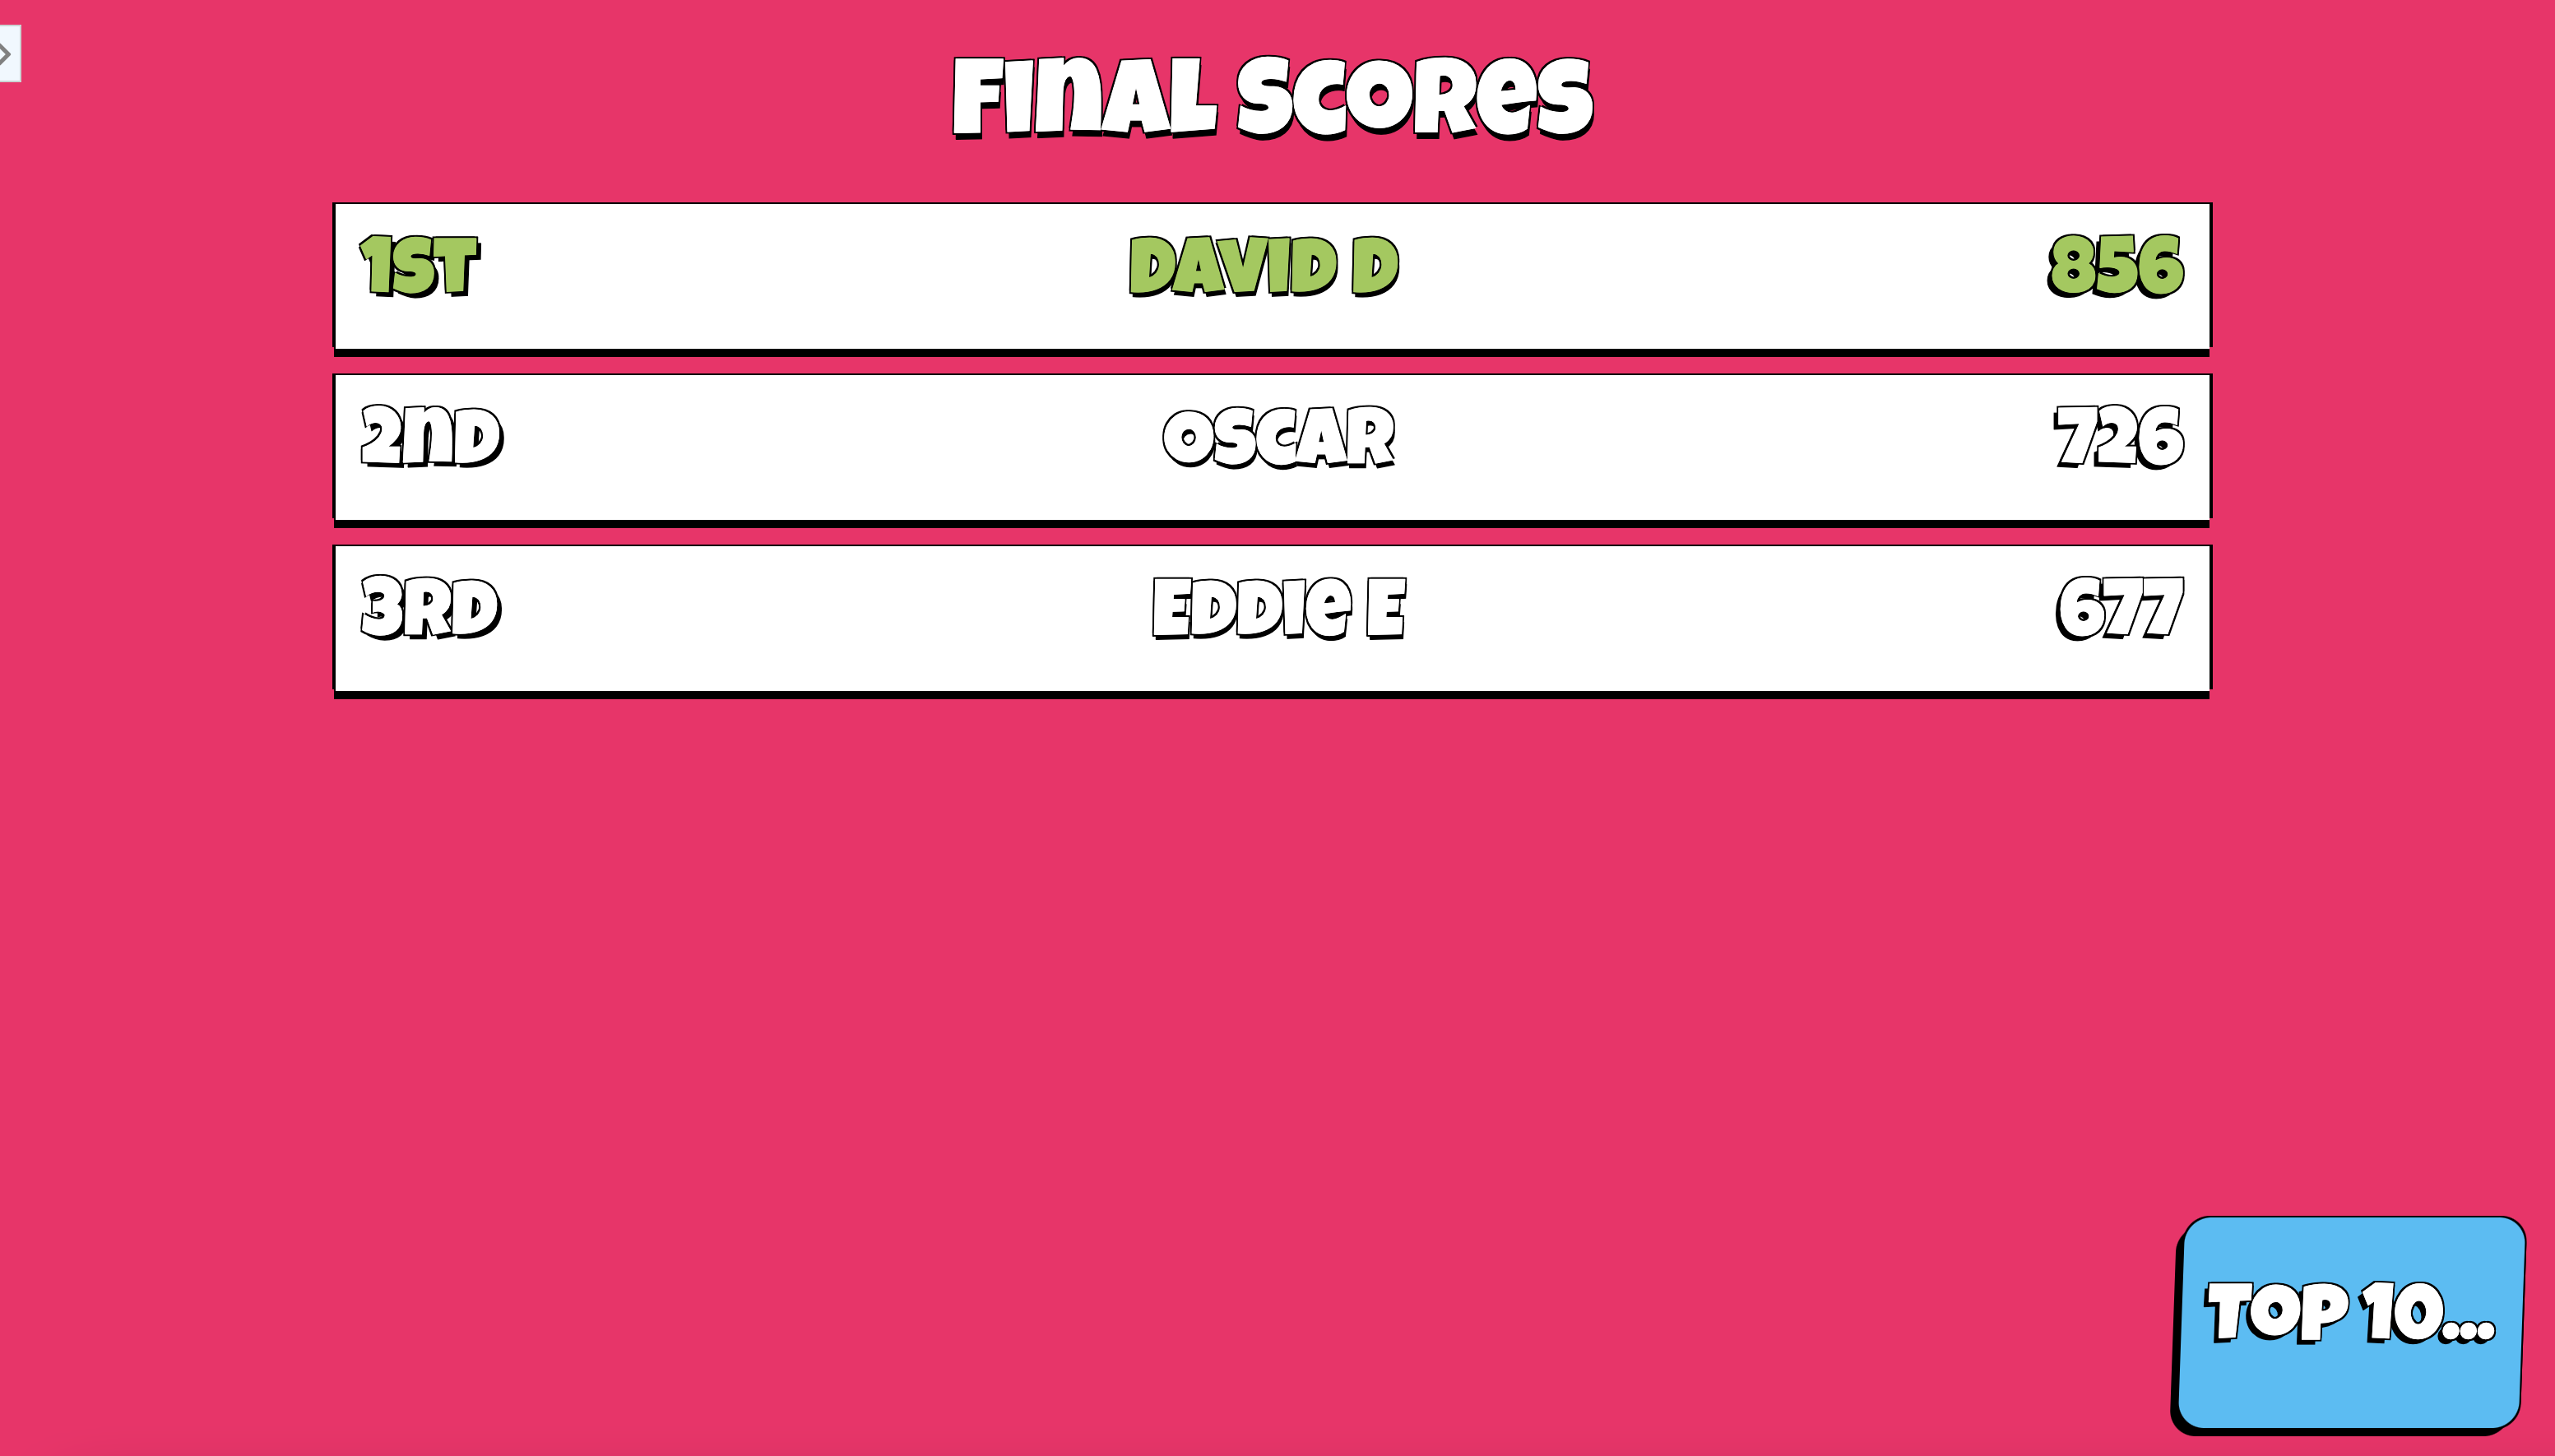
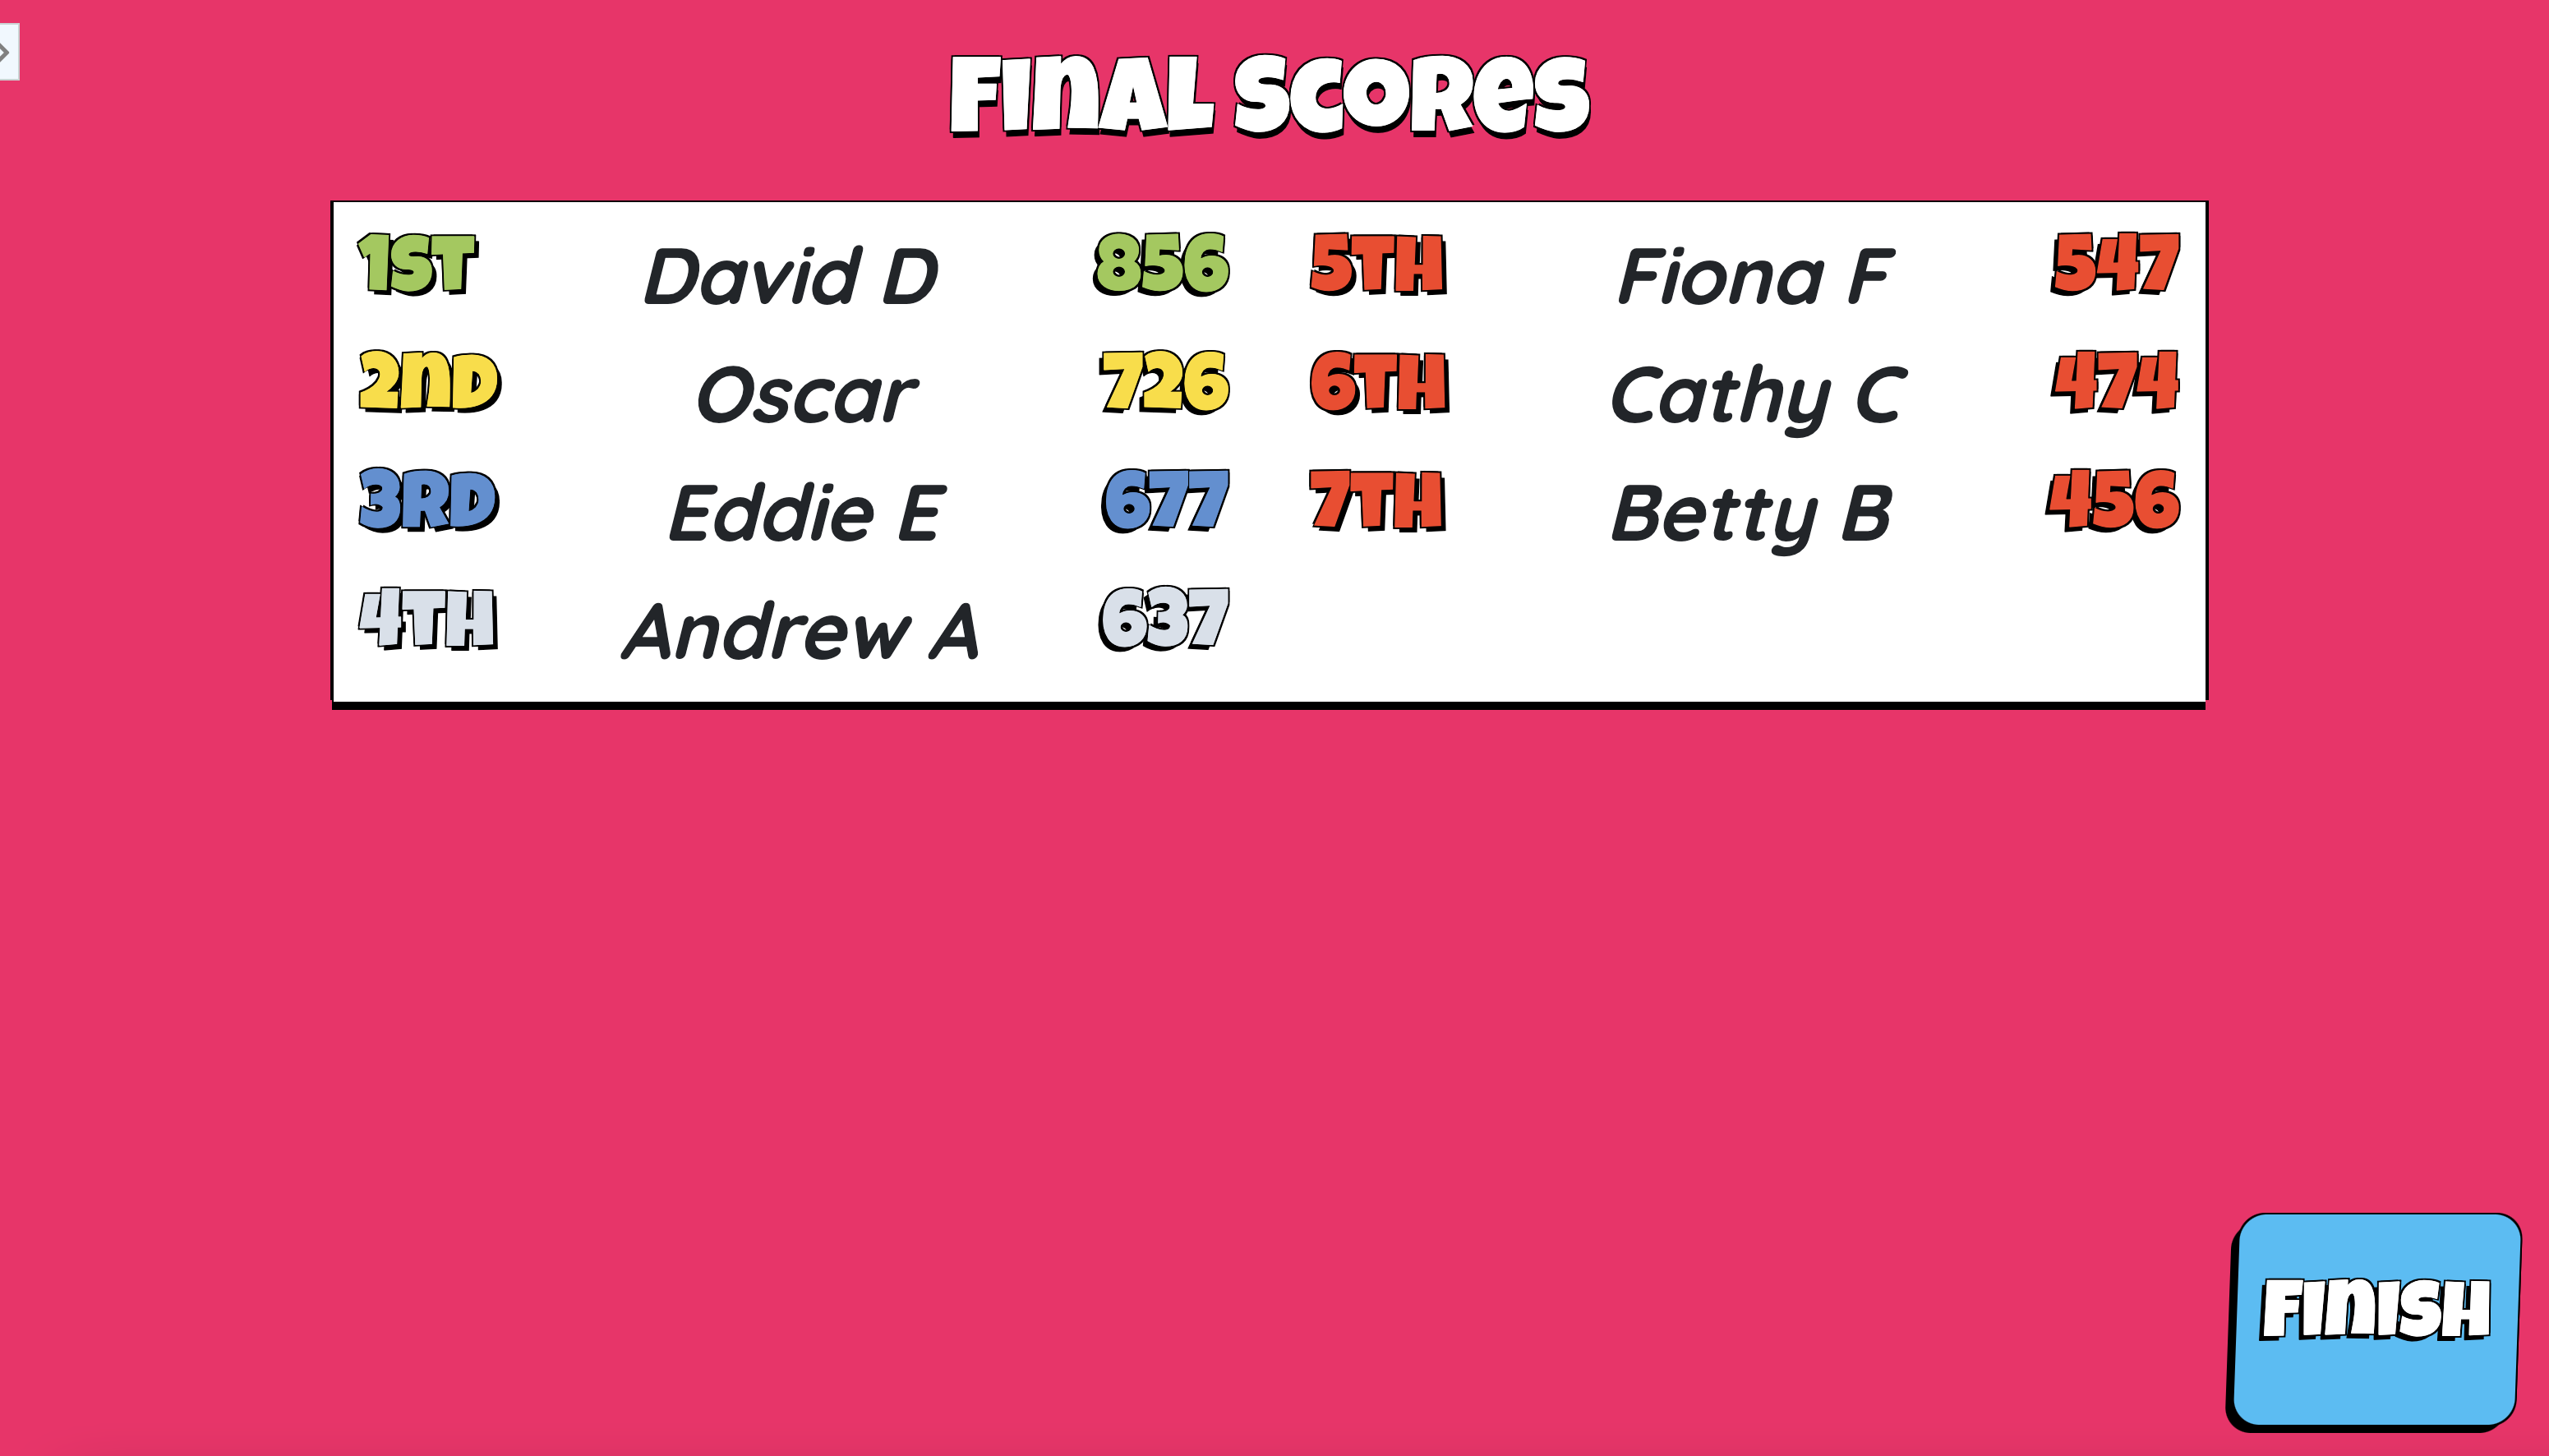
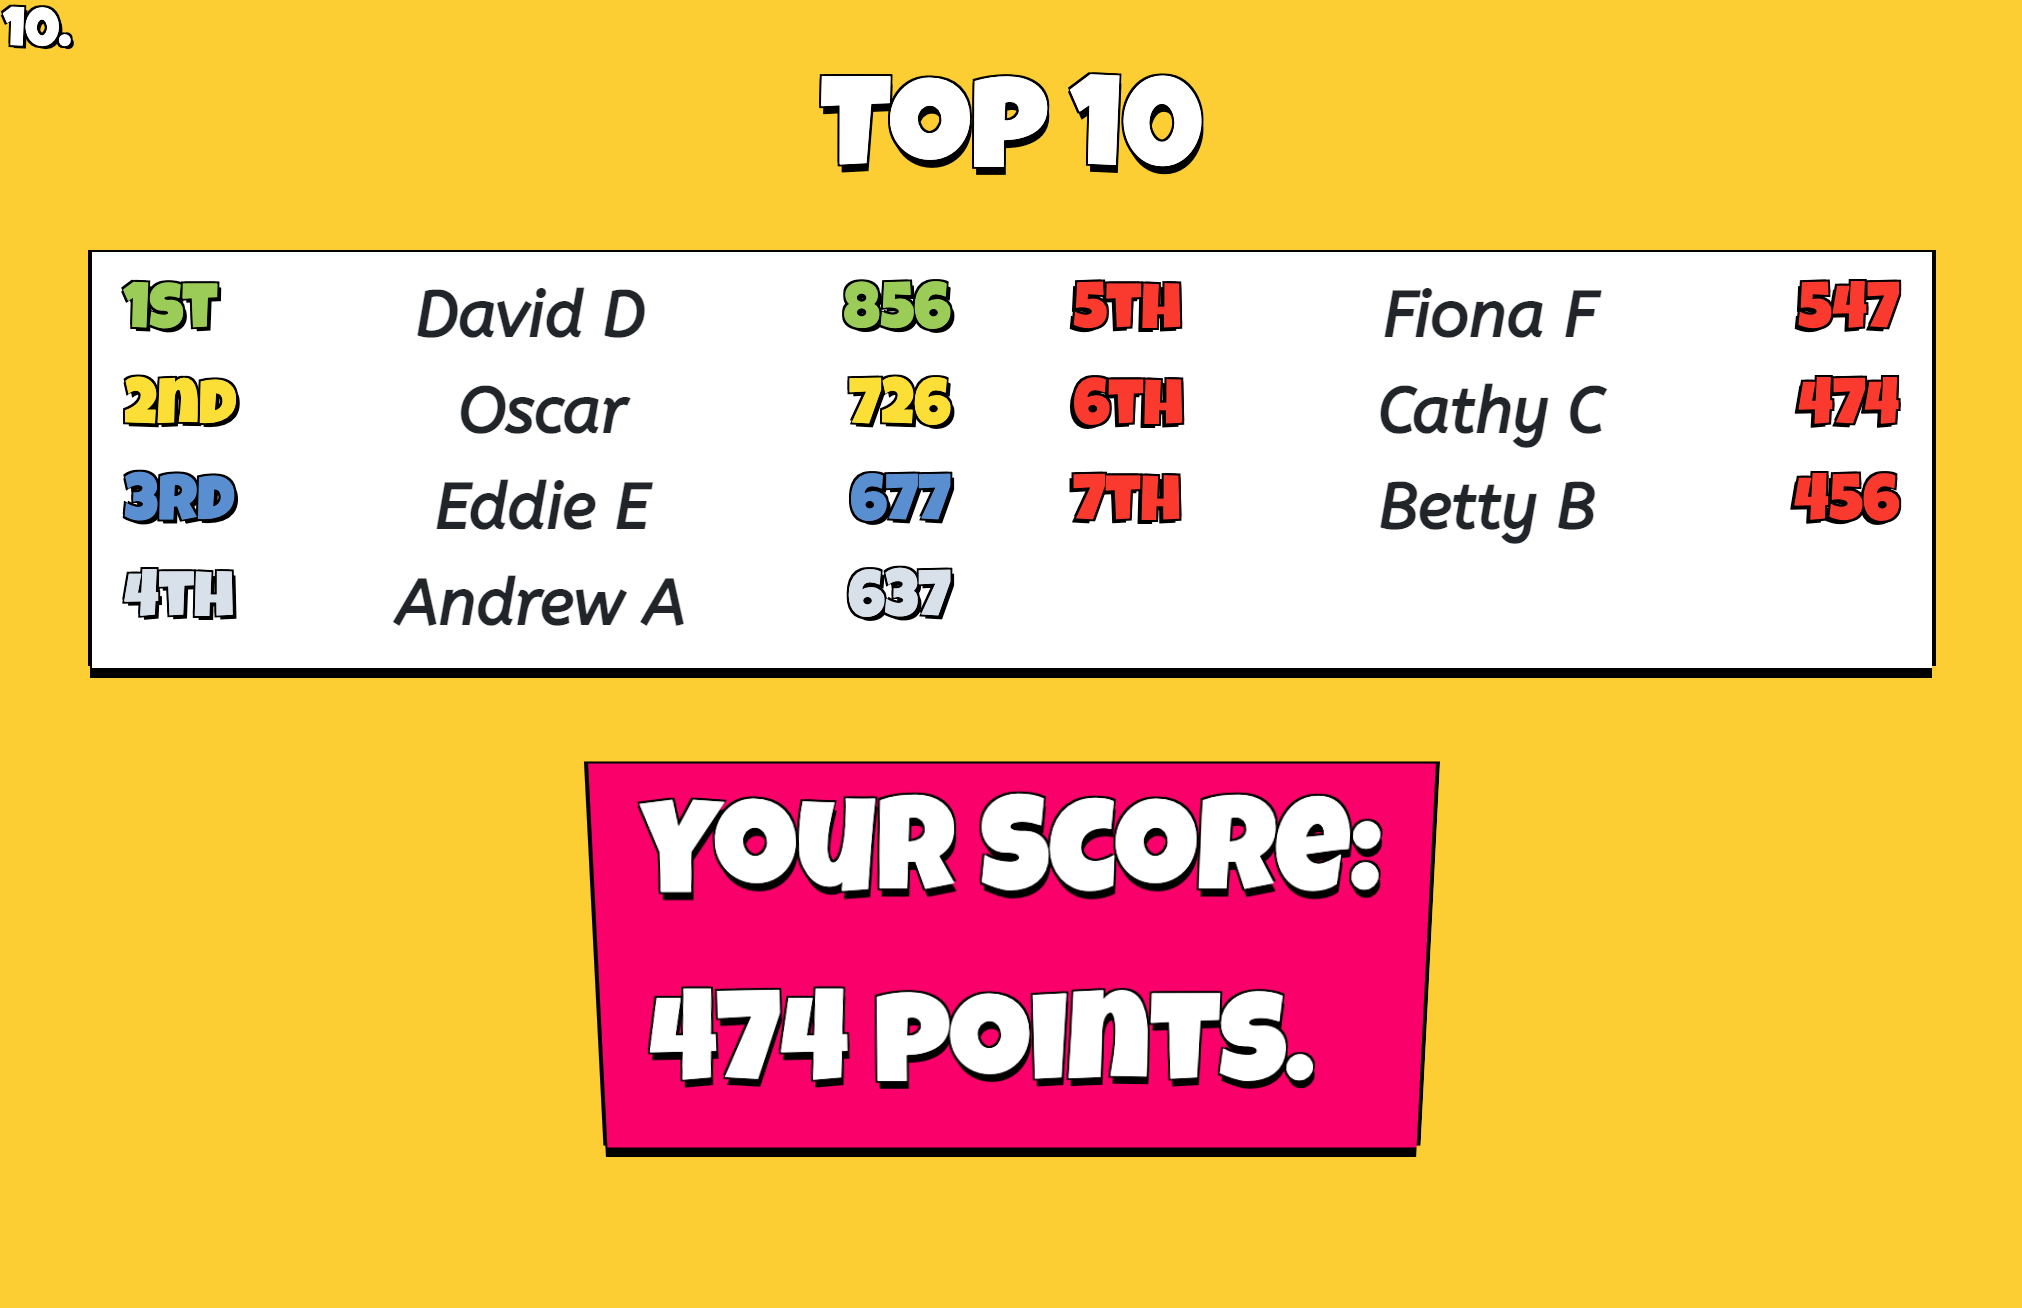
And finally, students will see the top 10 and their own score.
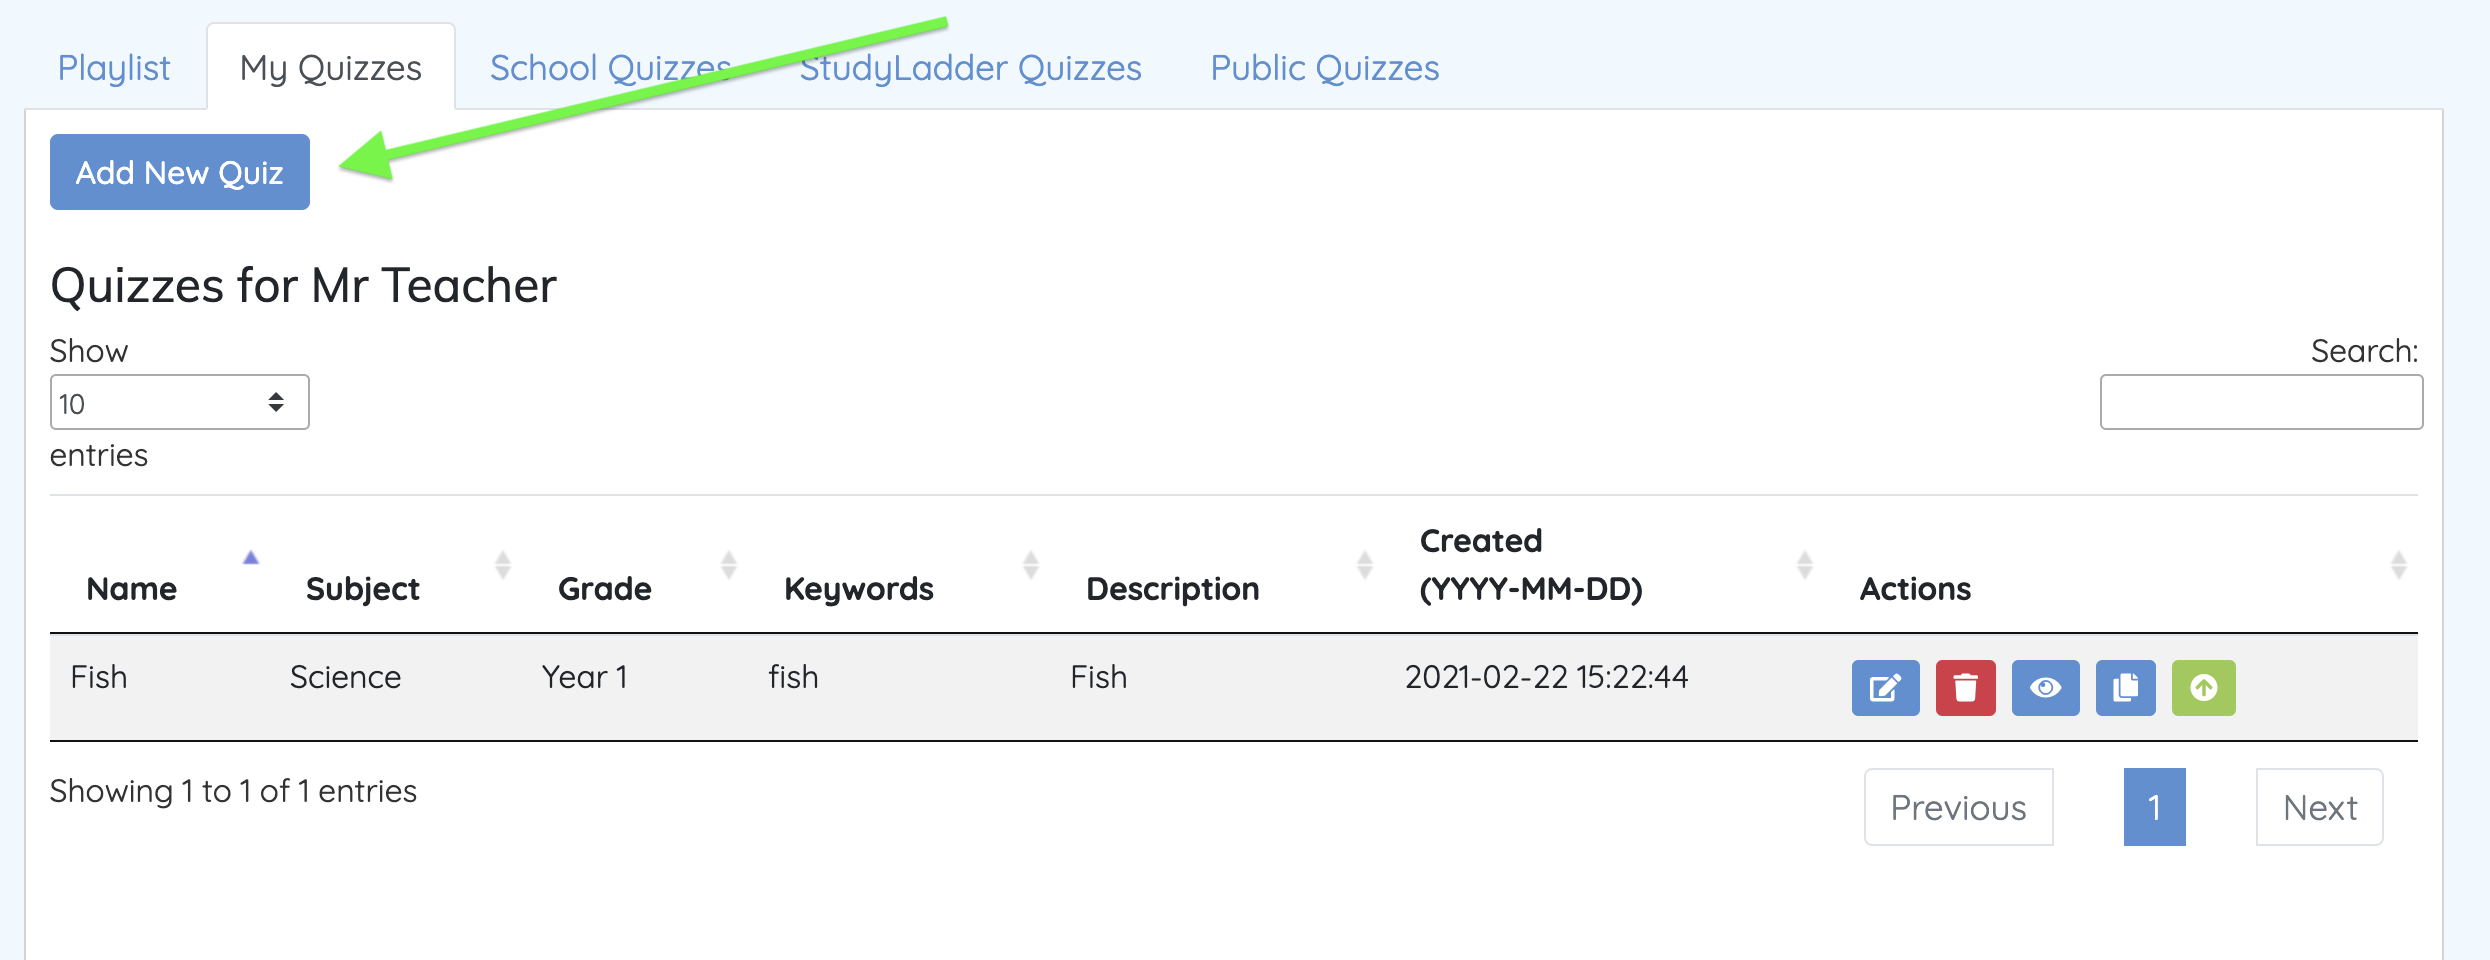
In order to create a quiz, you need to be on the "My Quizzes" tab. Select the Add New Quiz button to start the process.
You can choose to create a new quiz from scratch (New blank quiz), or create one from an activity you have recently loaded. Choosing this last option will automatically generate all of the questions and answers and copy in any images.
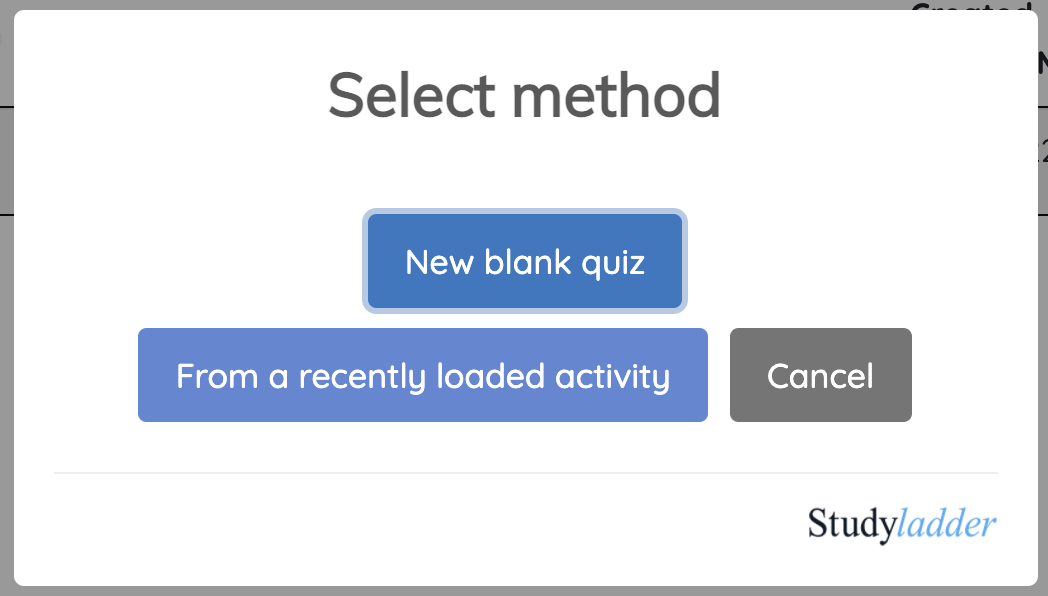
For the purpose of this example, we will use the second option and create a quiz based on the "Animal care and sensitivity" activity.
First is the Quiz Details page.
You can edit any of the fields here, but you must include a name, key words, subject and grade in order to move on.

Privacy settings are explained on the screen and sharing is enabled by default - you must uncheck the boxes if you don't want to share the quiz.
Questions will be played in random order by default, but you may want to disable this if you want to follow the order you set when adding / editing questions (next).
Once you are happy with the details, click the "Next" button to move on to adding questions.
In this example, because we copied the quiz from an activity, all of the questions have already been created. We just need to edit them.
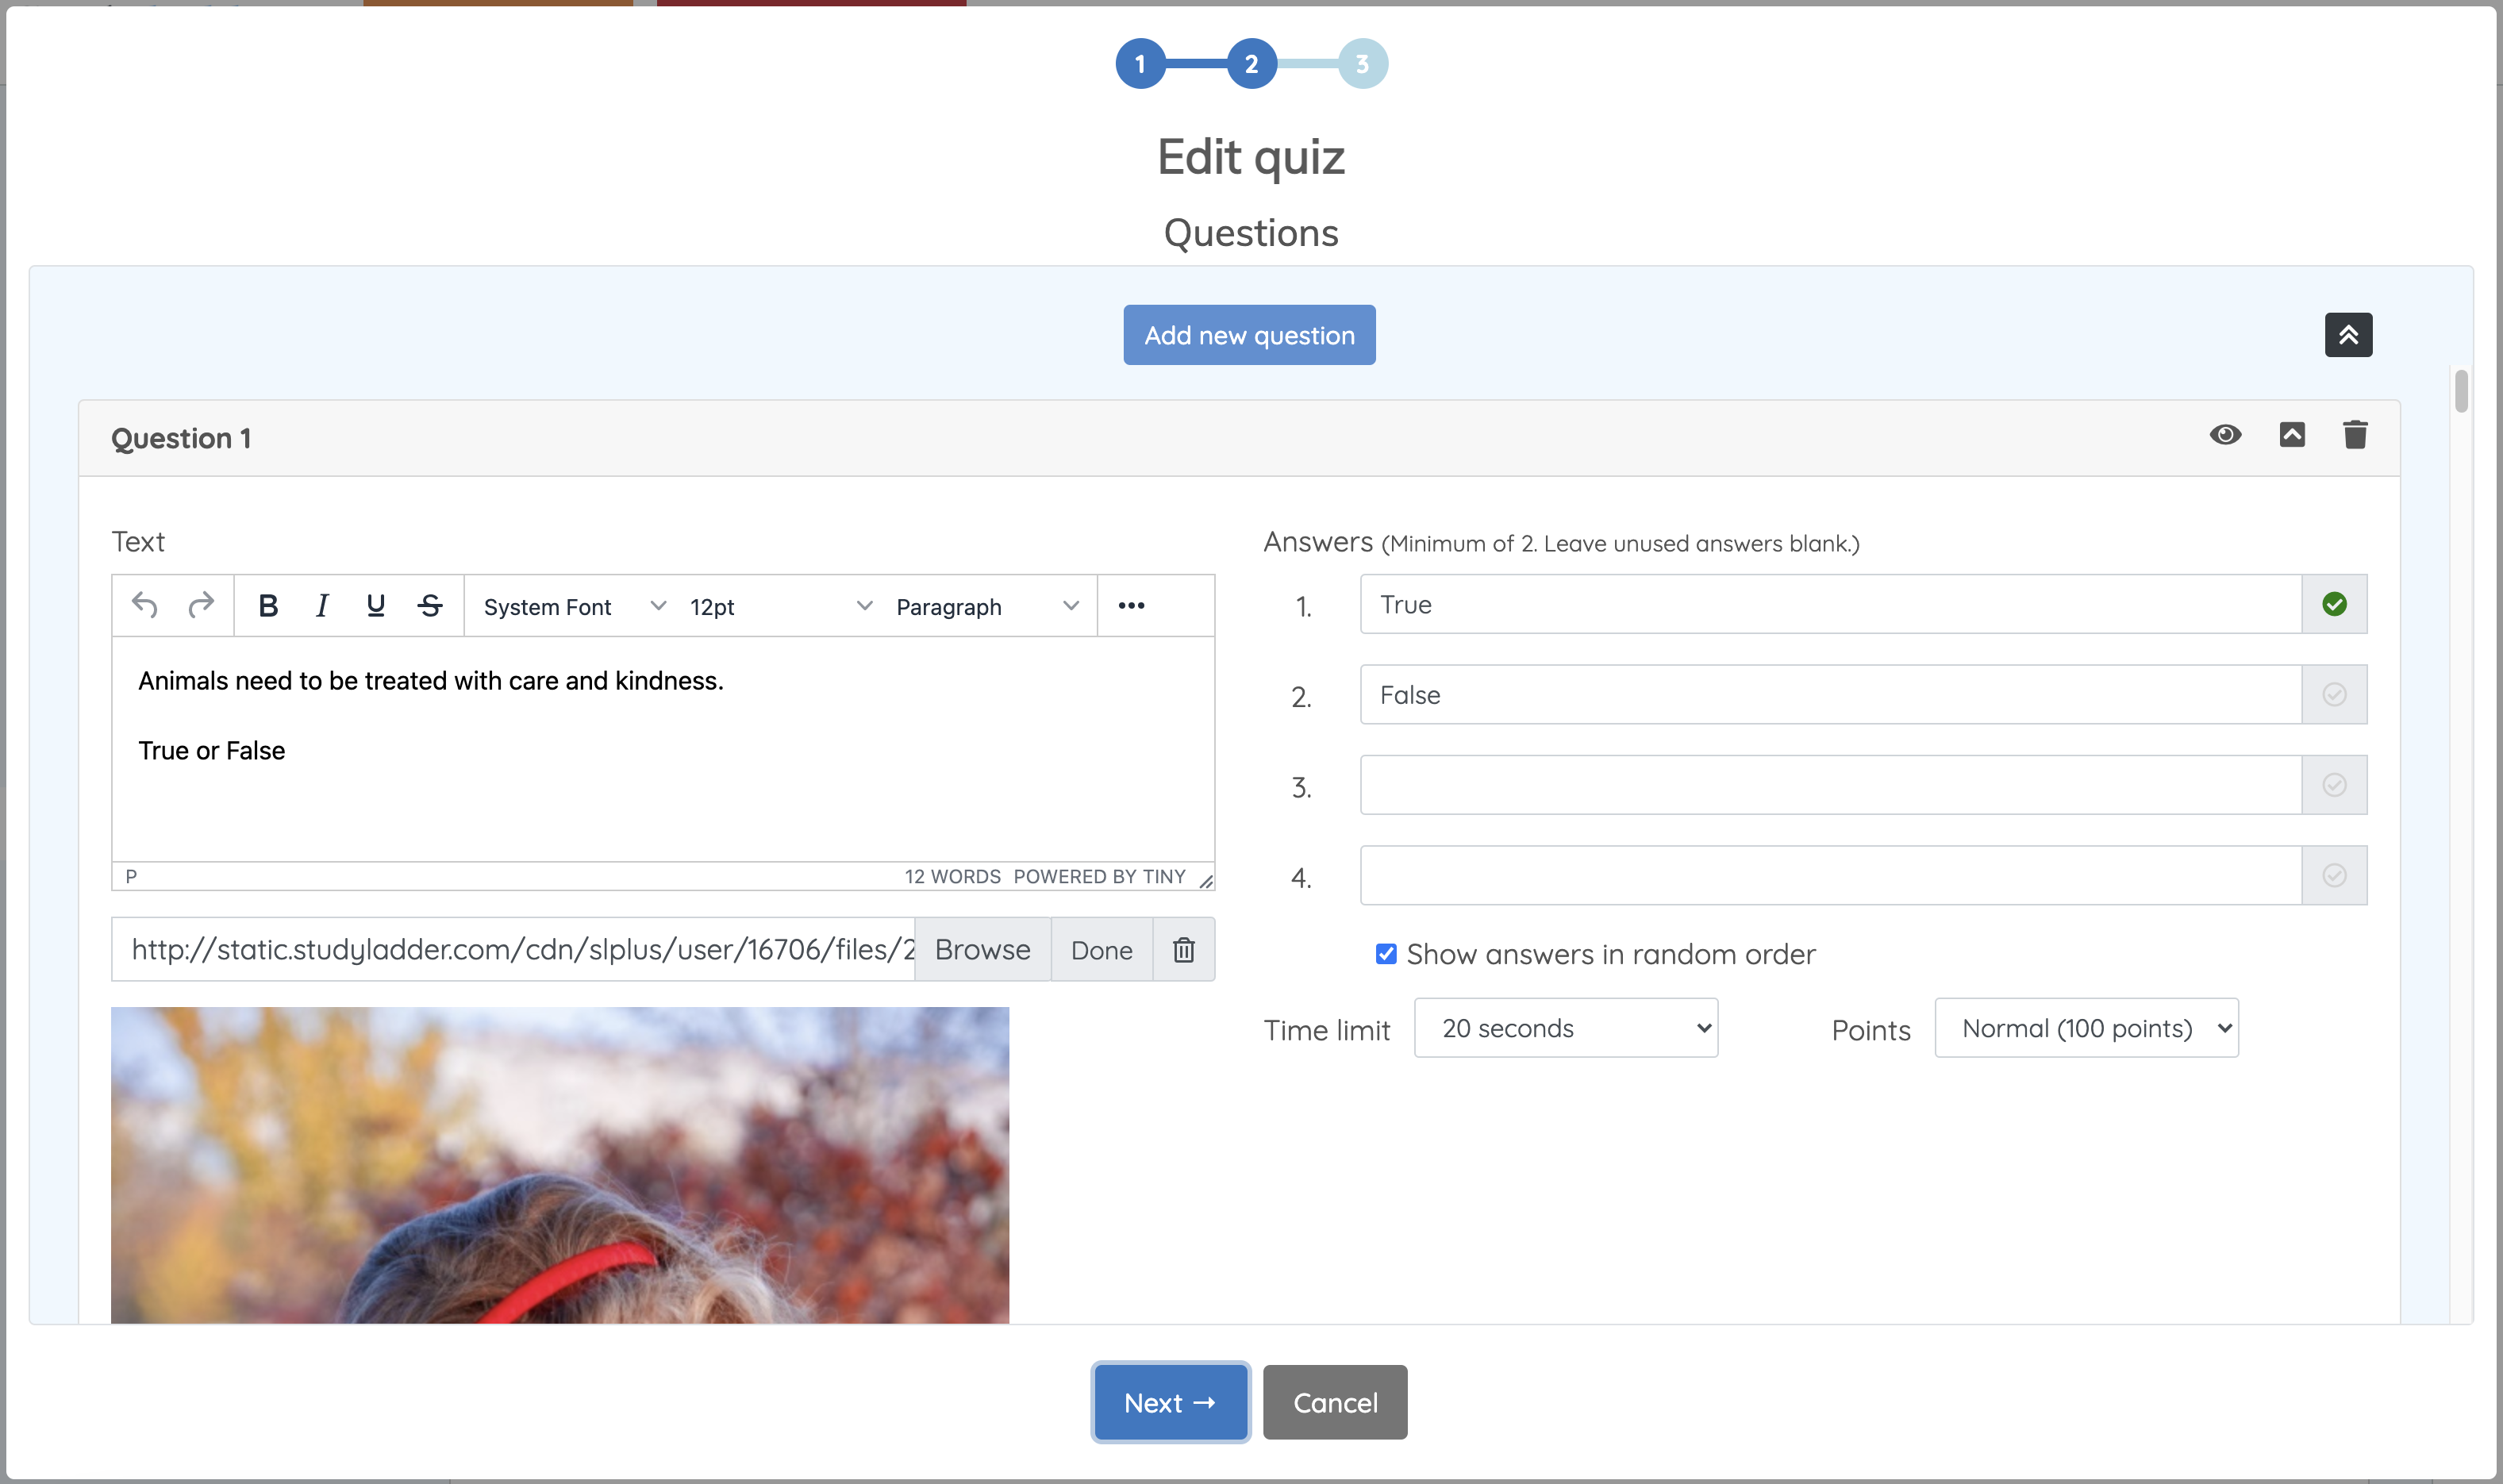
You must include question text OR a picture. You can include both if you like
To include a picture, you must first "Browse" to find the file, then click "Upload" to upload it to the server. "Upload" will change to "Done" when the picture has uploaded. To change a picture, just click on "Browse" again and find the new picture. You will then be able to upload it.
Show answers in random order is on by default. This option means that answers will be randomly positioned on the student device. This makes it more difficult for students to "copy" other students answers.
The time limit is 20 seconds by default, but can be set for 15, 10 or 5 seconds.
Points are set to 100 by default, but can be halved or doubled if required.
Use the Add new question button to add a new question.
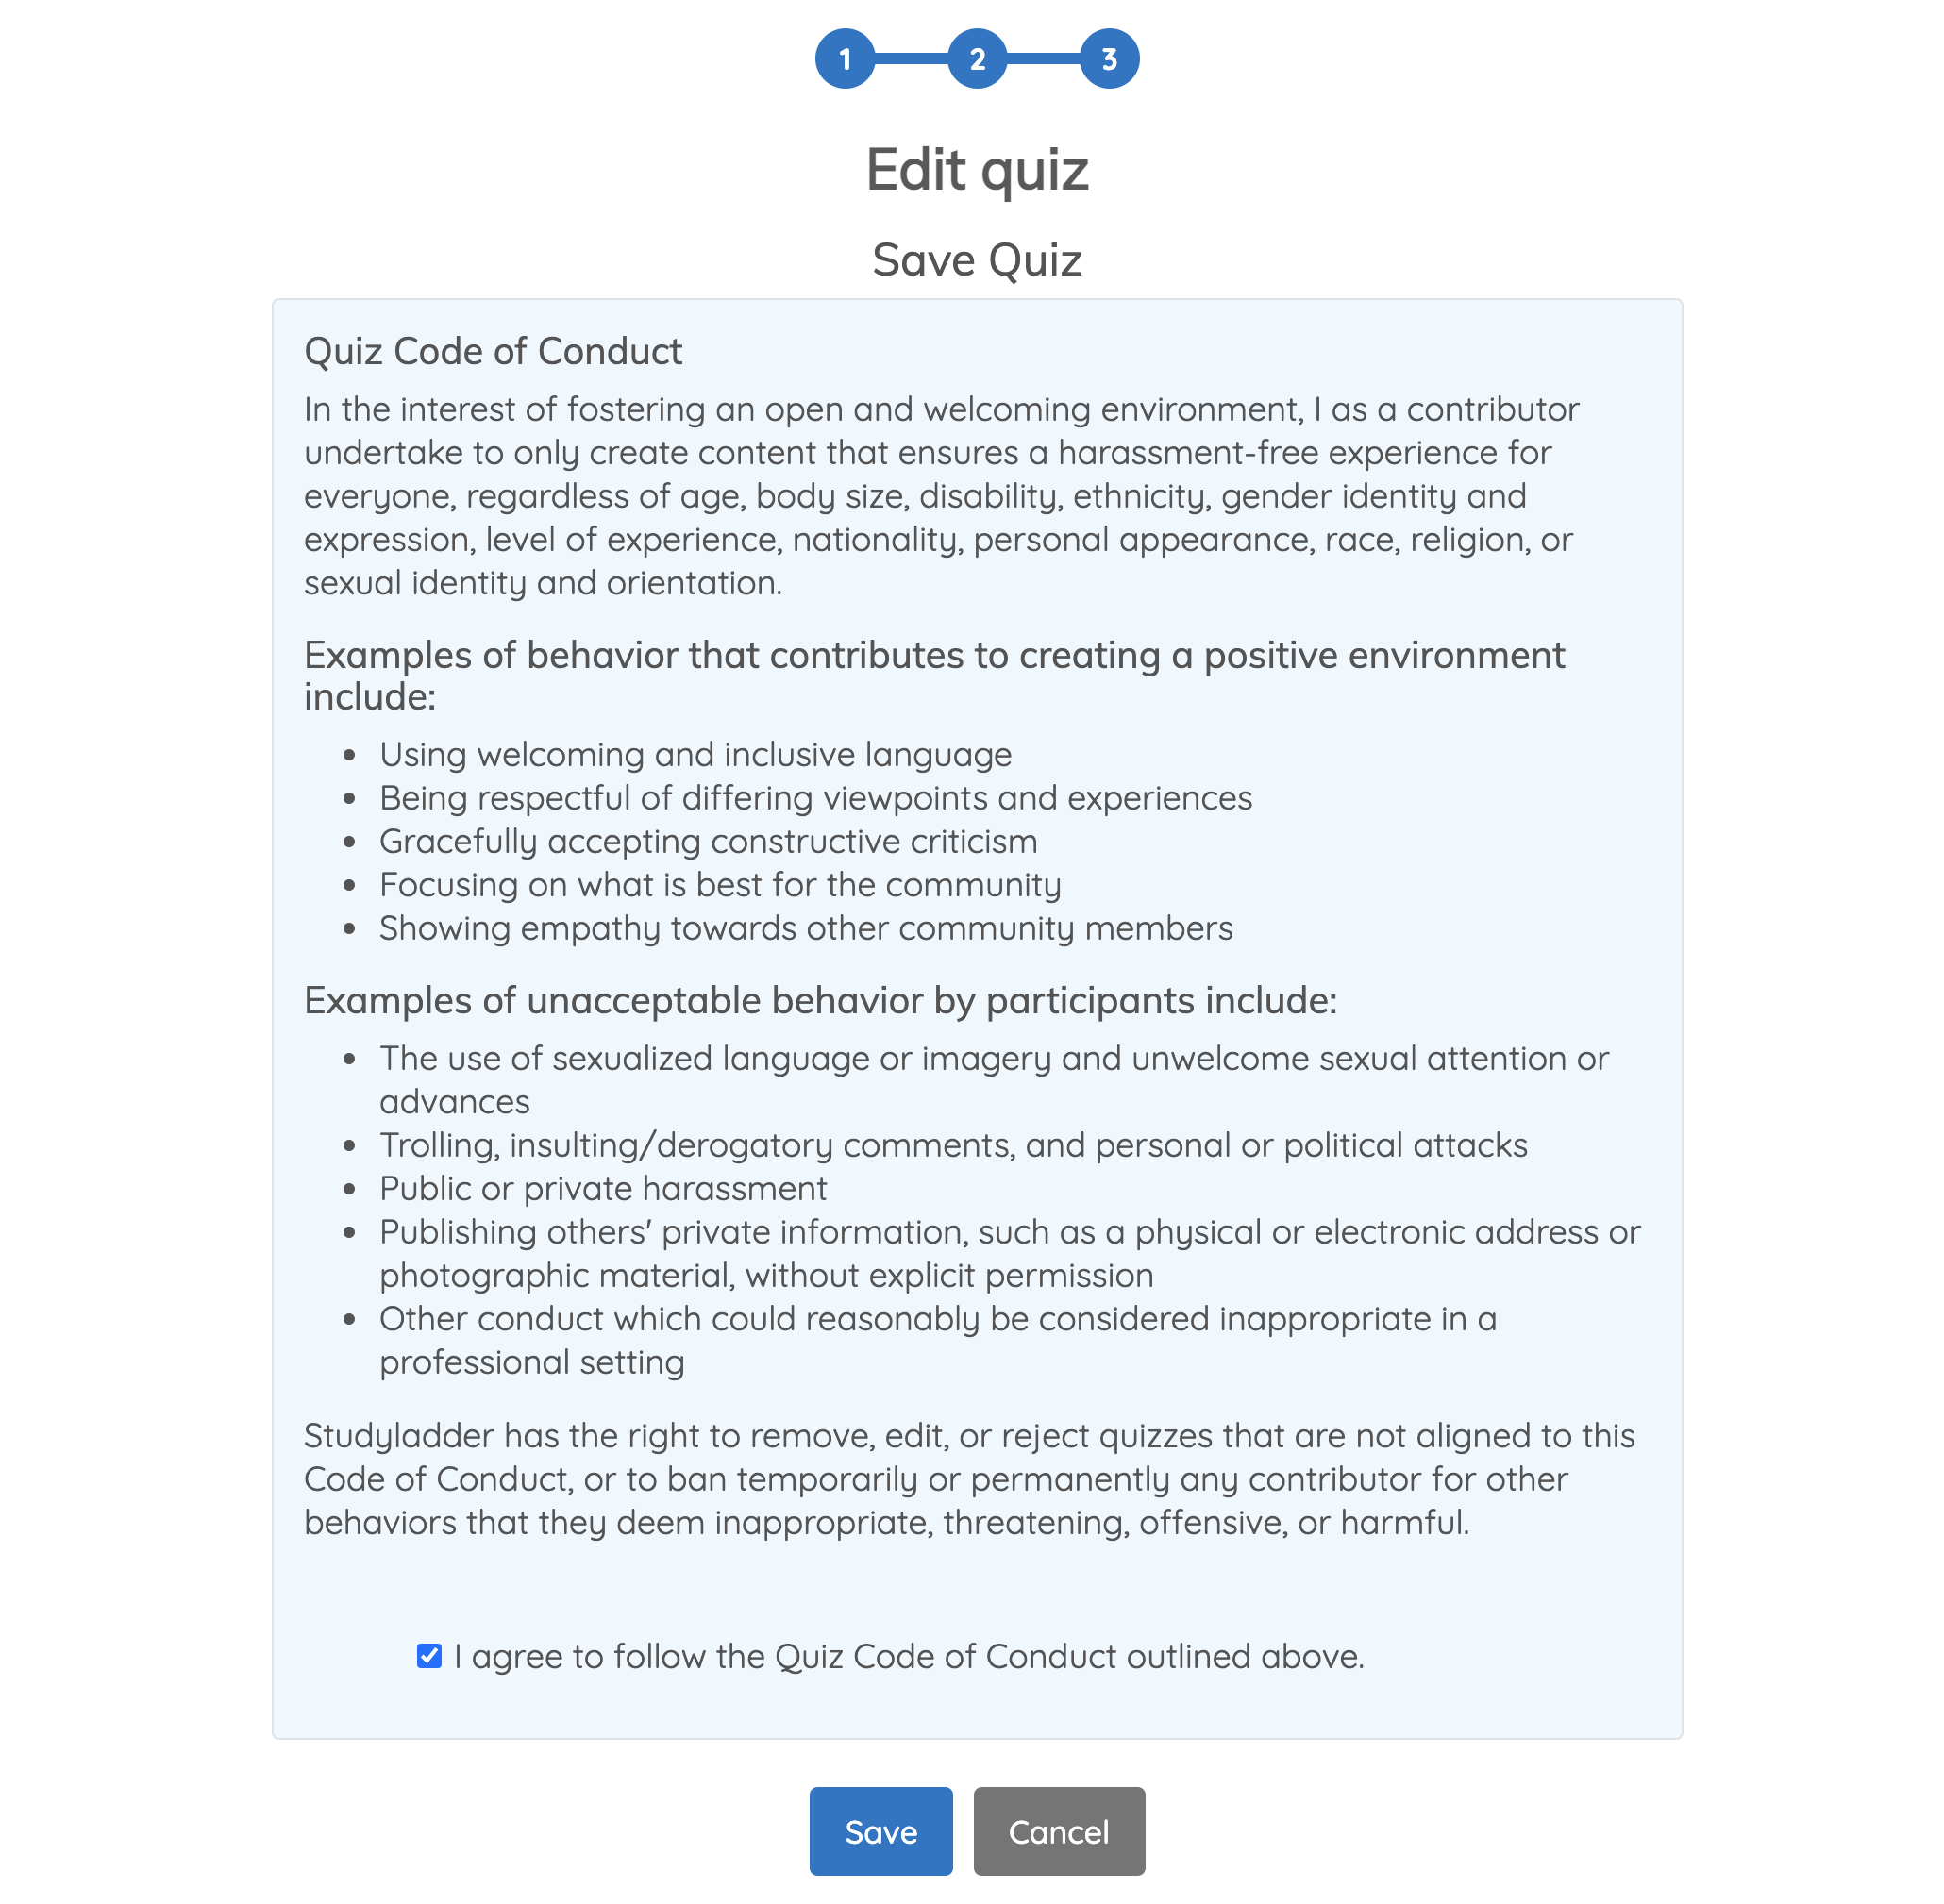
Once you are finished adding ALL QUESTIONS, click the "Next" button.
You will now need to agree to the Quiz Code of Conduct before you can save this quiz.
If your quiz does not appear in the list after saving, you may need to close and re-open the "Manage Quizes" tab.
Just click on any other section in the Actions sidebar (like "Instant Activities"), then click on "Manage Quizzes" again and go to the "My Quizzes" tab.
This function allows you to control student access to various areas in the StudyLadder website, as long as the browser window remains open.
Once you close the Interactive Classroom window, any access controls you have set are removed.
Note:
You Do not need to create an Interactive Classroom session to use this feature.
It will control student access in this class whether the student is logged into an Interactive Classroom session or not.
Using access control, you can determine student access right down to individual students for any of the listed activity types.
All Features will change the status of every column, either for a student, or for the entire class if you use the shortcut buttons.

For example, click the red cross shortcut on All Features and then the green tick shortcut on Activities to allow only standard activities
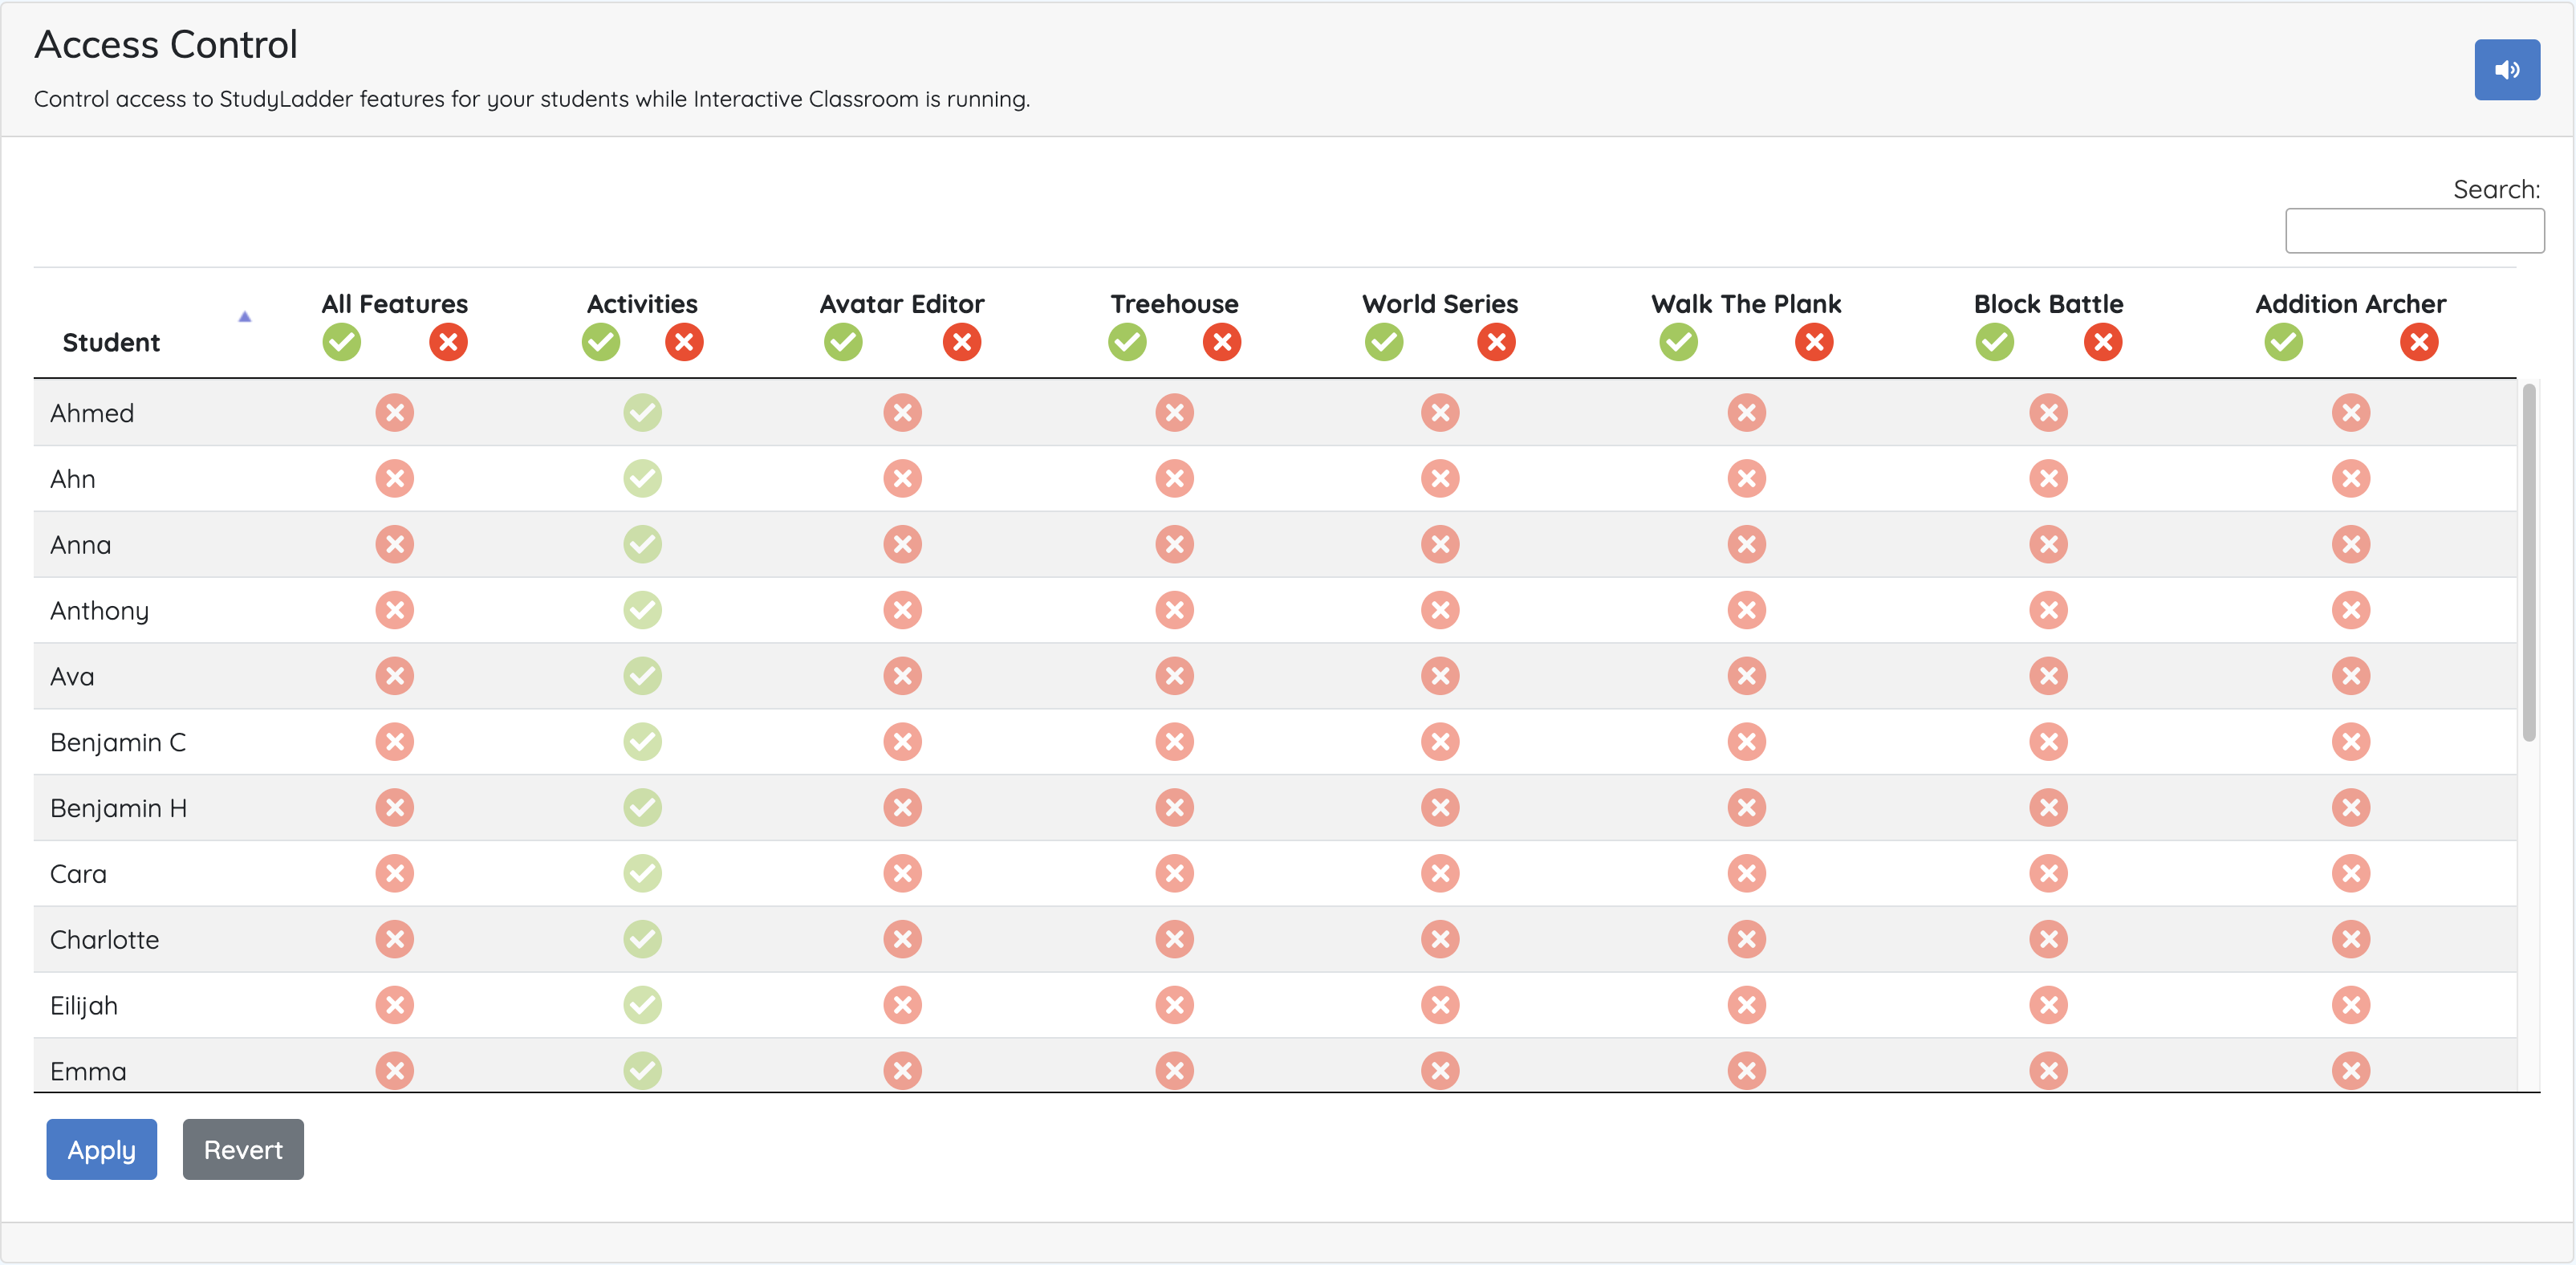
Notice that the icons are faded. This indicates that they have not yet been applied
Click the Apply button to apply your changes and make them live.
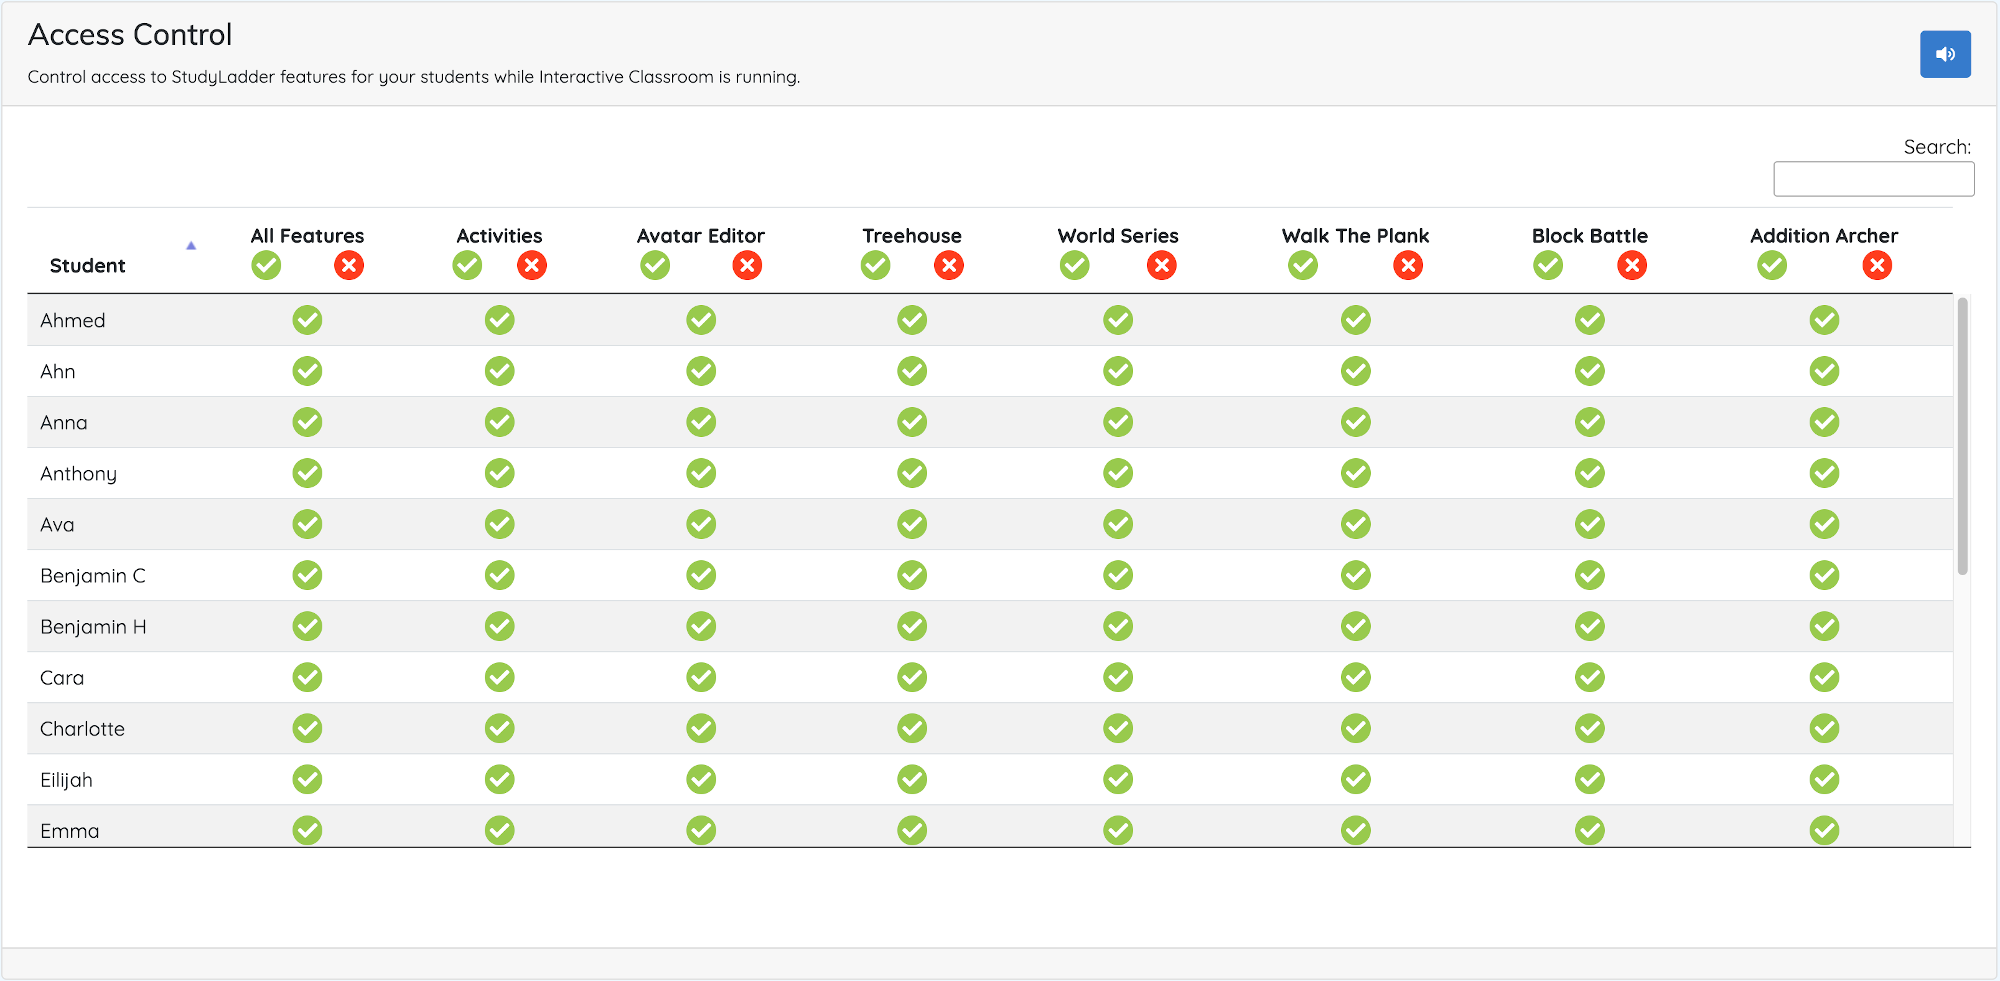
In another scenario, you may want to allow everything except the avatar editor and the treehouse. Click the green tick shortcut on All Features and then the red cross shortcut on both Avatar Editor and Treehouse
It will appear like this after applying.

At any time, you can click on individual ticks and crosses for a particular student to change permissions just for them.
Use the All Features icon next to a student's name to change everything in that row only.
You can turn sound on or off for all StudyLadder games and activities using the sound toggle button. Once clicked, it can take up to 20 seconds to affect all student devices.
You do not need to apply this change, it is automatically applied.
